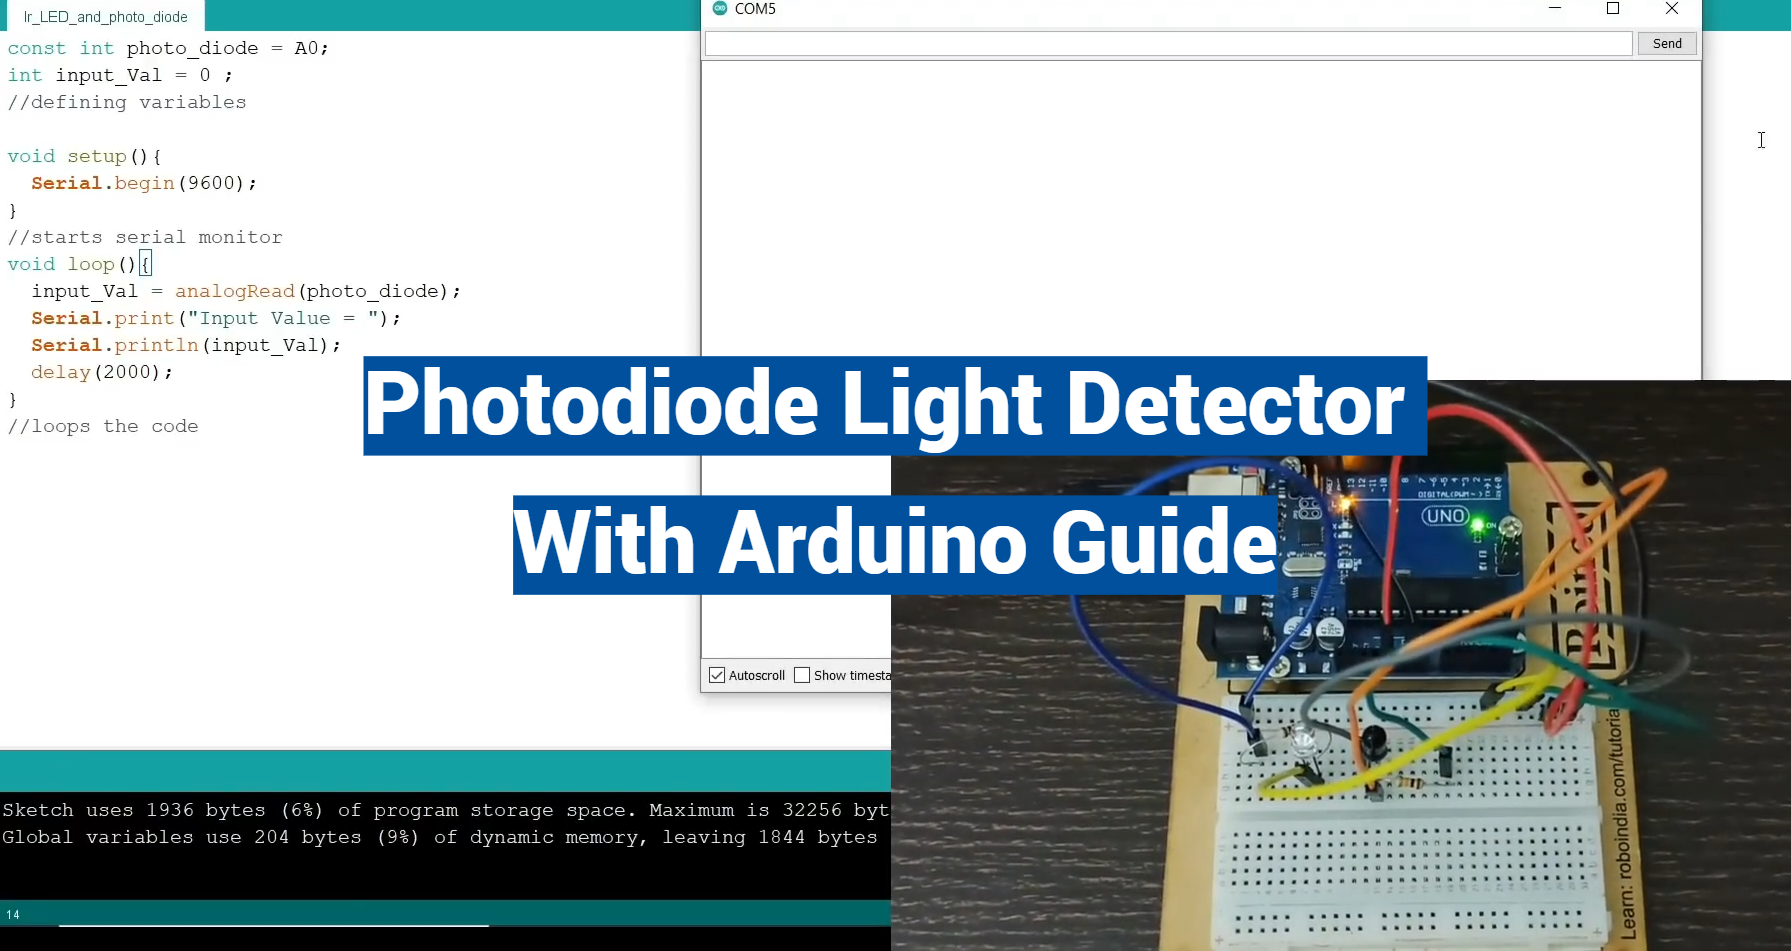
In this guide, we will be delving into the world of light detection using a Photodiode with an Arduino. This fascinating technology possesses an array of applications, from environment sensing to remote control systems. By manipulating the photodiode, an Arduino can interpret changes in light intensity, thus enabling your creations to interact with their surroundings in unique and innovative ways. Let’s commence our journey towards understanding this compelling facet of Arduino programming and hardware interfacing.
Photodiode Light Detection with Arduino – Tips and Tricks
Introduction
Materials Required
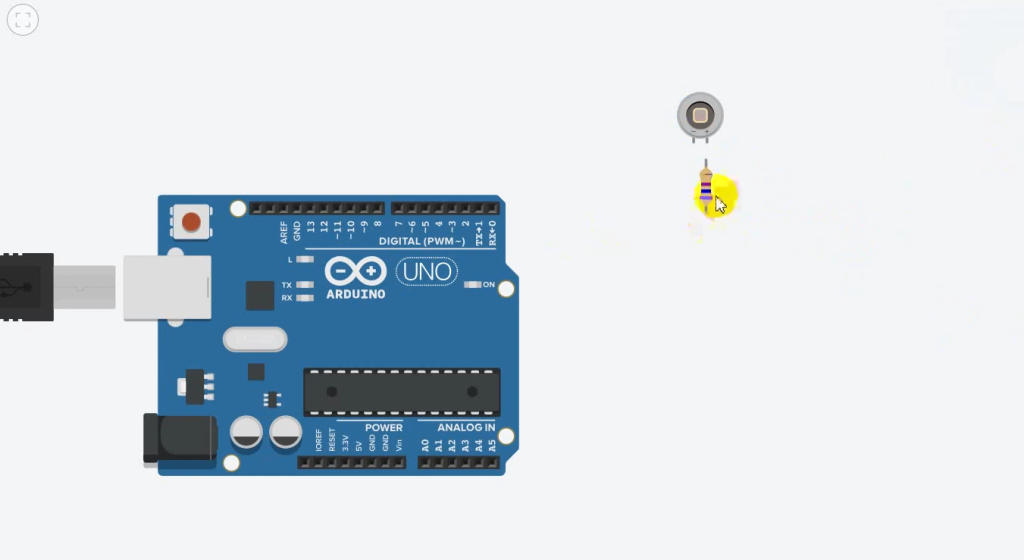
Before we dive into the details of photodiode light detection with Arduino, let’s quickly go through the materials you will need to get started:
- Arduino board (any model)
- Photodiode
- Resistor (10k ohm)
- Jumper wires
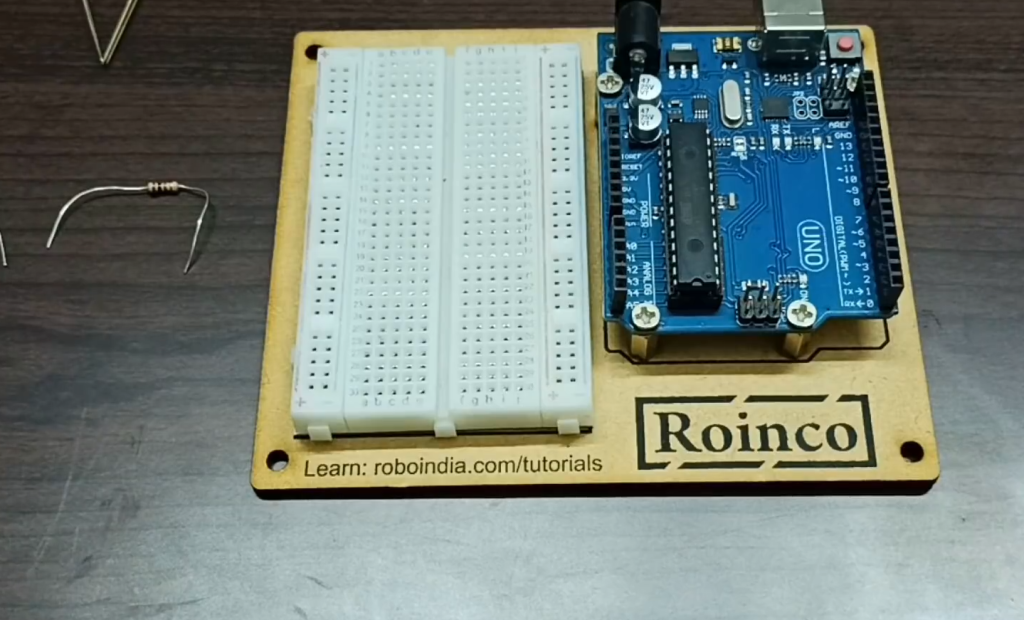
- Breadboard
Circuit Setup
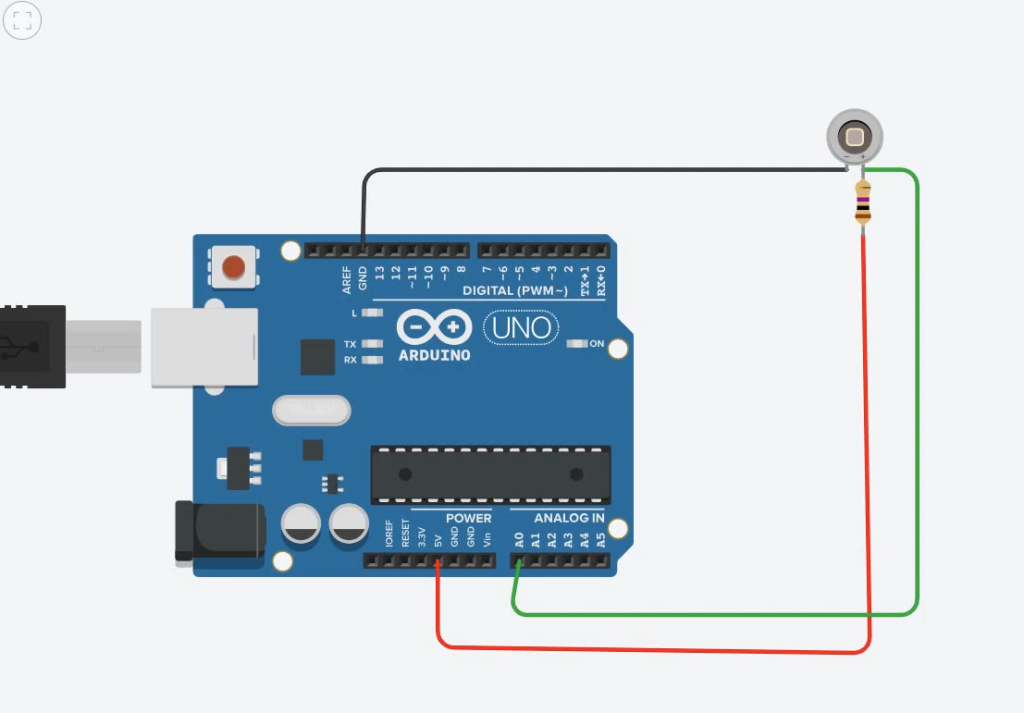
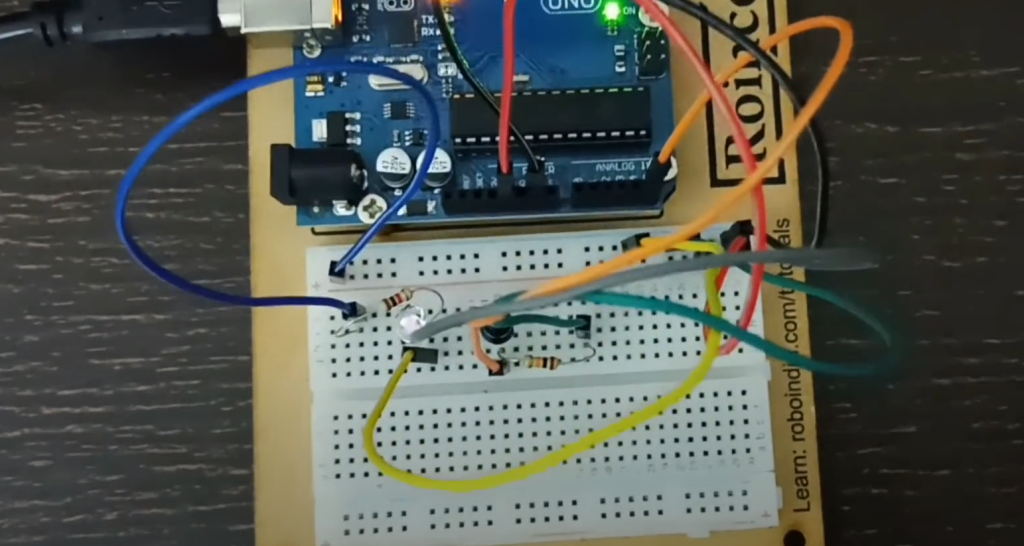
To begin, we will first establish a basic circuit using an Arduino board and a photodiode. Connect one end of the photodiode to the 5V pin on your Arduino board and the other end to analog input A0. Then, connect a 10k ohm resistor between the analog input A0 and ground (GND) on your Arduino board. [1]
Code Explanation
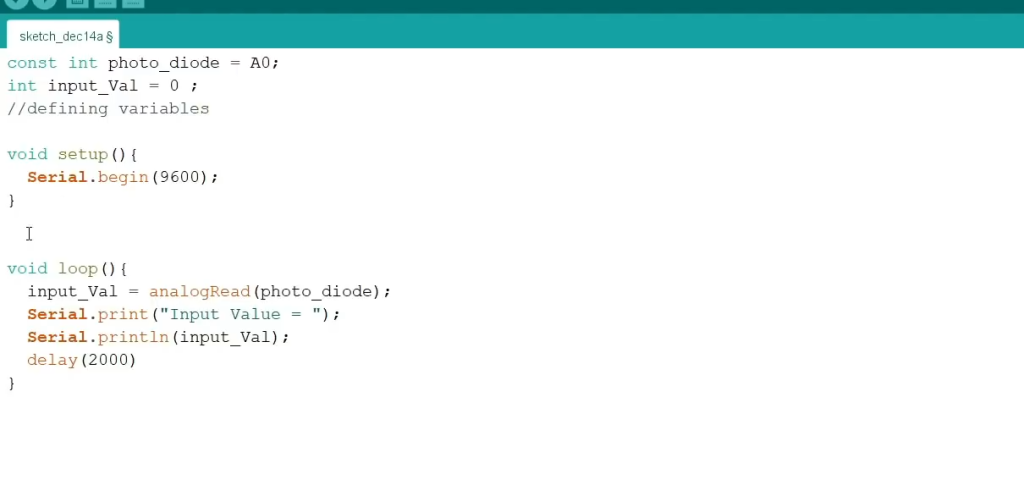
With the circuit setup complete, we can now move on to writing our code. The concept behind photodiode light detection is to measure the changes in voltage across the photodiode as light is detected. In our circuit, the 10k ohm resistor acts as a voltage divider and reduces the voltage from 5V to a readable value for the analog input A0.
Measuring Light Intensity
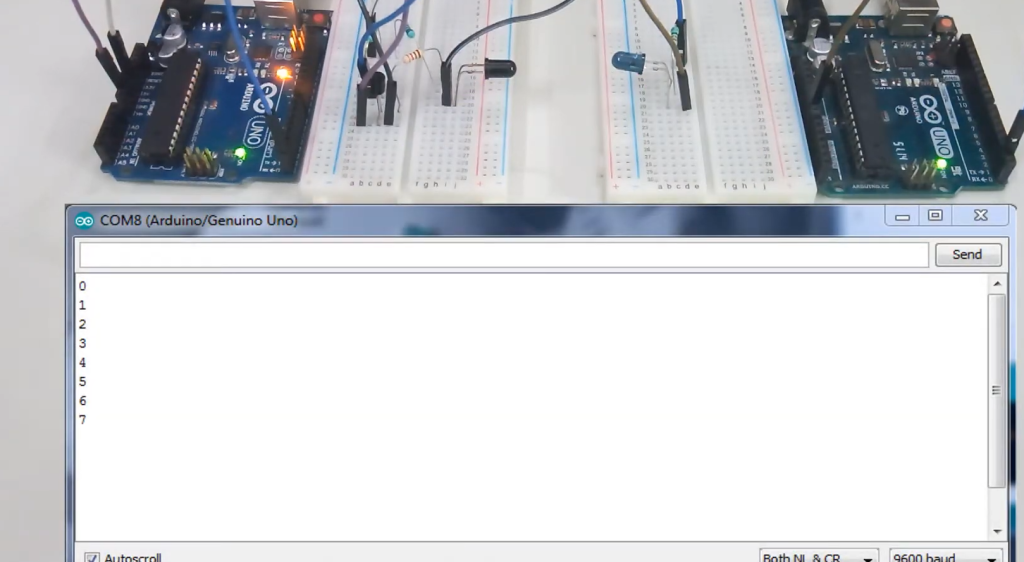
Now that we have our code ready, we can test our photodiode light detection system. Start by pointing the photodiode towards a light source and check the values being displayed on your Arduino serial monitor. You will notice that as the intensity of light changes, so does the value on your serial monitor.
Tips and Tricks
- Use a breadboard to easily connect all your components without soldering.
- Experiment with different values for the resistor to get more accurate readings.
- Place a lens in front of the photodiode to focus and intensify the light being detected.
- Try using multiple photodiodes for detecting light from various angles or sources.
How a Photodiode Works
A photodiode works based on the principle of the photoelectric effect, which states that light can be used to free electrons from a material. In simple terms, when light hits the photodiode’s semiconductor material, it causes an electron to move across the material and generate an electrical current.
Applications
Photodiodes have various applications in modern technology, such as:
- Light sensors in automatic lighting systems
- Optical communication devices such as laser transmitters and receivers
- Barcode scanners and optical storage devices
- Solar cells for converting light into electricity [2]
Types of Photodiodes
There are various types of photodiodes available in the market, each with its unique features and applications. Some of the commonly used types include:
- PN Photodiode: This is the most basic type of photodiode that has a p-n junction and can be easily integrated into electronic circuits.
- PIN Photodiode: These have a wider depletion region compared to PN photodiodes, making them more sensitive to light.
- Avalanche Photodiode: These have a high internal gain and can detect even the weakest of light signals.
Troubleshooting Common Issues
While working with photodiodes and Arduino, you may encounter some common issues such as:
- Incorrect readings due to improper circuit connections: Double-check your circuit setup and ensure all components are correctly connected.
- Inaccurate readings due to ambient light: Try covering the photodiode with a dark material or using it in a darker environment.
- False signals caused by external factors: Keep your circuit away from any potential sources of interference, such as motors or high-frequency devices. [3]
Tips for Better Performance
To ensure better performance and accurate readings from your photodiode light detection system, consider these tips:
- Keep your circuit away from external factors that may cause interference.
- Use a digital multimeter to measure the voltage across the photodiode for more precise readings.
- Consider using an operational amplifier (op-amp) to amplify the voltage output from the photodiode for improved sensitivity.
Building a Simple Light Detection Circuit with an Arduino
To demonstrate the power of photodiodes and Arduino, let’s build a simple light detection circuit using an LED. Connect the cathode (shorter leg) of an LED to ground through a 220 ohm resistor, and connect the anode (longer leg) to pin 7 on your Arduino board. Then, place a photodiode in series with the LED, as shown in the circuit diagram.
In this circuit, the photodiode will act as a switch that turns on the LED when sufficient light is detected. You can experiment with different values of resistors and LEDs to create more advanced circuits and projects.
Can a Photodiode Detect Invisible Light?
Yes, a photodiode can detect invisible light such as infrared (IR) and ultraviolet (UV) light. However, the sensitivity of a photodiode to these types of light will depend on its construction and materials used. For example, some photodiodes are specifically designed for UV detection and may not be as sensitive to IR light.
What Happens When Light Hits A Photodiode?
When light hits a photodiode, it generates electron-hole pairs in the semiconductor material. The photons from the light have enough energy to free electrons from their atoms, creating an electric current that can be measured by the connected circuit. The more intense the light, the greater the number of electron-hole pairs generated, resulting in a higher electrical current.
Is A Photodiode A Voltage Or Current?
A photodiode can function as both a voltage and current source, depending on the circuit it is connected to. In most cases, when used in light detection circuits, a photodiode acts as a current source, generating an electric current proportional to the intensity of light detected. However, by adjusting the circuit setup and using different components such as resistors and operational amplifiers, a photodiode can also act as a voltage source. Overall, the output of a photodiode is determined by the circuit and its components used in conjunction with the photodiode itself. [4]
Does Temperature Affect Photodiode?
Yes, temperature can affect the performance of a photodiode. As with most electronic components, changes in temperature can cause variations in the output and sensitivity of a photodiode. The amount of current generated by a photodiode is directly related to the number of electron-hole pairs created by light, and higher temperatures can alter this process, resulting in inaccurate readings.
To mitigate the impact of temperature, you can use a special type of photodiode called a temperature-compensated photodiode. These are designed to maintain consistent performance even in varying temperatures. Additionally, keeping your circuit in a stable and controlled environment can also help minimize the effect of temperature on your photodiode’s readings.
How Is Photodiode Used to Measure Light Intensity?
As mentioned earlier, when light hits a photodiode, it creates an electron-hole pair that generates a current proportional to the intensity of the light. Therefore, by measuring this electrical current using a multimeter or other circuit components, we can determine the light intensity.
Pros and Cons of Arduino-Powered Photodiode Light Detection
There are several advantages and disadvantages to using Arduino-powered photodiode light detection systems:
Pros:
- Cost-effective: Arduino boards and components are relatively inexpensive, making it an affordable option for creating light detection circuits.
- User-friendly: The Arduino software and community offer a user-friendly platform for beginners to get started with electronics and coding.
- Versatile: With a wide array of compatible components and modules, the possibilities for creating custom light detection projects are endless.
Cons:
- Limited precision: Arduino boards may not offer the same level of precision and accuracy as professional-grade equipment, making them better suited for hobbyist or prototyping purposes.
- Potential for interference: As with any electronic circuit, there is always the risk of interference from external sources, which can affect the performance and readings of your photodiode light detection system. [5]
Arduino Alternatives for Photodiode Light Detection
While Arduino is a popular choice for creating light detection circuits with photodiodes, there are also other platforms and microcontrollers that can be used. Some alternatives include:
- Raspberry Pi: Similar to Arduino, Raspberry Pi is a versatile platform that can be used for various electronic projects. It offers the added advantage of being able to run a full operating system and supports programming in various languages.
- Microcontrollers: There are many other microcontrollers on the market that can also be used for light detection projects, such as PIC, STM32, and ESP series.
- Bare PCB: For those with more advanced electronics knowledge, using a bare printed circuit board (PCB) and programming it with custom firmware can offer greater control and customization options for photodiode light detection systems.
Ultimately, the choice of platform will depend on your specific project requirements and personal preferences. However, Arduino remains a popular and accessible option for those starting out with photodiode light detection.
FAQs
What is a photodiode and how does it work?
A photodiode is an electronic component that converts light into electrical current using the photoelectric effect. When light hits the photodiode’s semiconductor material, it frees up electrons and generates a flow of electric current.
How can I improve the sensitivity of my photodiode light detection system?
You can use an operational amplifier (op-amp) to amplify the voltage output from the photodiode for improved sensitivity. Additionally, using a lens to focus and intensify the light being detected can also improve sensitivity.
Can I use a photodiode to detect different types of light?
Yes, depending on the type of photodiode you are using, they can be sensitive to various wavelengths of light, including infrared and ultraviolet light. Some photodiodes also have filters that can be used to detect specific types of light. So, they can be used in various applications such as flame detection and water turbidity measurement.
How can I connect a photodiode to an Arduino?
To connect a photodiode to your Arduino, you will need to use an analog input pin. Connect the cathode of the LED to ground and the anode to an analog input pin through a resistor. You can then read the voltage across the photodiode using the `analogRead()` function in your code.
What are some applications of using a photodiode with an Arduino?
Some common applications of using a photodiode with an Arduino include light sensors for automatic lighting systems, optical communication devices, barcode scanners, and solar cells for generating electricity. However, the possibilities are endless as you can use a photodiode in any project that involves detecting or measuring light.
What kind of light can a photodiode detect?
Photodiodes can detect various types of light, including visible light, infrared and ultraviolet light. The type of photodiode used will determine the wavelength range it can detect. Some photodiodes also have filters that allow them to detect specific wavelengths. So, they can be used in a wide range of applications such as color sensors and flame detectors.
How can I ensure that my photodiode is functioning correctly?
To ensure your photodiode is functioning correctly, you can use a digital multimeter to measure the voltage across the component. If there is no change in voltage when light is shone on the photodiode, it may be damaged and needs to be replaced. Additionally, double-checking your circuit connections and using proper shielding from external factors can also help ensure accurate readings. So, always verify the functionality of your photodiode before using it in a project.
How should I calibrate my photodiode for accurate light detection?
To calibrate your photodiode for accurate light detection, you can use a known light source such as a flashlight or LED and measure the output voltage across the photodiode using a multimeter. By adjusting the resistance in your circuit, you can find the optimal sensitivity for detecting different levels of light. It is also recommended to periodically recalibrate your photodiode if it is being used in a long-term project.
Can a photodiode work in the dark?
Yes, photodiodes can work in the dark. However, their sensitivity and accuracy may vary depending on the type of photodiode and circuit setup used. It is recommended to test your photodiode’s performance in low light conditions to determine its capabilities accurately.
Are there any safety precautions I should take when working with photodiodes?
As with any electronic component, it is important to handle photodiodes with care and ensure proper safety precautions are taken when working with them. Avoid touching the semiconductor material of the photodiode as it may damage or contaminate it. Additionally, be mindful of any potential sources of interference that may affect your circuit’s performance. So, always exercise caution and follow proper handling procedures when using photodiodes in your projects.
How do I troubleshoot if the photodiode doesn’t seem to be working?
If your photodiode doesn’t seem to be working, there are a few things you can check for. First, make sure all your circuit connections are correct and that the photodiode is receiving power. Then, ensure that the photodiode is properly shielded from external light sources that may interfere with its readings. If all else fails, try using a different photodiode or verifying its functionality with a digital multimeter.
Can I use photodiodes for long-distance light detection?
Yes, photodiodes can be used for long-distance light detection. However, the sensitivity and accuracy may decrease as the distance increases due to factors such as attenuation and noise. To improve performance in long-distance applications, you can use amplification techniques or opt for more sensitive photodiodes with a larger surface area.
Are there different types of photodiodes, and if so, what are the differences?
Yes, there are different types of photodiodes. Some common variations include PIN, PN, and avalanche photodiodes. These types differ in their construction and materials used, resulting in varying sensitivity levels and response times. It is important to choose the right type of photodiode for your specific application to achieve optimal results.
Can I use multiple photodiodes in one circuit?
Yes, you can use multiple photodiodes in one circuit. This can be useful for detecting light from different directions or measuring light intensity at various points. When using multiple photodiodes, it is important to consider potential interference and shielding techniques to ensure accurate readings from each component.
Conclusion
In this guide, we have explored the use of an Arduino board as a photodiode light detector. We have discussed the basic working principle of a photodiode and how it can be used to detect light. Additionally, we have learned about the components needed for this project and how to wire them together.
We also went through the process of programming the Arduino board using the Arduino IDE and uploading the code to the board. Finally, we tested our project by using a light source and observing the output on our serial monitor.
Through this guide, we have learned how to use an Arduino board as a photodiode light detector and gained a better understanding of the components involved in such a project. We hope this has been a useful resource for you in your exploration of Arduino projects.
There are many other applications for photodiodes and Arduino boards that you can explore, such as creating a light-controlled switch or building a solar-powered project. The possibilities are endless with these versatile tools.
We encourage you to continue learning and experimenting with different components and programming techniques to create your own unique projects. With the knowledge gained from this guide, you are well on your way to becoming a skilled Arduino user.
Thank you for following along with this guide, and we wish you the best of luck in your future projects! Happy tinkering!
Useful Video: Using a photodiode in Arduino. Turn on leds using a photodiode.
References:
- https://www.ee-diary.com/2021/08/photodiode-light-detector-with-arduino.html
- https://www.dfrobot.com/blog-611.html
- https://www.canadarobotix.com/blogs/how-to/photodiode-module-guide
- https://www.build-electronic-circuits.com/arduino-light-sensor/
- https://arduinogetstarted.com/tutorials/arduino-light-sensor

