Arduino, with its versatile features, has become a staple for electronics hobbyists and professionals alike. One of its key features is the Analog Comparator, an essential tool for comparing voltage levels. It measures input signals and compares them to a reference voltage, enabling efficient and responsive decision making in your electronics projects. This guide will take you through the basics of using Arduino’s Analog Comparator, setting the groundwork for more complex applications.
Understanding the Arduino Analog Comparator
How Does the Arduino Analog Comparator Work?
Essentially, the Analog Comparator works by comparing two input voltages, known as Vin+ and Vin-. The comparator then outputs a logic level signal, which can be used to trigger other components in your circuit. This makes it an essential tool for designing projects that require precise control over voltage levels.
One common use for the Analog Comparator is in creating a reference voltage for analog-to-digital converters (ADC). This allows you to set a specific threshold for the ADC to trigger, ensuring accurate readings.
How to Use the Arduino Analog Comparator?
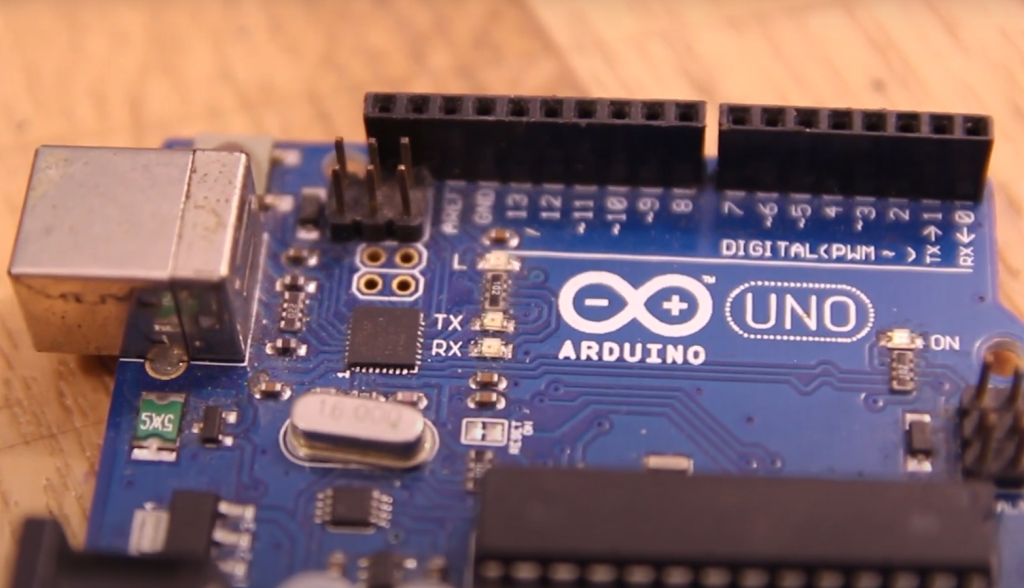
Utilizing the Analog Comparator on an Arduino board is a straightforward process, making it easily accessible for users. The first step is to identify which pins on your specific board are designated for the comparator. Once you have located them, you can connect the input voltages to these pins.
Next, you will need to set up the comparator by programming it using the Arduino IDE. This involves configuring the comparator’s settings, such as which pins are used for input and the reference voltage.
Finally, you can use the output signal from the comparator to trigger other components in your circuit or take further action based on the comparison results. [1]
Tips for Using the Analog Comparator
Here are a few things to keep in mind when using the Arduino Analog Comparator:
- The comparator only works with analog voltage signals, so you may need to use a voltage divider circuit if your input signals are digital.
- Make sure to select the appropriate pins for your specific board when programming the comparator.
- You can adjust the reference voltage using a potentiometer or other adjustable component to fine-tune your comparisons.
Overall, understanding how the Arduino Analog Comparator works and how to use it effectively can greatly enhance your electronics projects. With the ability to accurately compare analog voltages, you can create more precise and reliable circuits for a variety of applications.
Key Components of an Analog Comparator
While the specific features and functions may vary depending on the model, here are some common components you can expect to find in an Analog Comparator:
- Two inputs for connecting analog voltage signals (Vin+ and Vin-)
- A reference voltage input for setting a specific threshold for comparison
- An output pin for triggering other components based on the comparison results
- Adjustable settings such as hysteresis and input polarity
By understanding the different components of an Analog Comparator, you can better utilize its capabilities and incorporate it into your projects effectively.
Applications of the Arduino Analog Comparator
The Arduino Analog Comparator is a versatile and useful component that can be used in various projects. It has many applications, including but not limited to:
- Sensor monitoring: The Analog Comparator can be used to monitor the output of sensors such as temperature, light, or sound sensors. This allows for real-time data analysis and control based on sensor readings.
- Motor control: The Analog Comparator can be used to control the speed and direction of motors by adjusting their input voltage based on the output of the comparator. This is commonly used in robotic projects.
- Audio processing: The comparator can be used to process audio signals, such as filtering out certain frequencies or amplifying specific signals.
- Battery monitoring: In battery-powered projects, the Analog Comparator can be used to monitor the battery voltage and trigger warning signals when it falls below a certain threshold.
- Solar power optimization: By using the Analog Comparator, solar-powered projects can optimize their energy usage by automatically adjusting the input voltage based on available sunlight.
- Security systems: The comparator can be used in security systems to detect changes in voltage levels and trigger alarms or other actions accordingly.
- Proximity sensing: By using the Analog Comparator, projects can detect and measure proximity to objects by analyzing changes in voltage levels.
- Automation control: The Analog Comparator can be used to automate tasks based on analog signals, such as turning on lights when it gets dark or adjusting room temperature based on ambient light levels.
In addition to these applications, the Arduino Analog Comparator can also be used in various DIY projects for creative purposes. Its versatile nature and ease of use make it a popular component among hobbyists and professionals alike. [2]
Troubleshooting and Common Issues
While the Arduino Analog Comparator is a reliable and efficient component, there are some common issues that may arise while using it. Some of these include:
- False triggers or erratic behavior: This can occur due to noise interference or unstable input signals. Using proper shielding and filtering techniques can help alleviate this issue.
- Voltage mismatch: The comparator may not function properly if the input voltages are not within its allowed range. It is important to carefully select the appropriate voltage levels for your project.
- Power supply issues: Inadequate power supply or fluctuations in input voltage can also affect the performance of the Analog Comparator. It is recommended to use stable and regulated power sources.
If you encounter any of these issues, refer to the Arduino Analog Comparator’s datasheet for troubleshooting tips or seek assistance from online forums and communities.
Coding for Using the Analog Comparator
To use the Analog Comparator in your Arduino project, you will need to write a few lines of code. Here is an example using the built-in comparator on an Arduino Uno board:
“`
// Define the pins for input and output
const int analogPin = A0;
const int ledPin = 13;
void setup() {
// Configure comparator pins
ACSR = (0 << ACBG) | // Bandgap reference disconnected from comparator
(1 << ACD); // Disable the digital input buffer on AIN0 and AIN1
DIDR1 |= (1 << AIN0D) | // Disable the digital input on analog pin 0
(1 << AIN1D); // Disable the digital input on analog pin 1
ADCSRB |= (0 << ACME); // Disable analog multiplexer // Configure LED pin pinMode(ledPin, OUTPUT); } void loop() { // Read the input voltage from the comparator int sensorValue = analogRead(analogPin); if (sensorValue > 512) { // If the voltage is higher than half of Vcc
digitalWrite(ledPin, HIGH); // Turn on LED
} else {
digitalWrite(ledPin, LOW); // Turn off LED
}
}
“`
This simple code reads the input voltage from the comparator and turns on an LED if it goes above a certain threshold. You can modify this code to suit your specific project needs. [3]
Pros and Cons of Using the Analog Comparator
Like any component, the Analog Comparator has its own advantages and disadvantages. Here are some of them:
Pros
- Simple and easy to use: The comparator can be easily integrated into Arduino projects with just a few lines of code.
- Versatile: As discussed earlier, it has various applications in different types of projects.
- Low power consumption: The Analog Comparator consumes very little power, making it suitable for battery-powered projects.
- Affordable: The comparator is relatively inexpensive compared to other components with similar functions.
Cons
- Limited input range: The Analog Comparator can only handle input voltages within a certain range, which may not be suitable for some projects.
- Noise interference: As mentioned earlier, noise interference can affect the performance of the comparator.
- Limited output options: The comparator has a binary output, which may not be ideal for projects that require more complex signals.
Types of Comparators
There are different types of comparators available, each with its own unique features and functions. Some popular ones include:
- LM339: This is a quad comparator IC that can handle up to four inputs, making it suitable for more complex projects.
- LM311: The LM311 has a faster response time compared to other comparators, making it ideal for applications that require high-speed processing.
- LM393: This is a dual comparator IC commonly used in voltage detection and monitoring circuits.
It is important to choose the right type of comparator based on your project requirements to ensure optimal performance.
Importance of Using Analog Comparator in Arduino Projects
Furthermore, the use of the Analog Comparator allows for better utilization of resources and energy efficiency, making it a valuable addition to any DIY project. So if you are looking to enhance the capabilities of your Arduino projects, consider using the Analog Comparator for increased accuracy and functionality. Since it is a versatile component with various applications, experimenting with it can also lead to innovative and creative outcomes in your projects.
In conclusion, the Analog Comparator is an important tool for voltage detection and comparison in Arduino projects. Its simplicity, affordability, and wide range of functions make it a popular choice for hobbyists and professionals alike. With proper usage and troubleshooting techniques, the Analog Comparator can greatly enhance the performance and efficiency of your projects. [4]
Is Arduino Analog Input Voltage Or Current?
The Arduino Analog Comparator deals with voltage inputs, not current. It compares the input voltage to a reference voltage and provides an output based on that comparison. Therefore, it is important to ensure that the input voltage is within the comparator’s allowed range in order for it to function properly. Additionally, using a stable and regulated power supply can help avoid any issues with fluctuations in input voltage. While the Analog Comparator may not directly deal with current, it is important to consider the current requirements of your project when selecting a power supply and using other components in conjunction with the comparator.
Can Arduino Convert Analog-To-Digital?
Yes, Arduino boards have built-in Analog-to-Digital Converters (ADC) that allow them to read and process analog signals. This is essential for projects that require the use of sensors or other analog input devices.
The ADC on an Arduino board converts the continuous analog signal into discrete digital values, which can then be interpreted and used in code. The resolution of the ADC may vary depending on the specific Arduino board, but most have a resolution of 10 bits, providing values from 0 to 1023.
In summary, the Analog Comparator is just one aspect of the Arduino’s capability in handling analog signals. With its built-in ADC and other components, it can effectively convert analog signals into digital values for use in various projects.
How Fast Can Arduino Read Analog Input?
The speed at which Arduino can read analog inputs depends on the ADC’s sampling rate, which is typically defined in samples per second (SPS). The sampling rate determines how many times the ADC will read and convert an analog input into a digital value in one second.
For most Arduino boards, the maximum sampling rate is 10,000 SPS. However, other factors such as the processor speed and code complexity can also affect the actual sampling rate. Therefore, it is important to consider these factors when designing projects that require high-speed analog input readings.
In conclusion, the Arduino’s analog input reading speed is limited by its ADC’s sampling rate, but there are ways to optimize and improve this process for faster and more accurate results. [5]

Can You Use Arduino As DAC?
Yes, some Arduino boards have built-in Digital-to-Analog Converters (DAC) that allow them to output analog signals. This can be useful for projects that require the generation of specific waveforms or analog outputs.
The DAC on an Arduino board works by converting digital values into corresponding analog voltages, allowing for a smooth and continuous signal output. The resolution of the DAC may vary depending on the specific Arduino board, but most have a resolution of 8 bits, providing values from 0 to 255.
In summary, the Arduino can also function as a DAC in addition to its ADC capabilities, making it a versatile tool for handling both analog and digital signals.
Can An Arduino Be Used As An Audio Amplifier?
While an Arduino can technically be used as an audio amplifier, it is not the most efficient or practical solution. The limited power output and frequency response of the Arduino’s digital pins make it unsuitable for high-quality audio amplification.
However, there are ways to improve the performance of the Arduino in this aspect, such as using external amplifiers or adding additional components to enhance its output capabilities. Ultimately, it is best to use dedicated audio amplifiers for optimal and reliable results in audio applications.
Can I Use Arduino For Commercial Purposes?
Yes, Arduino boards and software can be used for commercial purposes as long as the licensing terms and conditions are followed. The official Arduino website states that their hardware and software is “open-source,” meaning it is available for anyone to use and modify for personal or commercial projects.
However, if you plan on using Arduino in a commercial project, it is important to carefully read and understand the licensing terms, as they may vary depending on the specific components and software used. Additionally, it is always recommended to give credit and acknowledge the use of Arduino in your commercial products or services. [6]
Is C or C++ Better For Arduino?
C++ allows for a more organized and modular code structure, making it easier to manage larger projects. It also has built-in libraries that can be useful for specific applications. On the other hand, C may be more suitable for simpler projects due to its straightforward syntax and easier learning curve.
Ultimately, the decision between using C or C++ for Arduino will depend on personal preference and the requirements of your project. Both languages are supported by the Arduino IDE, allowing you to switch between them as needed.
FAQs
What is an Arduino Analog Comparator?
An Arduino Analog Comparator is a built-in module in most Arduino boards that allows you to compare analog voltages. It compares the input voltage with a reference voltage and outputs either a high or low signal depending on the result of the comparison.
How does it work?
The Analog Comparator has two inputs, one for the reference voltage and one for the input voltage. The comparator continuously compares the two voltages and outputs a high signal if the input voltage is higher than the reference voltage, and a low signal if it’s lower. This makes it useful for applications such as sensor readings, where you want to trigger an event or action when a certain threshold of voltage is reached.
How can I use it in my Arduino projects?
To use the Analog Comparator in your Arduino projects, you will need to connect the reference voltage and input voltage pins to the respective components. You can then use the comparator output as a trigger for other actions in your code, such as turning on an LED or activating a motor.
Are there any limitations to using the Analog Comparator?
Yes, there are some limitations to be aware of when using the Analog Comparator. One limitation is that it can only compare analog voltages within a specific range (usually between 0-5V). Additionally, the accuracy of the comparator may vary depending on factors such as temperature and power supply voltage.
Do I need any additional components to use the Analog Comparator?
No, you do not need any additional components to use the Analog Comparator as it is already built-in to most Arduino boards. However, you may need to use external components such as resistors or capacitors to adjust the reference voltage or input signal for your specific project needs.
Can I use multiple Analog Comparators in one project?
Yes, you can use multiple Analog Comparators in one project by connecting them to different pins on your Arduino board. This allows you to compare multiple analog signals simultaneously.
Where can I find more information about using the Analog Comparator?
You can find more information about using the Analog Comparator in the official Arduino documentation or through online resources such as tutorials and forums. Additionally, experimenting with different projects and code will also help you gain a better understanding of how to use the Analog Comparator effectively in your own projects.
What are the alternatives to an Arduino Analog Comparator if any?
There are a few alternatives to an Arduino Analog Comparator, such as using a digital comparator or using the built-in ADC (Analog-to-Digital Converter) on your Arduino board. Digital comparators work by comparing two digital signals instead of analog voltages, but they may not be suitable for all applications. Using the ADC allows you to convert analog signals into digital values that can then be compared in your code. It ultimately depends on the specific needs of your project and which method will provide the most accurate results.
What is the difference between an Analog Comparator and a Digital Comparator in Arduino?
The main difference between an Analog Comparator and a Digital Comparator in Arduino is the type of signals that they compare. An Analog Comparator compares analog voltages, while a Digital Comparator compares digital signals. Additionally, the output of an Analog Comparator is a continuous signal, whereas the output of a Digital Comparator is a discrete signal (usually either high or low). This makes them suitable for different types of applications and it’s important to understand which one is best for your specific project needs.
What precautions do I need to take while using an Arduino Analog Comparator?
There are a few precautions to keep in mind while using an Arduino Analog Comparator. First, ensure that the input and reference voltages are within the specified range (usually between 0-5V). Also, be mindful of temperature and power supply voltage variations, as they may affect the accuracy of the comparator. Additionally, make sure to properly connect all necessary components and double
How can I troubleshoot issues with the Arduino Analog Comparator?
If you encounter any issues with the Analog Comparator in your Arduino projects, there are a few troubleshooting tips to keep in mind. First, check that all connections are secure and properly connected. Make sure that the input and reference voltages are within the specified range and try adjusting them if needed. You can also use a multimeter to measure the voltages and ensure they are accurate. If you are still having issues, try using different code or consulting online resources for further assistance.
Conclusion
The analog comparator in Arduino is a simple yet powerful feature. In this document, we have discussed the basics of an analog comparator and how it works. We have also explored some practical examples of using the analog comparator in Arduino projects.
Using an analog comparator can greatly enhance the capabilities of your Arduino board. It allows for precise comparison between different voltages, making it useful for applications such as sensor interfacing and signal processing.
Furthermore, learning how to use the analog comparator in Arduino opens up a whole new world of possibilities for your projects. You can now incorporate more complex and precise measurements into your designs, making them more functional and efficient.
We hope this article has provided you with a comprehensive understanding of the analog comparator in Arduino and how to utilize it in your projects. So go ahead, experiment with the analog comparator and see what new possibilities you can discover! Happy making!
Useful Video: Arduino Analog Comparator with Interrupt
References:
- https://www.engineersgarage.com/arduino-analog-comparator/
- https://www.ee-diary.com/2021/07/how-to-use-arduino-analog-comparator.html
- https://microcontrollerslab.com/arduino-comparator-tutorial/
- https://www.arnabkumardas.com/arduino-tutorial/analog-comparator/https://electronoobs.com/eng_arduino_tut128.php
- https://www.gammon.com.au/forum/?id=11916
- https://www.hackster.io/yeshvanth_muniraj/analog-comparator-module-in-atmega328p-migrating-to-c-7502ea

