
Choosing the right power supply for your Arduino board is a critical element in any project. The Arduino board can be powered through various means, each with its own advantages and considerations. From using the onboard USB connector to employing an external power supply, the choice ultimately depends on the specific requirements of your project.
This article will guide you through the different ways to power your Arduino boards, providing insights into the pros and cons of each method, and helping you understand how to maximize the efficiency and performance of your Arduino projects. Let’s explore the world of Arduino power supplies together.
Why Is Power Supply Important For An Arduino Board?
The power supply is crucial for an Arduino board for several reasons:
- Voltage Regulation: Arduino boards typically operate at a specific voltage level, often 5V or 3.3V, depending on the model. Providing a stable and appropriate voltage is essential to ensure the board functions correctly. If the voltage is too high or too low, it can damage the components or cause erratic behavior;
- Stability: Arduino boards need a stable power supply to function reliably. Fluctuations or noise in the power supply can disrupt the operation of the microcontroller and other components, leading to unpredictable behavior;
- Component Protection: Arduino boards have various components like microcontrollers, sensors, and other integrated circuits. These components are sensitive to voltage variations and can be damaged if not provided with a proper power supply;
- Precise Timing: Some Arduino projects involve precise timing, such as generating PWM signals or controlling servo motors. In such cases, a stable power supply is crucial to ensure accurate timing and control;
- Analog Inputs: Arduino boards often have analog inputs used for reading sensors. A stable power supply helps maintain the accuracy of analog readings, especially in applications where small voltage changes need to be detected;
- Avoiding Resets: Voltage drops or interruptions can lead to the Arduino board resetting, which can disrupt the operation of your project. A stable power supply minimizes the risk of unintentional resets;
- Efficient Operation: Efficient power supplies can help extend the battery life of portable Arduino projects, making them more practical and cost-effective [1];
To achieve a stable power supply for your Arduino board, you can use various methods, including:
- USB Connection: Powering the Arduino through a USB connection from a computer or a USB power adapter is a common and reliable method;
- External Power Supply: You can use an external power supply, such as a battery pack or a wall adapter, to provide a stable and regulated voltage to the Arduino;
- Voltage Regulators: Some Arduino boards have built-in voltage regulators that allow you to power them with a wider range of input voltages. These regulators ensure a stable output voltage to the board;
- Battery Power: For portable projects, you can use batteries and voltage regulators to supply power to the Arduino, ensuring stable operation even when not connected to a fixed power source;

What Power Supply Can You Use With Any Arduino Board:
USB Power Supply
Advantages:
- Widely available: USB ports are ubiquitous on computers, laptops, power banks, and wall adapters;
- Stable voltage: USB provides a regulated 5V supply, ensuring reliable operation;
- Easy connection: Simply plug in a USB cable, and your Arduino is powered up;
Limitations:
- Tethered: Your Arduino needs to be connected to a USB source, limiting mobility;
- Limited current: USB ports may not provide sufficient current for power-hungry projects;
AC Socket
Powering your Arduino board from an AC socket involves using an adapter to convert the AC voltage from the wall outlet to a DC voltage suitable for your Arduino.
Advantages:
- Stable voltage: AC adapters provide regulated DC voltage;
- Continuous power: You can run your Arduino continuously without worrying about battery life [2];
Limitations:
- Limited mobility: AC-powered Arduino projects are stationary due to the fixed power source
- Voltage compatibility: Ensure the adapter voltage matches your Arduino’s requirements;
Battery Power
Batteries are a portable and versatile power source for Arduino projects. You can use various types of batteries depending on your project’s requirements.
Advantages:
- Portability: Battery power allows for mobile and remote Arduino applications
- Versatility: Different battery types (e.g., alkaline, LiPo, NiMH) can be used based on project needs;
Limitations:
- Limited runtime: Battery life depends on capacity and power consumption;
- Voltage regulation: Some Arduino models may require voltage regulation when using batteries;
VIN (Voltage In)
Many Arduino boards feature a VIN pin or a voltage input header. This option allows you to supply an external voltage source directly to your board. Here’s what you should know:
Advantages:
- Customizable voltage: VIN pins accept a wide voltage range, making them versatile;
- Flexibility: You can use various power sources, such as solar panels or alternative power supplies;
Limitations:
- Voltage range: Ensure the voltage supplied falls within the board’s specified range;
- Potential damage: Incorrect voltage can damage your Arduino, so exercise caution;
Screw Terminal (Only MKR FOX or WAN 1300)
The MKR FOX and WAN 1300 Arduino boards feature screw terminals for power input. These terminals provide a secure connection for specific projects [3].
Advantages:
- Secure connection: Screw terminals prevent accidental disconnections;
- Easy wiring: Suitable for projects that require sturdy power connections;
Limitations:
- Limited to specific models: This option is exclusive to the MKR FOX and WAN 1300 boards;
- Not as common: Screw terminals are not as widely available as other power sources;
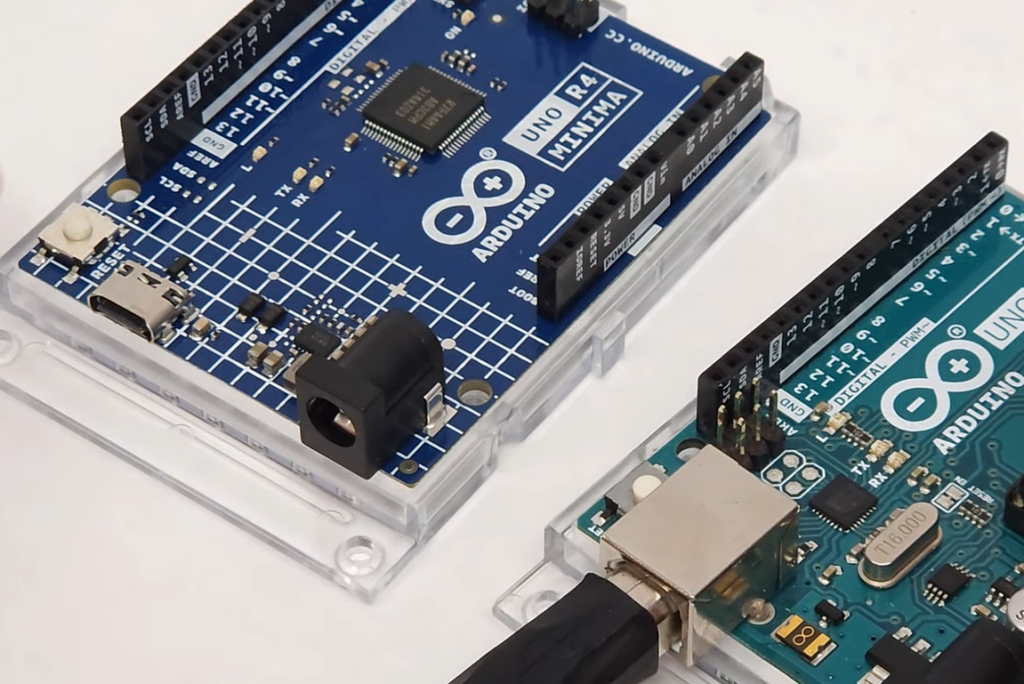
Barrel Jack Connector
The barrel jack connector is a common power input method for many Arduino boards. It allows you to connect an external power adapter easily.
Advantages:
- Standardized connection: Barrel jacks are widely used and compatible with various adapters;
- Easy to use: Simply plug in an adapter to power your Arduino;
Limitations:
- Voltage compatibility: Ensure the adapter voltage matches your Arduino’s requirements;
- Connection security: The plug can be accidentally disconnected if not secured properly;
Battery Connector
Some Arduino boards have dedicated battery connectors or headers for battery power. This simplifies the process of connecting batteries.
Advantages:
- Battery support: Tailored for powering your Arduino with batteries;
- Secure connection: Battery connectors ensure reliable power;
Limitations:
- Limited to specific models: This option is available on certain Arduino boards;
- Voltage and capacity considerations: Ensure the battery type and voltage align with your project’s requirements;
3V3/5V Pin
Arduino boards often feature 3.3V and 5V pins, which can be used to power external components or sensors [4].
Advantages:
- Component power: Useful for providing power to sensors, modules, or peripherals;
- Voltage flexibility: Choose between 3.3V or 5V depending on your project’s requirements;
Limitations:
- Limited current: These pins have a current limitation, so be mindful of power consumption;
- Not suitable for powering the entire board: They’re typically used for external components rather than the Arduino itself;
Recommended Arduino Power Supply For Professional Arduino Projects:
When it comes to professional Arduino projects, ensuring a reliable and appropriate power supply is essential. Arduino boards are versatile microcontroller platforms used in various industries, from automation and robotics to environmental monitoring and IoT solutions.
USB Power Supply
Method: Connect your Arduino board to a computer, USB hub, or USB power adapter using a USB cable.
Advantages:
- Convenience: USB ports are widely available, making it easy to power your Arduino board;
- Stable Voltage: USB provides a regulated 5V supply, ensuring reliable operation;
- Ease of Development: Ideal for prototyping and development on a workstation;
Limitations:
- Tethered Operation: Professional projects may require mobility, which USB power cannot provide;
- Limited Current: USB ports may not deliver enough current for high-power applications [5];
Best Use Case: USB power is excellent for initial development and testing phases of professional projects, where mobility and power demand are not critical.
AC Socket Power Supply
Method: Use an external AC-to-DC adapter to provide power to your Arduino through a standard electrical wall socket.
Advantages:
- Stable Voltage: AC adapters provide a regulated DC voltage, ensuring reliable operation;
- Continuous Power: Ideal for applications that require uninterrupted operation;
- Scalability: Suitable for setups with multiple Arduino devices;
Limitations:
- Stationary: AC-powered projects are fixed to the location of the electrical outlet;
- Compatibility: Ensure the adapter voltage matches your Arduino’s requirements;
Best Use Case: Professional applications that demand constant, uninterrupted operation, such as industrial control systems, can benefit from AC socket power supplies.
Battery Power Supply
Method: Power your Arduino board with various types of batteries, depending on your project requirements.
Advantages:
- Portability: Battery power enables mobility, making it suitable for remote or field deployments;
- Versatility: Different battery types (e.g., alkaline, LiPo, NiMH) can be chosen based on project needs;
- Backup Power: Batteries can serve as a backup power source in case of power outages;
Limitations:
- Limited Runtime: Battery life depends on capacity and power consumption, requiring monitoring and maintenance;
- Voltage Regulation: Some Arduino models may require voltage regulation when using batteries [6];
Best Use Case: Professional projects that need mobility or operate in remote areas, such as environmental monitoring stations or portable medical devices, can benefit from battery power supplies.
Solar Panel Power Supply
Method: Harness sunlight by connecting a solar panel to your Arduino to provide renewable power.
Advantages:
- Sustainability: Solar power is renewable and environmentally friendly, reducing the project’s carbon footprint;
- Remote Operation: Ideal for outdoor or remote projects without access to traditional power sources
- Cost Savings: Over time, solar panels can save on electricity costs;
Limitations:
- Sunlight Dependency: Solar panels rely on sunlight, so nighttime operation requires energy storage or alternative power sources;
- Voltage Regulation: Ensure the voltage from the solar panel is regulated for stable operation;
Best Use Case: Professional projects involving remote environmental monitoring, data collection, or agriculture benefit from solar panel power supplies, reducing the need for frequent battery replacements.
Coin Cells
Method: Use small coin cell batteries (e.g., CR2032) for low-power, long-lasting applications.
Advantages:
- Compact Size: Ideal for projects with limited space or miniaturization requirements;
- Longevity: Coin cell batteries can power low-power Arduino setups for months or even years;
- Low Maintenance: Minimal need for battery replacement;
Limitations:
- Limited Current: Unsuitable for high-power applications or projects that require continuous operation;
- Voltage Compatibility: Ensure the voltage matches your Arduino’s requirements;
Best Use Case: Professional projects that demand compact, low-power solutions, such as wearable medical devices or IoT sensors, can benefit from coin cell power supplies [7].
FAQ:
1. What’s the best way to power up Arduino?
The best way to power up an Arduino depends on your project’s requirements. For ease of use and stability during development, a USB connection is often recommended. For standalone projects, you can use a dedicated power supply, batteries, or other sources based on your specific needs.
2. Is it safe to power Arduino with 12V and a USB cable at the same time?
It’s generally safe to power an Arduino with 12V via its external power jack while also having it connected to a USB cable [8]. The Arduino board is designed to handle this situation by automatically selecting the power source with the higher voltage. However, it’s essential to ensure that the 12V power supply is within the specified voltage range for your specific Arduino model to avoid damage.
3. How to power Arduino boards using a battery?
You can power Arduino boards using batteries by connecting them to the appropriate power input. Ensure that the voltage and current capacity of the battery match the Arduino’s requirements, and use a connector or voltage regulator if necessary to achieve a stable supply.
4. How to power Arduino boards with a 3.7V lithium battery?
To power Arduino boards with a 3.7V lithium battery, you can connect the positive (red) wire to the Arduino’s VIN pin or an appropriate voltage regulator and the negative (black) wire to the ground (GND) pin. This voltage is within the acceptable range for many Arduino boards.
5. Can Arduino boards work on 3.3V?
Yes, some Arduino boards can operate at 3.3V, such as the Arduino Pro Mini and Arduino Due [9]. Others can switch between 3.3V and 5V operation using jumpers or voltage regulators. Always check your specific Arduino model’s documentation to confirm its voltage compatibility.
6. What things do you need to power your Arduino?
To power your Arduino, you may need a power source (e.g., battery, USB connection, external adapter), connectors or wires, and possibly voltage regulators or adapters to ensure the voltage and current are suitable for your board.
7. What precautions do you need to take when powering up your Arduino?
Some precautions when powering up your Arduino include:
- Ensuring the voltage is within the specified range for your board;
- Avoiding voltage spikes or fluctuations;
- Properly connecting wires, connectors, and power sources to prevent shorts or loose connections;
8. What should you be aware of when powering up an Arduino?
Be aware of:
- The Arduino’s voltage requirements and limitations;
- The power source’s voltage and current capacity;
- The potential for voltage spikes or polarity reversals that can damage your board;
9. Can Arduino run on 12V?
Many Arduino boards can handle a 12V power supply through their external power jack. Check your specific Arduino model’s documentation to verify its voltage compatibility.
10. What power supply can you use with your Arduino board?
You can use various power supplies, including USB connections, AC adapters, batteries, solar panels, and more, depending on your project’s requirements and your Arduino model’s specifications.
11. What components do you need to power up an Arduino?
The components you need to power up an Arduino include a power source, suitable connectors or wires, and, in some cases, voltage regulators or adapters to match the voltage and current requirements of your board.
12. How does Arduino get powered?
Arduino can be powered via USB, external power sources (e.g., batteries, adapters), or specialized power connectors, depending on your project’s needs.
13. Can Arduino run on a power bank?
Yes, you can power an Arduino using a power bank with a USB output. Power banks provide a regulated 5V supply, making them compatible with most Arduino models.
14. Can Arduino use a 12V power supply?
Many Arduino boards can be powered with a 12V power supply through their external power jack [10]. However, always verify the voltage compatibility with your specific Arduino model.
15. How long can a 9V battery power an Arduino?
The runtime of a 9V battery powering an Arduino depends on the Arduino model, the power consumption of your project, and the battery’s capacity. It could last anywhere from a few hours to several days.
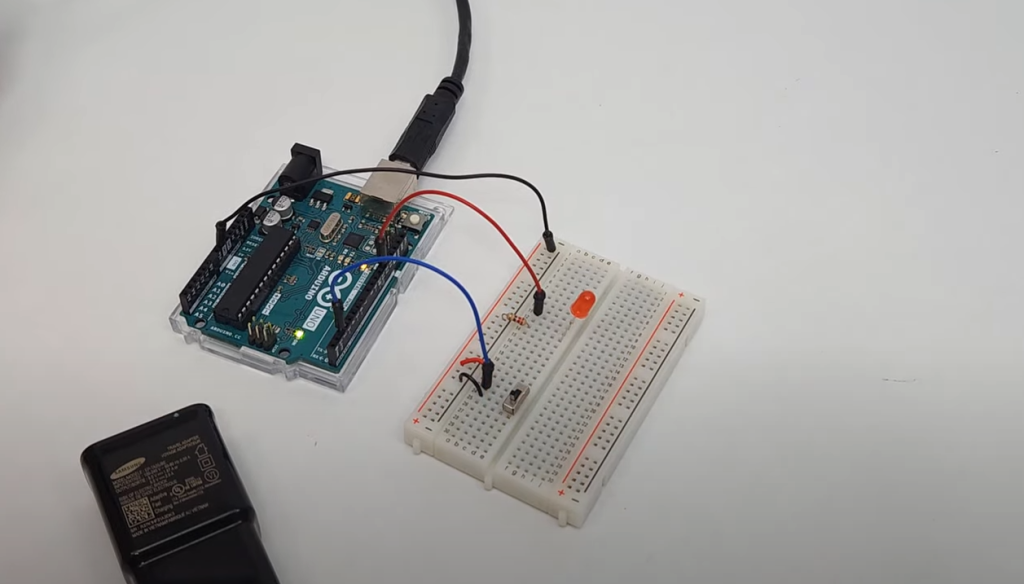
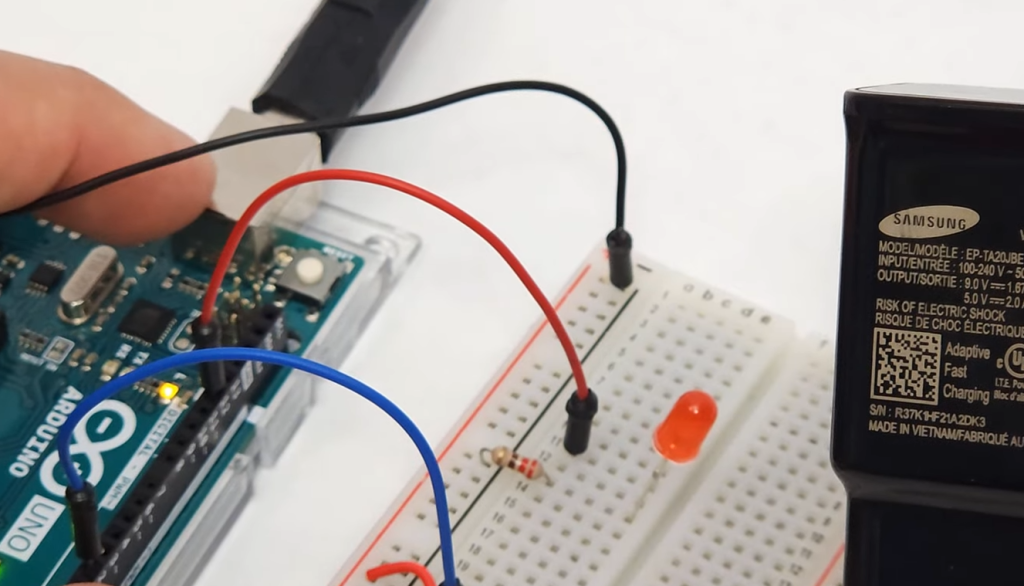
16. Can you power an Arduino with a phone charger?
Yes, you can power an Arduino using a phone charger that provides a stable 5V output via a USB cable. Ensure the charger can supply the required current for your project.
17. Can you power an Arduino with 15V?
Providing 15V directly to most Arduino models is not recommended, as it exceeds their voltage specifications. It could damage the board. Use an appropriate voltage regulator or supply voltage within the specified range.
18. Can you power an Arduino through a 5V pin?
Yes, you can power an Arduino through the 5V pin, but make sure the voltage supplied is stable and within the specified range (typically around 5V). Be cautious not to exceed the voltage limit.
19. What is the max current for Arduino 12V?
The maximum current that an Arduino can handle when powered with 12V depends on the specific Arduino model and its voltage regulator capabilities [11]. It’s essential to consult the documentation for your specific board.
20. Is it safe to plug the Arduino into the wall?
Plugging an Arduino into the wall via an AC adapter is safe, provided that the voltage and current supplied by the adapter match the board’s requirements, and all connections are made correctly.
21. Can you power an Arduino with 12V and USB?
Yes, you can power an Arduino with both 12V and USB simultaneously. The board should automatically select the power source with the higher voltage. Ensure that the 12V supply is within the board’s voltage tolerance range.
22. How long can an Arduino run on an 18650 battery?
The runtime of an Arduino powered by an 18650 battery depends on the Arduino model, power consumption, and the capacity of the battery. A typical 18650 lithium-ion battery may power an Arduino for several hours to a few days, depending on usage.
Useful Video: How to Power an Arduino Project (Lesson #19)
References:
- https://support.arduino.cc/hc/en-us/articles/360018922259-What-power-supply-can-I-use-with-my-Arduino-board-
- https://docs.arduino.cc/learn/electronics/power-pins
- https://circuitdigest.com/article/best-way-to-power-arduino-boards
- https://thepihut.com/blogs/raspberry-pi-tutorials/how-do-i-power-my-arduino
- https://linuxhint.com/best-power-supplies-arduino/
- https://www.programmingelectronics.com/power-arduino/
- https://arduinoguides.com/recommended-arduino-power-supply/
- https://www.startupopinions.com/what-power-supply-can-i-use-with-my-arduino-board/
- https://robocraze.com/blogs/post/how-do-i-power-my-arduino
- https://randomnerdtutorials.com/arduino-5-ways-to-power-up-your-arduino/
- https://circuitjournal.com/arduino-power-pins