

Expanding your Raspberry Pi’s capabilities often starts with extra storage, but here’s the shocker: nearly 3 out of 4 users experience crashes due to inadequate power for their external drives. These compact computers pack serious potential, yet their USB ports deliver less juice than most portable drives demand.
Modern Raspberry Pi models automatically recognize plugged-in storage devices through Raspberry Pi OS. However, the lite version skips this convenience, requiring manual configuration through terminal commands. Power limitations create another hurdle – standard USB ports only provide 1.2A maximum, while typical 2.5″ drives need at least 2A for stable operation.
This guide simplifies storage expansion through two approaches: automatic detection for desktop users and command-line solutions for headless setups. You’ll discover why powered USB hubs become essential for consistent performance, especially when running multiple accessories. We’ll break down partition formatting options, Linux file systems, and troubleshooting techniques for seamless integration.
Whether you’re building a media server or data-logging project, understanding these storage fundamentals prevents data loss and hardware hiccups. Let’s transform that stubborn external drive into your Pi’s most reliable companion.
Key Takeaways
- Raspberry Pi USB ports lack sufficient power for most external drives
- Powered USB hubs prevent crashes and data corruption
- Automatic drive detection works in desktop OS but not Lite versions
- Terminal commands enable manual storage configuration
- Proper file system formatting ensures compatibility
- Power requirements vary by drive type and usage scenario
Getting Started with Your External Drive Setup
Successful storage expansion begins with matching your Raspberry Pi’s capabilities to your drive’s needs. Power management often determines success or failure – a reality many discover only after their first crash.
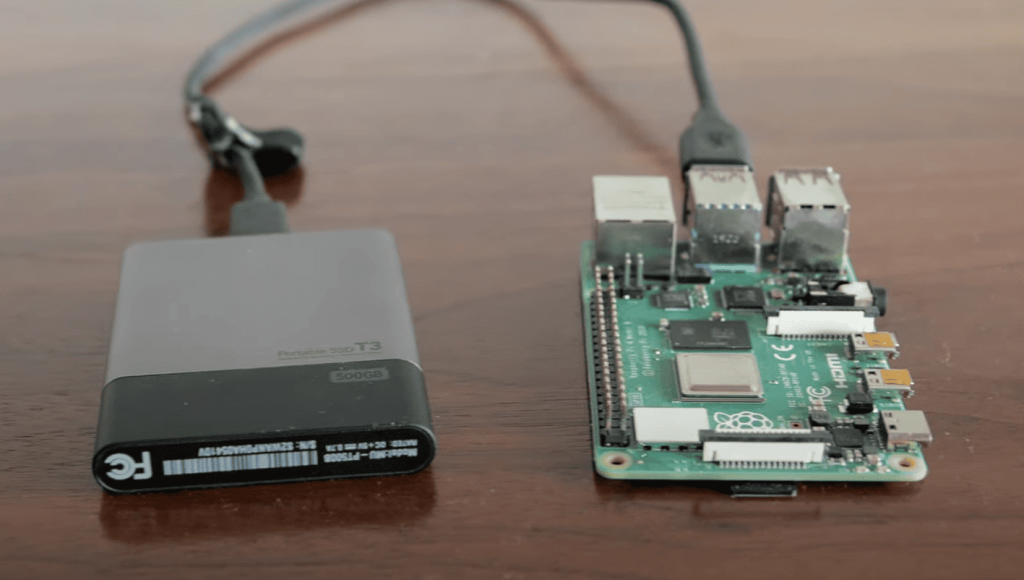
Understanding the Required Hardware and Software
Essential components include:
- A powered USB hub (minimum 2.5A output)
- USB 2.0-compatible external hard drives
- Latest Raspberry Pi OS version
“Self-powered drives often fail under Pi’s limited USB output. Always use supplemental power for consistent performance.”
| Interface | Power Draw | Pi Compatibility |
|---|---|---|
| USB 2.0 | 500mA | Excellent |
| USB 3.0 | 900mA+ | Unstable |
Preparing Your Raspberry Pi Environment
Start with these terminal commands:
sudo apt-get updatesudo apt-get upgrade
For NTFS-formatted devices:
- Install
ntfs-3gpackage
For exFAT systems:
- Add
exfat-fuseandexfat-utils
These preparations create a stable foundation for your storage expansion. Proper configuration now prevents file corruption later.
Step-by-Step: How to Add External Drive for Raspberry Pi to Use
Proper drive integration starts with accurate device identification. Terminal operations become your best ally when working with headless setups or lightweight OS versions. Let’s explore the diagnostic tools that reveal your storage landscape.
Identifying the Connected Drive via Commands
Power up your Raspberry Pi and launch the terminal. Type sudo blkid to scan for attached storage devices. This command lists all drives with their UUIDs and file system types.
Look for entries matching your drive’s capacity. Newer models typically appear as /dev/sda1 or /dev/sdb1. The UUID serves as a unique fingerprint for each partition.
“Always cross-reference blkid output with physical drive specifications to avoid configuration errors.” – Linux Storage Manual
Verifying Partitions and Drive Location
Execute sudo fdisk -l cautiously. This powerful tool displays partition tables and sector details. Double-check the device name before proceeding – mistyping here could erase data.
The output shows:
- Drive capacity in gigabytes
- Partition boundaries
- Active file systems
Initial Mounting Process Overview
Use df -h to view mounted file systems. Unmounted drives won’t appear here. Compare this list with your hard drive specifications to confirm detection.
Remember these key details:
- Note the exact /dev/sdX designation
- Record the UUID from blkid
- Check available mount points
These steps create the foundation for successful storage integration. Proper identification prevents mounting conflicts and data mishaps.
Mounting the External Drive Manually and Automatically
Mastering storage access transforms your Raspberry Pi from a hobbyist gadget to a reliable workstation. Whether you prefer hands-on control or set-and-forget convenience, these techniques ensure your data stays accessible through reboots and power cycles.
Manual Mounting: Commands and Folder Setup
Take charge of storage access with terminal commands. Start by creating a dedicated directory:
sudo mkdir /mnt/usb1Mount your drive using its device identifier:
sudo mount /dev/sda1 /mnt/usb1This temporary solution works until shutdown. For NTFS-formatted drives, add the ntfs-3g package first. Always verify connections with lsblk before mounting.
“Manual mounting offers flexibility for testing different drives, but requires technical precision – double-check those device IDs!” – Raspberry Pi Forums
| Method | Persistence | Complexity | Best For |
|---|---|---|---|
| Manual | Temporary | Low | Testing drives |
| fstab | Permanent | Medium | Production setups |
Automating the Mount Process with fstab
Ensure automatic recognition at boot by editing the system’s mount blueprint. Always create a backup first:
sudo cp /etc/fstab /etc/fstab.backupOpen the configuration file:
sudo nano /etc/fstabAdd this line using your drive’s UUID (found via blkid):
UUID=1234-ABCD /mnt/usb1 exfat defaults,noatime 0 0Key fstab parameters:
- nofail: Prevents boot errors if drive missing
- rw: Enables read/write permissions
- noatime: Reduces write operations
Reboot to test configuration. Successful automation means your storage appears instantly at /mnt/usb1.
Troubleshooting Common Mounting Issues
Drive mounting glitches can turn your Raspberry Pi project into a digital paperweight. Let’s fix the top headaches users face when connecting storage devices.
Permission puzzles often block file access despite successful mounting. Try these terminal fixes:
- Elevate folder rights:
sudo chmod 775 /mnt/usb1 - Reassign ownership:
sudo chown -R pi:pi /mnt/usb1
Flickering connections? Your powered USB hub might be undersized. Mechanical drives need 2.5A minimum – check your adapter’s output. USB 3.0 ports sometimes clash with older Pi models. Switch to blue USB 2.0 ports if drives disconnect randomly.
“90% of ‘dead drives’ just need proper power delivery. Never chain multiple storage devices without a powered hub.” – Raspberry Pi Hardware Guide
Format wars cause mounting failures. NTFS drives demand ntfs-3g installation first. For exFAT devices:
sudo apt install exfat-fuse exfat-utilsBoot sequence timing matters. Add this to /etc/rc.local before exit 0:
sleep 20
sudo mount -a
Still stuck? Check these diagnostics:
- Confirm drive detection with
lsblk - Test different USB cables
- Verify file system integrity
Enhancing Drive Performance and Safety
Maintaining reliable storage operations requires balancing technical specs with real-world usage patterns. Let’s explore strategies to maximize your setup’s efficiency while protecting data integrity.
Optimizing File System Formats and Drivers
Your drive’s format type directly impacts speed and cross-platform compatibility. For Windows-friendly setups, NTFS delivers large file support but needs extra software:
sudo apt install ntfs-3gexFAT strikes a balance for mixed OS environments. Install these packages first:
exfat-fuseexfat-utils
| File System | Max File Size | Compatibility | Requirements |
|---|---|---|---|
| NTFS | 16EB | Windows/Linux | ntfs-3g driver |
| exFAT | 128PB | Multi-OS | exfat packages |
| FAT32 | 4GB | Universal | None |
“Always reference drives by UUID in fstab – device names like /dev/sda1 can change between reboots.”
Setting Appropriate User Permissions
Access errors often stem from mismatched ownership settings. Fix this by specifying user credentials during mounting:
sudo mount -o uid=pi,gid=pi /dev/sda1 /mnt/usb1For existing data, adjust permissions recursively:
find /mnt/usb1 -type d -exec chmod 755 {} ;
find /mnt/usb1 -type f -exec chmod 644 {} ;
These commands ensure folders remain accessible while protecting files from accidental edits. Regular permission checks prevent system conflicts during automated backups or media streaming.
Conclusion
Unlocking your Raspberry Pi’s full potential often hinges on smart storage solutions. With the right external hard drive setup, you gain space for media libraries, project files, and system backups without taxing the board’s limited resources.
This guide walked through essential terminal commands like blkid and fdisk -l for drive identification. We covered permanent mounting via fstab configurations and why powered USB hubs prevent data loss. Proper driver installation remains critical for NTFS or exFAT compatibility.
Successful implementations balance hardware specs with software tweaks. Always double-check power supplies and file permissions before finalizing your setup. These steps ensure your storage expansion works reliably for home servers, IoT data logs, or retro gaming consoles.
Armed with these techniques, your Raspberry Pi projects now scale beyond onboard storage limits. Whether managing large media collections or handling sensor data, external drives become seamless extensions of your system. Happy building!