
Did you know that prototyping electronic projects can cost hundreds of dollars in hardware? Many developers face this financial barrier when testing their ideas. This comprehensive guide introduces a solution that eliminates these expenses entirely.
The platform we’re exploring runs directly in your web browser. No downloads or installations are required. This makes it incredibly accessible for everyone, from beginners to experienced professionals.
You can work with multiple microcontroller architectures using this browser-based environment. It supports popular boards and advanced systems alike. The versatility extends to testing sensors, displays, and cloud interactions.
This approach revolutionizes how we develop embedded systems. It provides significant cost savings and incredible accessibility. Both students and professional engineers benefit from this modern development method.
Our guide will walk you through creating projects from basic LED controls to complex IoT applications. You’ll learn to debug code effectively before touching physical hardware. The collaborative features allow easy sharing with colleagues or classmates.
Key Takeaways
- Browser-based platform eliminates hardware costs during prototyping
- Supports multiple microcontroller architectures and popular boards
- Test sensors, actuators, and cloud interactions virtually
- Debug code effectively before physical implementation
- Collaborate easily through simple URL sharing
- Suitable for students, educators, and professional developers
- Streamlines the entire IoT development workflow
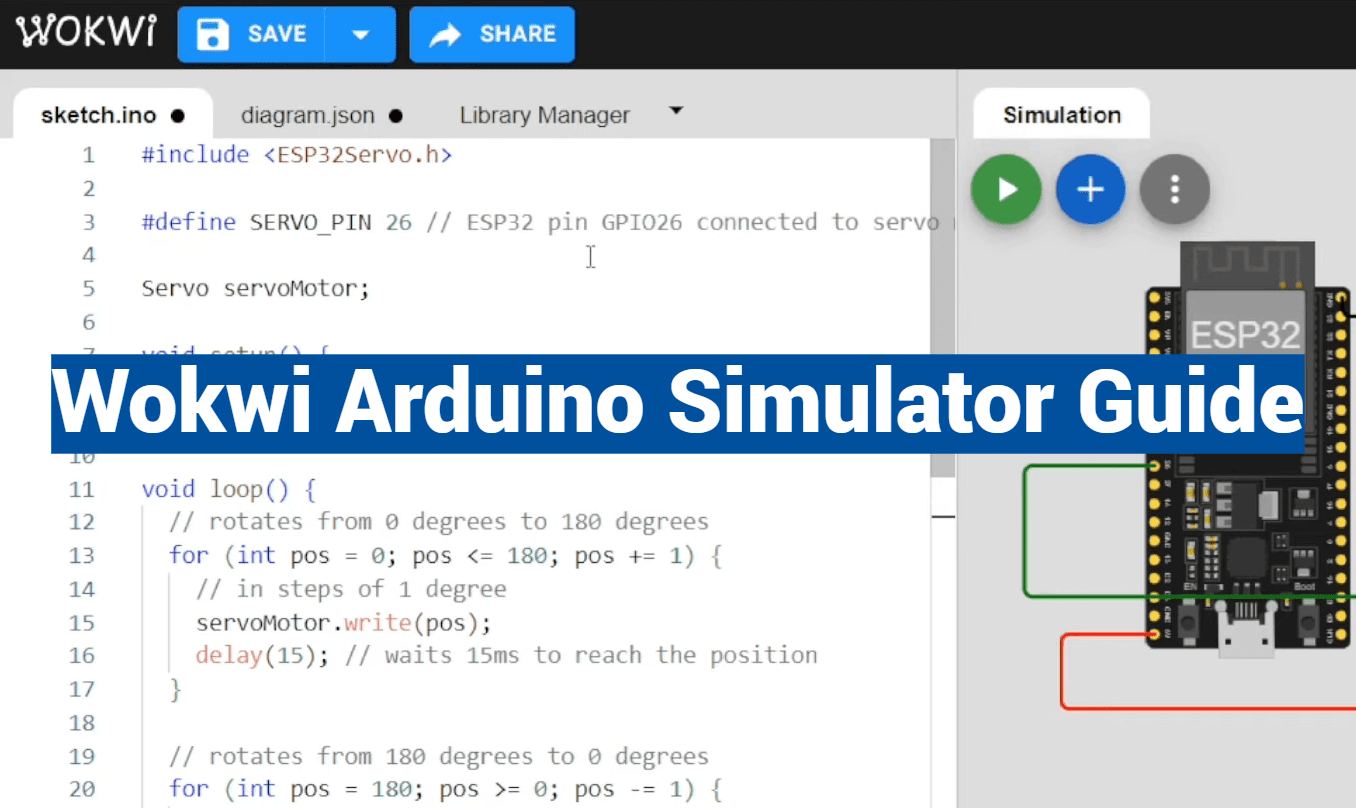
Introduction to the Wokwi Arduino Simulator Guide
Imagine testing complex electronic circuits without ever touching physical components. This browser-based platform brings professional development tools to everyone’s fingertips.
What is the Wokwi Arduino Simulator?
The Wokwi Arduino Simulator is a comprehensive virtual environment for embedded systems. It runs directly in your web browser with zero installation required.
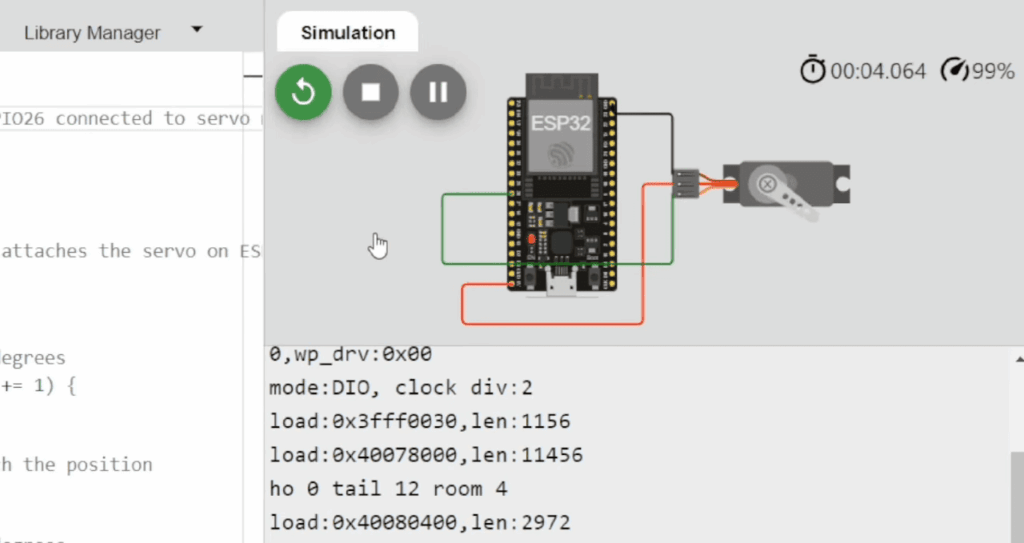
This powerful tool supports multiple microcontroller architectures. You can work with popular boards like Uno, Mega, and Nano. Advanced systems including ESP32 and Raspberry Pi Pico are also available.
The platform eliminates traditional barriers to electronics experimentation. No expensive hardware purchases are needed during the learning phase.
Key Benefits of Online Simulation
Online simulation offers immediate accessibility from any internet-connected computer. You can test dangerous or costly scenarios completely safely.
Rapid iteration becomes possible without hardware wear concerns. The environment supports cloud-compatible IoT projects using MQTT and HTTP protocols.
Educational value shines through collaborative features perfect for remote learning. Real-time debugging shows pin values and memory usage during operation.
Open source integration allows seamless sharing through GitHub. Community libraries expand your project possibilities dramatically.
Exploring the wokwi arduino simulator
What if you could experiment with cutting-edge microcontroller technology using nothing more than your web browser? This platform brings professional-grade development tools to users across all operating systems.
Simulating Multiple Microcontrollers in Your Browser
The environment supports an impressive range of hardware options. You can work with classic boards like Uno, Mega, and Nano alongside modern systems including ESP32 DevKit and Raspberry Pi Pico.
Different processor architectures are fully supported. This includes RISC-V, ARM, Xtensa, and AVR technologies. Such diversity ensures code compatibility across various development projects.
Ease of Use for Beginners and Professionals
Beginners appreciate the intuitive interface that simplifies initial learning curves. They can start with basic LED projects and gradually advance to complex IoT applications.
Professional developers benefit from advanced features for rapid prototyping. The tool enables client demonstrations and educational content creation without physical hardware requirements.
Both user groups find the browser-based approach eliminates traditional compatibility issues. Whether using Windows, Mac, Linux, or Chromebook, accessibility remains consistent.
Setting Up Your Simulation Environment
Getting your development environment ready takes just minutes with this browser-based approach. The platform eliminates complex installations and compatibility issues that often slow down traditional setup processes.
To get started, simply open your favorite browser and navigate to the main website. You’ll find an intuitive interface waiting for you.
Creating a New Project with a Simple Click
The first step involves selecting your preferred microcontroller board. Options include popular choices like the Arduino Uno, ESP32 DevKit, and Raspberry Pi Pico. Each selection tailors the environment to your specific needs.
Click “New Project” to instantly generate your workspace. The interface provides three main areas: code editor, schematic design view, and serial monitor. This layout supports both coding and visual circuit creation.
If you need assistance, the ‘DOCS’ tab offers comprehensive guidance. Help resources are always one click away.
Collaboration and Sharing via Unique Project URLs
Every project receives a unique web address. This feature makes sharing your work incredibly simple. Send the link to colleagues or students for instant access.
GitHub integration allows permanent storage of your projects. Choose between public repositories for community contributions or private storage for proprietary work. Version control becomes seamless.
This streamlined approach lets you focus on building rather than configuring. You can begin testing circuits within minutes of your initial visit.
Navigating the Code Editor and Simulation Tools
The heart of any development workflow lies in its coding environment, and this platform delivers a surprisingly powerful one. Mastering these tools is essential for efficient project creation and testing.
Overview of the Integrated Code Editor
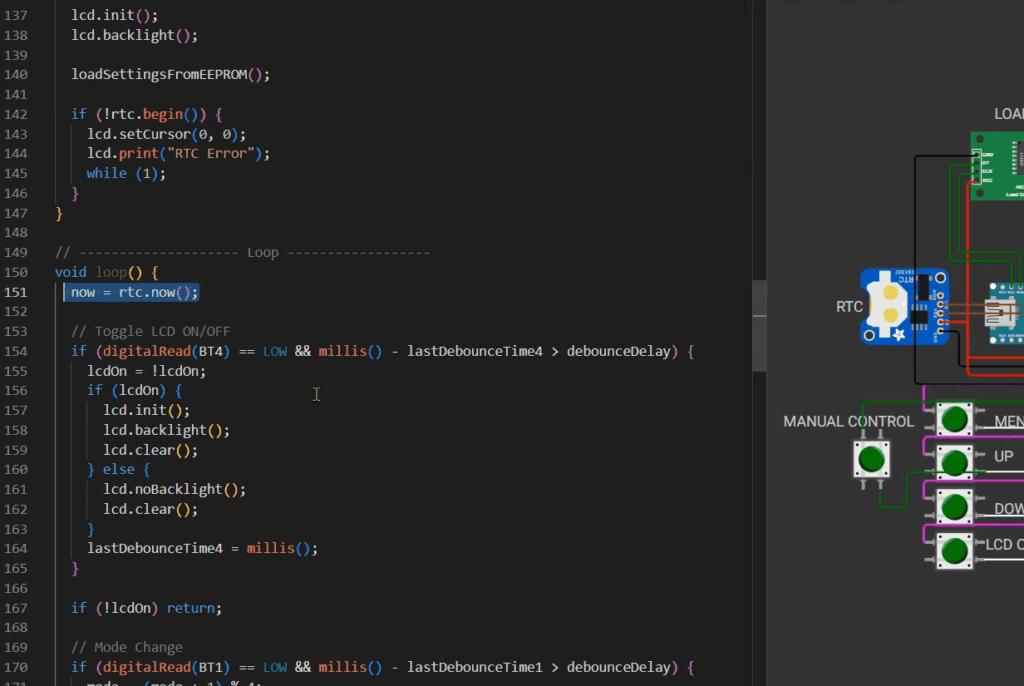
This integrated code editor feels familiar to anyone who has used the Arduino IDE. You can paste existing sketches directly into the editor without modification.
It supports standard C/C++ code and includes helpful features like syntax highlighting and auto-completion. These tools help you write cleaner code more efficiently.
Error detection happens in real-time, pointing out mistakes as you type. This immediate feedback speeds up the entire development process significantly.
Utilizing the Serial Monitor and Debug Features
Debugging is a core strength of this simulator. The serial monitor allows you to test communication and view program output effortlessly.
You can monitor live pin states and variable values during execution. For advanced users, the VS Code extension adds a Virtual Logic Analyzer.
This tool captures digital signals like UART and I2C for detailed analysis. GDB integration also enables professional debugging with breakpoints and step-through execution.
These powerful tools help you validate functionality before any physical deployment. Leveraging community libraries further expands your project possibilities.
Adding Components and Building Your First Project
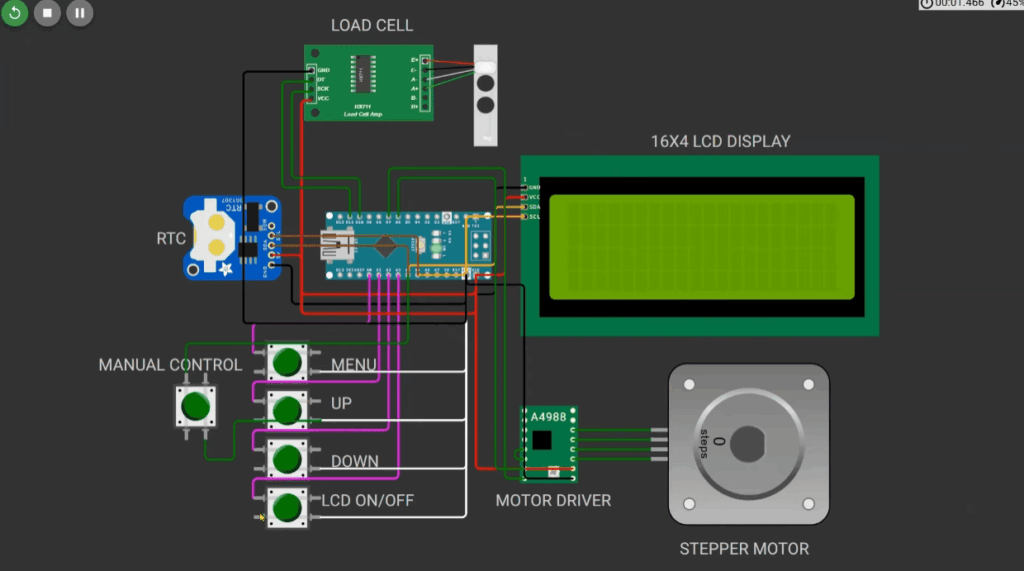
The component library offers hundreds of electronic parts ready for your experimentation. This extensive collection makes building virtual circuits both educational and enjoyable.
Using the Drag-and-Drop Interface to Add Parts
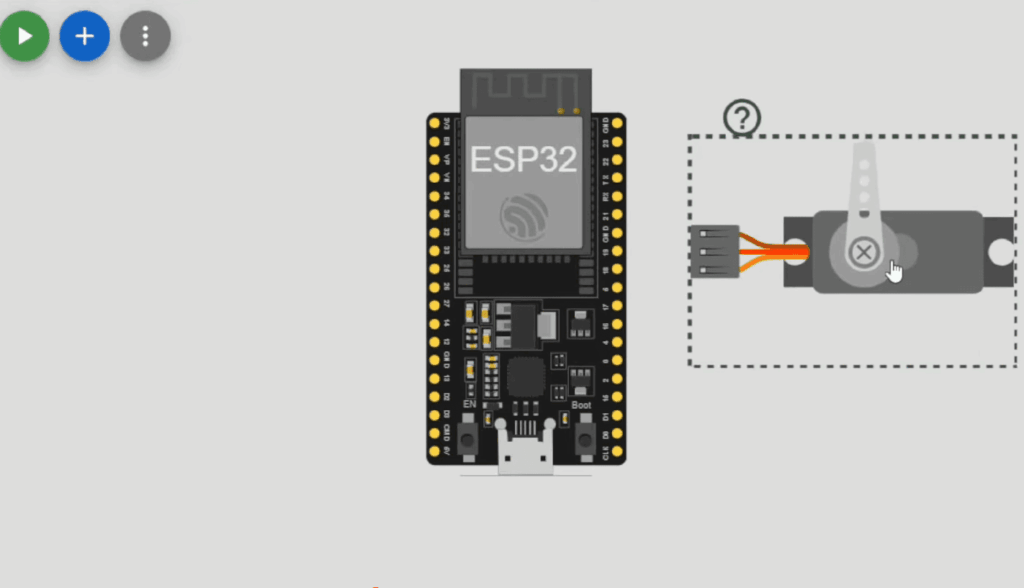
Begin by clicking the “Add Part” button to access the comprehensive library. You can search for specific components like sensors, displays, or motors. The intuitive interface simplifies the selection process.
Drag your chosen parts onto the virtual breadboard. Connect them using colored wires that mimic real circuit building. This visual approach helps beginners understand proper circuit design principles.
| Component Category | Example Parts | Typical Applications |
|---|---|---|
| Sensors | DHT22, MQ-2, Ultrasonic | Environmental monitoring |
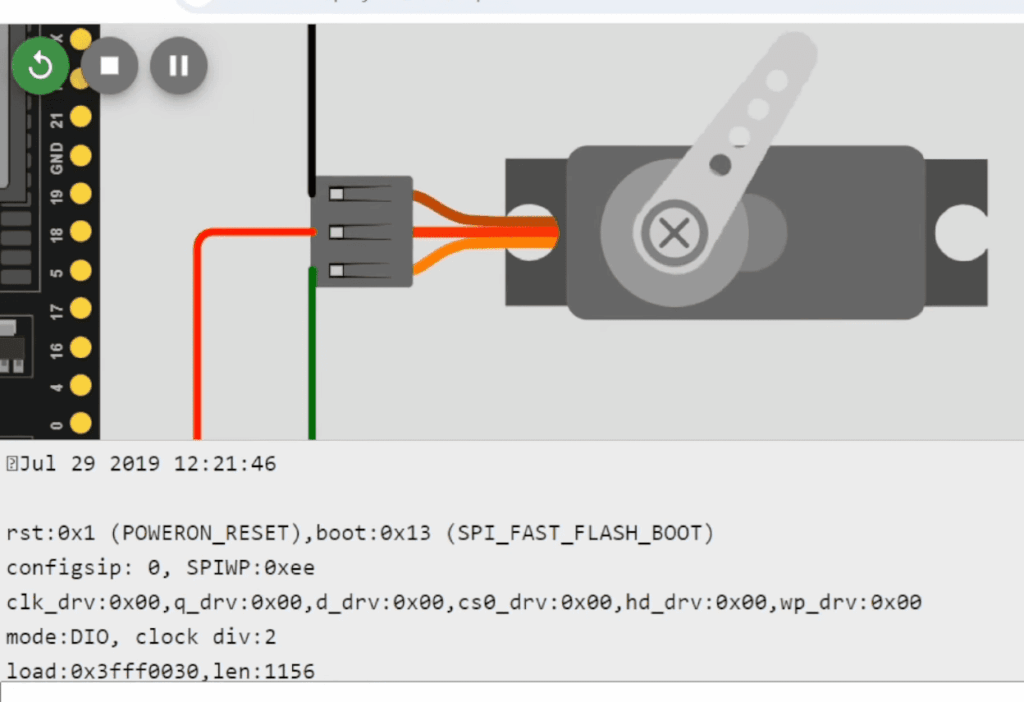
| Actuators | LED, Servo, Motor | Movement and indication |
| Displays | OLED, LCD, 7-Segment | Data visualization |
| Communication | Wi-Fi, MQTT, HTTP Client | IoT connectivity |
Organize your project with clear wire colors. Use red for power and black for ground connections. This simple step makes your circuits easier to read and debug.
Test different configurations by dragging new components. The platform allows rapid iteration without physical constraints. You can add components and modify your design effortlessly.
Each part includes specifications and pin diagrams. This information helps you understand connection requirements. The visual interface supports learning proper wiring techniques.
Building your first project becomes a rewarding experience. Start with simple LED and button circuits. Gradually advance to more complex designs as you gain confidence.
Integrating Sensors and Modules into Your Projects
Building interactive electronic systems requires careful integration of various sensing and control components. The platform’s extensive library provides everything needed for comprehensive IoT projects.
Connecting Sensors like DHT22, MQ-2, and Ultrasonic
Environmental monitoring becomes accessible with popular sensors. The DHT22 measures temperature and humidity with simple three-wire connections.
Gas detection projects use the MQ-2 module for safety applications. Ultrasonic sensors enable distance measurement for robotics and automation.
Each sensor connects using colored wires to appropriate data pins. Proper circuit design ensures accurate readings.
Incorporating Actuators, Displays, and Communication Modules
Output components bring your projects to life. LEDs provide visual feedback while servo motors enable precise movement control.
Display modules like OLED screens show graphical data. LCD character displays present text information clearly.
Communication modules support Wi-Fi connectivity and MQTT protocols. These features enable cloud-based IoT projects without physical hardware.
The component library simplifies testing complex circuits. You can validate entire systems before building physical prototypes.
Advanced Techniques for IoT and ESP32 Simulation
The transition from basic microcontroller projects to full-scale IoT applications represents a significant leap in complexity. Advanced simulation techniques make this progression much more accessible for developers at all levels.
Simulating Cloud-Based IoT Projects with MQTT and HTTP
Modern IoT simulation capabilities allow you to create sophisticated cloud-connected systems. The ESP32 board supports simulated Wi-Fi connectivity for testing real cloud services.
You can implement MQTT publish/subscribe patterns for efficient data exchange. HTTP GET and POST requests enable interaction with external APIs and cloud platforms.
JSON parsing using community libraries helps process structured data from web services. The built-in WiFi Gateway feature connects simulated devices to your actual network.
Real-Time Debugging and Data Visualization
Advanced debugging tools provide crucial insights during development. You can monitor live pin values and track memory usage in real-time.
This helps identify performance bottlenecks in complex IoT applications. Environmental monitoring stations can publish sensor data to online dashboards for visualization.
These techniques enable thorough testing before investing in physical hardware. The online simulator approach significantly accelerates the entire development workflow.
Utilizing the Simulator for Educational and Collaborative Projects
Educational institutions worldwide are discovering new ways to teach electronics through virtual labs. This approach transforms how students learn microcontroller programming and circuit design.
Both beginners and advanced learners benefit from immediate hands-on experience. They can experiment freely without hardware costs or logistical challenges.
Projects for Students and Educators
Educators create structured learning paths using sequential tutorials. Students progress from basic LED projects to complex automation systems.
The platform supports various microcontroller boards for different skill levels. This flexibility makes it perfect for diverse educational needs.
Collaborative features enable real-time teamwork on circuit designs. Unique project URLs allow instant sharing between students and instructors.
Universities across multiple countries use these tools for remote labs. Distance learning students complete practical coursework from home.
Educators can embed interactive projects in blogs and learning management systems. This creates engaging tutorials that students can modify and experiment with directly.
Best practices include starting with simple circuits and gradually introducing sensors. This step-by-step approach builds confidence while teaching core concepts effectively.
Customizing and Testing Your Code
Creating reliable virtual prototypes requires mastering the art of code customization and systematic testing. The platform’s automatic reload feature instantly restarts your simulation when you modify code. This enables rapid iteration cycles during development.
Debugging Techniques for Reliable Simulations
Effective debugging begins with the serial monitor. Print variable values and program flow indicators to track execution. This helps identify logic errors quickly.
Real-time pin monitoring verifies digital and analog outputs match expected values. Memory usage tracking prevents crashes in complex programs. These tools provide crucial insights.
| Debugging Tool | Primary Function | Best For |
|---|---|---|
| Serial Monitor | Program output tracking | Logic flow verification |
| Pin State Viewer | Live signal monitoring | Wiring error detection |
| Memory Tracker | RAM usage analysis | Performance optimization |
The VS Code extension adds professional debugging features. Set breakpoints and step through code execution line-by-line. The Virtual Logic Analyzer captures digital signals for detailed analysis.
Community libraries expand testing capabilities for various devices. Always test edge cases like sensor disconnections. This ensures your code handles real-world conditions reliably.
Tips and Tricks for Optimized Arduino Simulation
Proper layout and monitoring practices transform basic simulations into professional-grade development environments. These techniques help you create maintainable projects that are easy to debug and share with colleagues.
Best Practices for Component Placement and Wiring
Organize your virtual breadboard with a logical flow. Group related components like sensors and motors together. This creates clean circuits that are simple to troubleshoot.
Use consistent color coding for your wires. Red typically indicates power connections while black represents ground. Other colors can distinguish signal paths. This visual system makes your design instantly readable.
Keep connections short and minimize wire crossings. A tidy interface helps you spot errors quickly. Separate power distribution from signal routing for better organization.
Real-Time Monitoring for Enhanced Testing
Leverage the platform’s live monitoring view during testing. Watch pin states change as your code executes. This helps verify timing sequences and input responses.
Monitor memory usage and variable values in real-time. These insights prevent performance issues on resource-constrained boards. Systematic testing ensures each part functions correctly before integration.
Test edge cases like sensor disconnections. Validate automation sequences under various conditions. This approach creates robust simulations that handle real-world scenarios effectively.
Exploring Additional Features and Extensions
Beyond the browser-based environment lies a suite of professional tools designed for serious development work. These advanced features extend the platform’s capabilities for professional workflows.
Leveraging the VS Code Extension and GitHub Integration
The VS Code extension brings powerful simulation tools directly into your preferred code editor. This commercial product offers a free trial before requiring a license.
It supports multiple architectures including RISC-V, ARM, Xtensa, and AVR. Professional frameworks like ESP-IDF for ESP32 projects integrate seamlessly.
Unique features include a Virtual Logic Analyzer and Built-in WiFi Gateway. GitHub integration allows version control and collaborative project sharing.
Discovering Open Source Libraries and Community Projects
The platform’s extensive component library grows through community contributions. You can access thousands of shared libraries and example projects.
Wokwi Pro unlocks faster builds and advanced simulation options. The documentation tab provides comprehensive references for all features.
This ecosystem supports complex automation and professional development workflows. Community projects offer practical learning examples for various boards.
Conclusion
This guide has shown how a browser-based platform empowers everyone to explore electronics confidently. It removes the high cost and hassle of physical hardware for learners and professionals alike.
You can progress from simple tutorials to advanced IoT automation with various boards and sensors. Test your circuits and code safely before buying any devices.
Educators can run full virtual labs, while developers save significant time on prototyping. The ability to simulate complex projects online is a game-changer.
We encourage you to start your first online circuit simulation today. Build your skills and bring your ideas to life with zero risk. Join a vibrant community innovating in the virtual space.