
Nearly 80% of first-time projector users encounter a frustrating problem: a distorted, trapezoidal picture instead of a perfect rectangle. This common issue stems from simple placement challenges.
Ideally, your device should sit directly perpendicular to the screen for a flawless picture. In reality, furniture, room layout, and mounting options often prevent this perfect alignment. The result is an image that looks skewed and unprofessional.
This is where a crucial feature comes into play. Keystone correction is the digital tool that fixes this distortion. It compensates for the angle, digitally manipulating the picture to create a sharp, properly aligned rectangle on your screen.
Understanding this function is vital for anyone using this technology. Whether you’re creating a home theater or delivering a business presentation, it ensures a superior visual result. It empowers you to set up your system correctly from the start.
This guide will explore how this correction works, its pros and cons, and provide simple setup tips. Our goal is to help you achieve the best possible viewing experience, no matter your setup constraints.
Key Takeaways
- Keystone correction fixes a trapezoidal, distorted image caused by an angled projector.
- Perfect, perpendicular placement between the device and screen is often impossible in real-world setups.
- This feature digitally adjusts the picture to create a perfect rectangle.
- It is essential for both home entertainment systems and professional presentations.
- Understanding this tool helps you make better purchasing decisions and achieve optimal image quality.
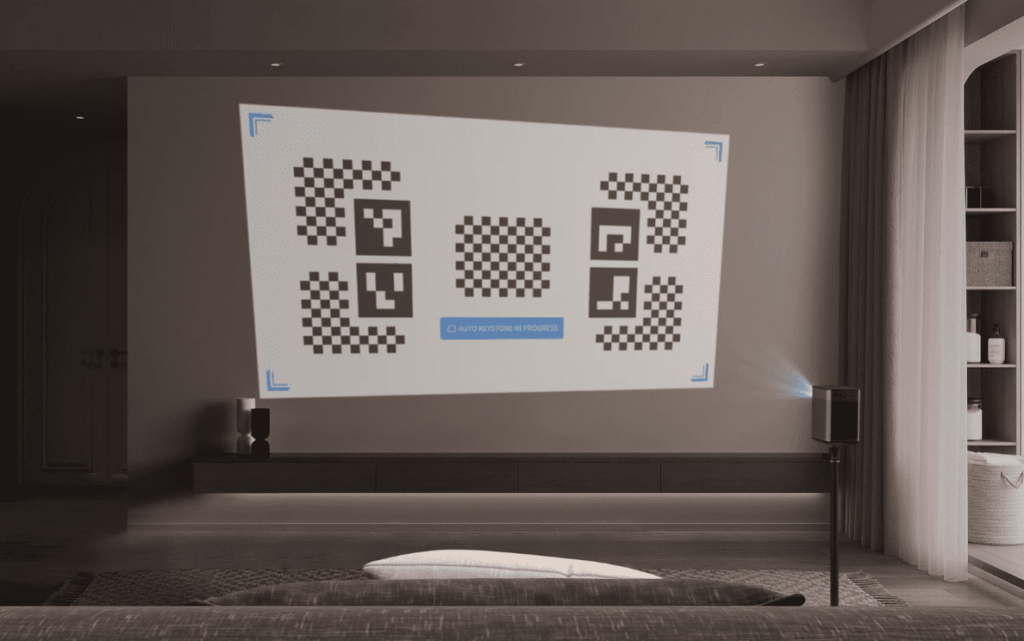
- Manual and automatic correction options are available on most modern projectors.
What Is Keystone on a Projector
The fundamental physics of light projection creates specific challenges when equipment isn’t perfectly positioned. When the lens sits at an angle to the screen, light travels varying distances to different areas. This discrepancy causes the projected picture to stretch unevenly.
Visually, this distortion manifests as a trapezoidal shape instead of a clean rectangle. One side appears noticeably wider or taller than its opposite. This geometric imperfection creates an unprofessional viewing experience that demands correction.
| Feature | Manual Correction | Automatic Correction |
|---|---|---|
| User Control | Full manual adjustment via menu settings | Sensor-based automatic detection |
| Setup Speed | Slower, requires user intervention | Instant, happens upon power-up |
| Precision Level | Highly precise with careful adjustment | Generally accurate for most setups |
| Ideal For | Permanent installations | Frequent room changes |
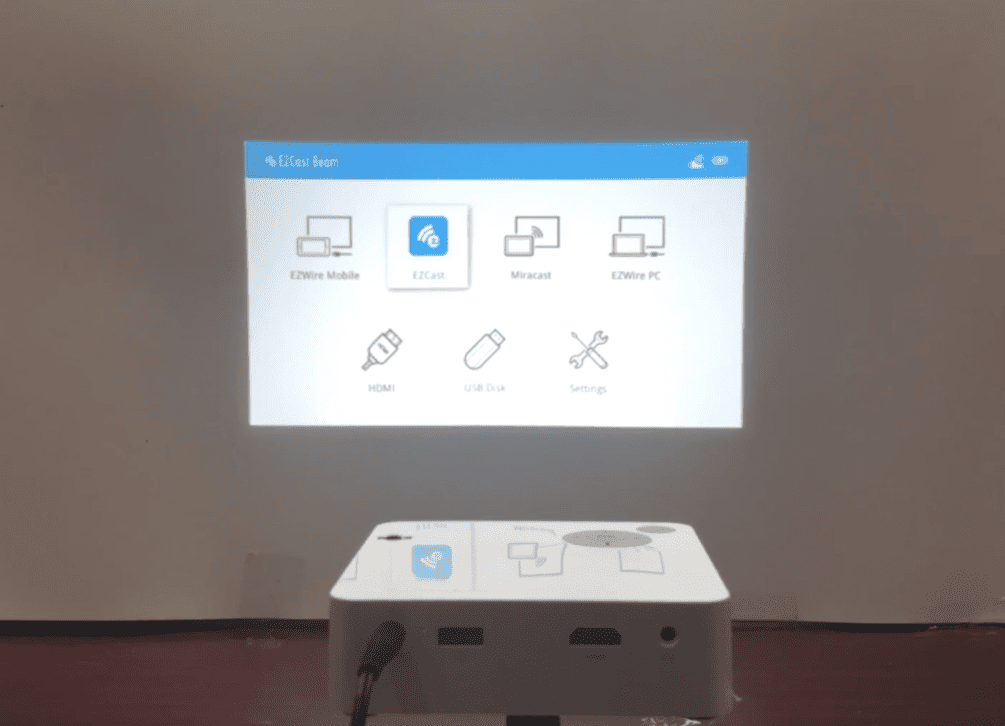
Modern devices offer both manual and automatic correction options. Manual adjustment gives users complete control over the process. Automatic systems use sensors to detect angles and make instant adjustments.
Understanding this essential feature helps achieve professional results in various scenarios. Placement on a low coffee table or off-center mounting often requires this correction. While incredibly useful, it’s important to recognize its limitations for optimal image quality.
Benefits and Drawbacks of Keystone Correction
This digital adjustment feature offers significant benefits but also comes with trade-offs that affect your viewing experience. Understanding both sides helps you make the best choices for your setup.
Pros: Alignment Flexibility and Easy Setup
Alignment flexibility stands as the primary advantage. You can position your equipment at various angles while maintaining a rectangular picture. This proves invaluable in challenging room layouts.
The setup process becomes remarkably simple. Temporary installations in conference rooms or outdoor settings benefit greatly. Text appears crisp and videos display without geometric distortion.
Professional presentations gain polished precision. Business meetings and educational lectures achieve superior visual quality with reliable correction.
Cons: Resolution Loss and Image Quality Degradation
Resolution loss represents the main drawback. Digital manipulation of pixels inevitably reduces sharpness. Excessive adjustment introduces blurring and artifacts.
Most devices correct within a 30-40 degree range. Extreme angles remain problematic. Fine detail content like architectural drawings may suffer.
Advanced automatic features typically increase equipment costs. Basic models offer limited correction capabilities.
| Aspect | With Keystone Correction | Without Keystone Correction |
|---|---|---|
| Setup Flexibility | High – works from various angles | Low – requires perfect alignment |
| Image Sharpness | Potentially reduced | Maximum native resolution |
| Installation Time | Fast and convenient | Time-consuming precision needed |
| Ideal Use Cases | Temporary setups, challenging rooms | Permanent, optimized installations |
How Keystone Correction Works
The technology that transforms distorted images into perfect rectangles operates through two primary directional adjustments. These systems address placement challenges through sophisticated processing.
Vertical vs Horizontal Correction
Vertical keystone correction fixes distortion when equipment sits above or below the screen’s center. Ceiling-mounted units pointing downward often need this adjustment.
Table-mounted projectors projecting upward also require vertical correction. This maintains rectangular image shape despite the angle.
Horizontal correction compensates for left or right offset from the screen center. Rooms with limited placement options frequently need this adjustment.
Digital vs Optical Techniques
Digital keystone correction is the most common method in consumer models. The processor remaps pixels to transform trapezoidal shapes.
This digital process compresses wider sides while stretching narrower areas. While flexible, it can reduce effective resolution.
Optical correction physically adjusts lens elements to maintain image quality. This premium method appears in high-end professional equipment.
| Correction Method | Technology Used | Image Quality | Cost Level |
|---|---|---|---|
| Digital Keystone | Pixel remapping processor | Potentially reduced | Consumer affordable |
| Optical Keystone | Lens element adjustment | Maximum preservation | Professional premium |
| Vertical Correction | Directional adjustment | Varies by method | Standard feature |
| Horizontal Correction | Side-to-side adjustment | Varies by method | Common in mid-range+ |
Optimal Projector Placement and Setup
The foundation of crystal-clear projection lies in thoughtful installation planning. Proper equipment positioning delivers superior results compared to relying on digital fixes.
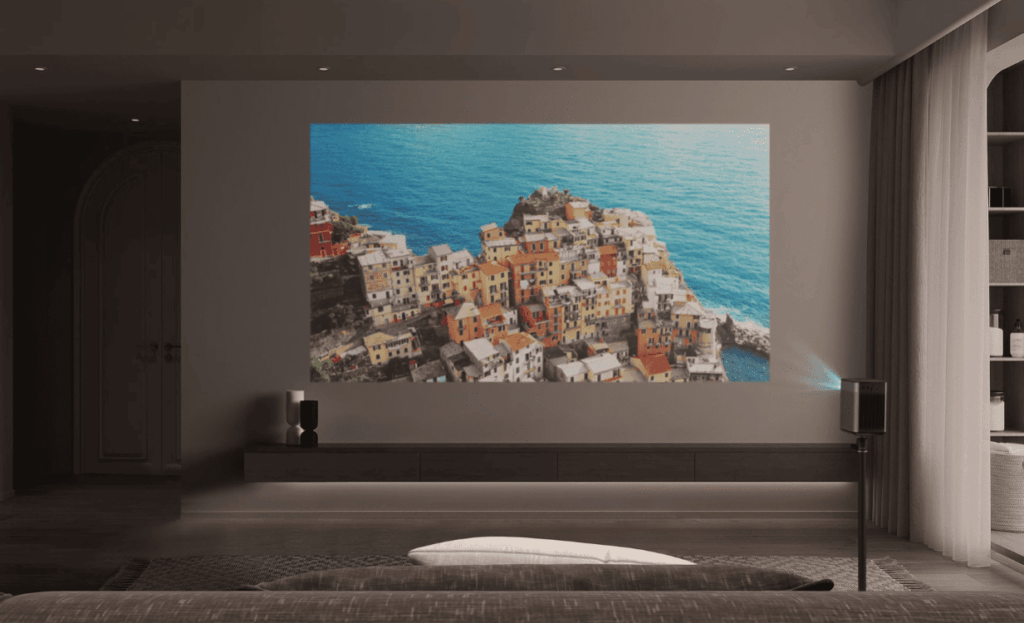
When your projector lens sits perpendicular to the screen, the image naturally forms a perfect rectangle. This ideal alignment preserves maximum resolution and sharpness.
Avoiding Common Distortion Issues
For table-mounted setups, elevate your unit so the lens center aligns with the screen center. Use adjustable brackets or sturdy pads to achieve this height.
Ceiling installations require downward projection angles. Position the mount directly above the screen’s center point for symmetrical results.
Many modern projectors feature lens shift technology. This mechanical adjustment moves the image without quality loss. However, its range remains limited.
Installation Best Practices for Clear Images
Always consult manufacturer specifications before installation. These documents provide precise throw distances and mounting templates.
Avoid tilting your projector to compensate for placement challenges. Even slight angles introduce geometric distortion requiring correction.
Most screens include black borders offering placement tolerance. Careful initial setup prevents disappointment and maximizes visual quality for your home theater.
Tips to Enhance Your Viewing Experience
Your projector’s full potential emerges when you master both placement techniques and advanced features. Smart setup choices can dramatically improve your visual results.
Maximizing Image Quality and Flexibility
Always prioritize physical alignment over digital fixes. Position your equipment perpendicular to the screen for optimal clarity. This approach preserves maximum resolution.
Use keystone correction only when physical constraints prevent proper placement. Excessive digital adjustment can reduce picture quality. Consider it a last-resort solution.
Many modern units include motion compensation technology. This feature reduces image smear during fast-action scenes. Sports and action movies appear smoother and clearer.
Portable projector users should disable automatic correction when proper positioning is possible. Take time during installation to achieve correct alignment. Hasty setups often require excessive digital fixes.
| Setup Approach | Image Quality | Flexibility | Best For |
|---|---|---|---|
| Perfect Physical Alignment | Maximum sharpness | Limited placement options | Permanent installations |
| Minimal Keystone Correction | Slight quality reduction | Good flexibility | Most home setups |
| Heavy Digital Correction | Noticeable quality loss | Maximum placement freedom | Temporary installations |
Evaluate your room’s lighting conditions carefully. Control ambient light to maximize contrast. The right screen selection also enhances overall picture quality.
Experiment with your specific configuration to find the ideal balance. Every room presents unique challenges. Your optimal setup combines technical precision with practical flexibility.
Conclusion
The journey to flawless projection begins with recognizing when to embrace technology versus when to prioritize physical positioning. Keystone correction serves as your essential tool for tackling trapezoidal distortion when room constraints prevent ideal placement.
This feature provides valuable flexibility, but remember the trade-offs. Digital manipulation of pixels can reduce resolution and affect overall picture quality. Understanding vertical and horizontal adjustment types helps you choose the right approach for your setup.
Proper lens alignment perpendicular to your screen remains the gold standard for maintaining optimal image quality. Use lens shift capabilities when available to minimize digital correction needs.
Your viewing experience benefits most from a balanced strategy. Embrace keystone correction for necessary flexibility, but always aim for optimal physical placement first. Armed with this knowledge, you can confidently create superior projection systems that deliver consistently stunning results.