
Did you know that over 50 million single-board computers worldwide now run mobile operating systems? This surprising trend shows how accessible advanced computing has become for hobbyists and developers.
Running a mobile OS on affordable hardware opens up incredible possibilities. You can transform a tiny computer into a powerful media center, development platform, or creative tool. The combination offers tablet-like experiences without the high cost.
emteria recently released an Android 14-based image specifically designed for these compact systems. Their solution makes setup much simpler than older methods. You get access to thousands of mobile apps on versatile hardware.
Installation offers two straightforward paths. The emteria Installer requires an account but guides you through the process. Alternatively, the official Raspberry Pi Imager provides both free and paid OS options.
The free Starter plan covers up to three devices with all features included. This works for both personal projects and commercial applications. You can test the system before committing to premium options.
This guide will walk you through everything from choosing the right distribution to optimizing performance. We’ll explore different builds like emteria’s Android 14 and community-developed alternatives.
By the end, you’ll understand what to expect from the installation process. We’ll cover typical setup times, performance considerations, and how to overcome common challenges.
Key Takeaways
- Mobile operating systems on compact computers create powerful, affordable solutions
- emteria offers an Android 14 build specifically optimized for single-board hardware
- Two installation methods provide flexibility for different user preferences
- The free Starter plan supports three devices with full feature access
- This combination enables unique media centers and development platforms
- Both personal and commercial use cases are supported
- Performance expectations and compatibility considerations are important factors
Introduction & Overview
Community-driven development has bridged the gap between mobile ecosystems and hobbyist computing platforms. While Google’s operating system was designed for smartphones and tablets, creative projects have adapted it for versatile single-board devices.
Understanding the Benefits of Android on Raspberry Pi
This combination unlocks exciting possibilities that traditional systems can’t match. You gain access to millions of mobile applications designed for touch interfaces. Your projects can range from custom media centers to interactive educational tools.
The experience differs from standard smartphones and tablets. Community builds provide essential features like touch support and app compatibility. These custom solutions fill the gap left by official manufacturer support.
What You Will Learn in This Guide
We’ll walk through each major step of the installation process. You’ll understand how to select the right build for your device and configure essential settings.
This overview prepares you for the technical journey ahead. You’ll discover realistic use cases where this operating system truly shines. By understanding the benefits upfront, you’ll appreciate this powerful software and hardware combination.
Preparing Your Hardware Setup
Before diving into the installation process, gathering the right components will ensure everything runs smoothly. Taking time to prepare your equipment prevents frustrating compatibility issues later.
Recommended Devices and Minimum Requirements
For the best experience with Android 14, emteria suggests using specific hardware. The Raspberry Pi 4 with at least 4GB RAM delivers solid performance.
The Raspberry Pi 5 offers even better responsiveness. Older models like the 3B+ can work but may feel slower than modern smartphones.
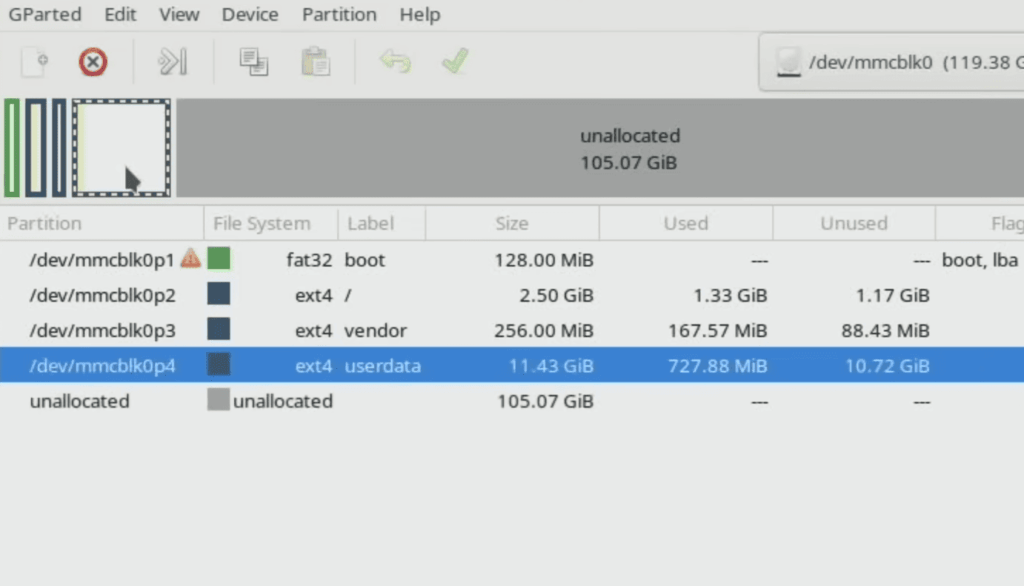
SD Card, USB Drive, and Monitor Essentials
Your storage card plays a crucial role in system performance. A quality 32GB minimum card ensures smooth operation.
Consider SSD or NVMe drives for better reliability. You’ll also need a basic USB drive for Google Apps installation.
Any monitor works, but touchscreen displays take full advantage of the touch-optimized interface. This makes your setup feel like a genuine tablet experience.
Downloading Required Images & Tools
Having the right software files ready before installation is crucial for a smooth setup process. This preparation phase ensures you won’t encounter interruptions when you’re halfway through the installation.
Selecting the Correct LineageOS or Android Image
Visit the Konstakang build website to find the appropriate system image for your device. Choose the latest version that matches your specific model. Using the wrong image can cause boot failures or performance issues.
Different Android versions offer varying stability and features. Consider your needs when selecting between releases like Android 14 or newer options. Always download the most current stable build for best results.
Using Raspberry Imager, Balena Etcher, and Additional Utilities
You’ll need a flashing tool like Raspberry Pi Imager or Balena Etcher. Both work on any operating system and create bootable media from your downloaded image file.
For Google services, download NikGapps from their website. The Core package includes Google Play Store without unnecessary apps. Copy this zip file to a USB drive immediately for easier access during setup.
NikGapps has become the preferred choice over OpenGapps due to regular updates. This ensures better compatibility with recent Android versions on your single-board computer.
Flashing the SD Card with Official Tools
Creating a bootable system is simpler than you might think using the official flashing tools available. This process transforms your blank storage media into a fully functional operating system ready for your device.
Step-by-Step with Raspberry Pi Imager
Begin by launching the official Raspberry Pi Imager application on your computer. Click “Choose OS” and scroll down to select “Use custom” from the menu options.
Navigate to your downloaded image file and select it. Now insert your card into the computer’s reader. The official Raspberry Pi Imager will detect your storage device automatically.
Click “NEXT” to begin the writing process. When prompted about OS customization settings, select “NO” followed by “YES” to confirm. This ensures proper installation without interference.
Alternative Approach with Balena Etcher
For users preferring a different tool, Balena Etcher offers a streamlined alternative. This cross-platform application provides consistent performance across operating systems.
The process follows a simple three-step pattern: select image, insert card, and flash. The interface clearly guides you through each stage with visual feedback.
Both methods reliably prepare your media within minutes. The official Raspberry Pi Imager and Balena Etcher represent trusted solutions for this critical installation step.
Booting and Configuring the Android System
Watching your custom-built system initialize for the first time marks a significant milestone in the project. This exciting phase transforms your hardware into a fully functional mobile computing environment.
First Boot and Setup Wizard
Insert your prepared storage media and power on the device. The initial startup takes longer as the operating system performs essential configuration tasks.
Newer builds feature a familiar welcome wizard. This guided process helps you connect to Wi-Fi networks and set your local time zone. Use keyboard navigation if display boundaries appear misaligned.
Some users report Ethernet connectivity challenges with recent hardware. Starting with wireless network configuration often resolves synchronization issues automatically.
Customizing Essential Android Settings
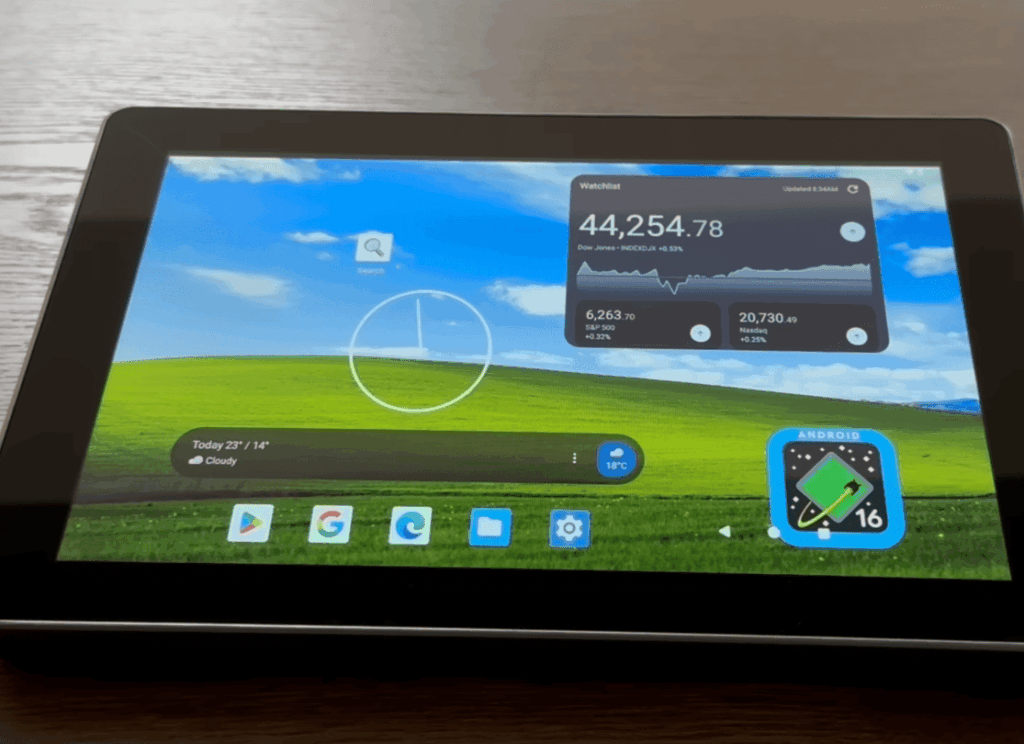
After completing the wizard, you’ll access the main interface. Swipe upward from the bottom edge to reveal available applications.
Visit the Settings application to fine-tune your preferences. Configure language options, display settings, and date/time accuracy. Proper configuration ensures all time-sensitive features work correctly.
| Common Issue | Symptoms | Recommended Solution |
|---|---|---|
| Display Misalignment | Screen edges cut off, navigation difficult | Use keyboard arrows during initial setup |
| Network Connectivity | Ethernet not working, time unsynchronized | Configure Wi-Fi first, then check wired connection |
| Slow Initial Boot | First startup takes 5-10 minutes | Normal behavior – system optimizing itself |
| Settings Not Applied | Wizard completed but preferences missing | Access Settings app to manually configure options |
Installing Google Play Store on android on raspberry pi
The transformation from a basic system to a fully functional platform happens when you add Google’s app ecosystem. This crucial step unlocks access to millions of applications designed for touch interfaces.
Entering Recovery Mode to Prepare Installation
Begin by enabling advanced restart in your Settings app. Search for “recovery” and toggle the option to unlock this special boot environment.
Hold the F5 key to access power options. Select Restart > Recovery and wait for the system to load. This mode allows essential system modifications.
Installing NikGapps for Google Play Access
Once in recovery mode, plug in your USB drive containing the Google Apps package. Click “Mount” and select your USB storage to make it accessible.
Navigate to Install > Select Storage and choose your drive. Locate the NikGapps zip file and swipe to confirm installation.
After completion, use the home button to return to the main menu. Select Reboot > System to restart normally. The Play Store will appear in your app list.
Sign in with your Google account when prompted. Choose “Wait” for any error messages during initial authentication. Close the app and reboot once logged in successfully.
Advanced Settings & Troubleshooting Tips
When your carefully configured system doesn’t behave as expected, having a troubleshooting toolkit can transform frustration into success. Even experienced users encounter challenges that require specific solutions.
Common Installation Hurdles and Their Fixes
The right file system makes all the difference for your installation. Make sure your USB drive uses FAT32 formatting—other types simply won’t work with Google Apps.
Display alignment issues are common during setup. Use keyboard arrows to navigate when screen edges appear cut off. This simple trick saves significant time.
Connectivity problems often resolve by configuring Wi-Fi first. This helps sync your device’s time automatically. Ethernet connections typically stabilize afterward.
Optimizing Performance and Managing Storage
Limited RAM requires smart management. Close unused apps regularly and disable unnecessary background processes. This keeps your system responsive.
Storage space fills quickly on smaller cards. Move apps to external storage when possible. Clear cache files monthly to maintain performance.
The emteria platform offers flexible options for different devices. Their free Starter plan supports three devices with full features. Creating an emteria account unlocks the installer tool.
Choose the correct Android version for your specific hardware. Each version has unique compatibility requirements. The latest emteria installation typically works best for modern devices.
Optional Alternative Boot Methods & Storage Options
Advanced users seeking optimal performance can explore storage options that significantly boost system responsiveness. Moving beyond the standard SD card setup unlocks faster app loading and smoother operation.
These alternative methods transform your mobile computing experience. You’ll notice immediate improvements in everyday tasks.
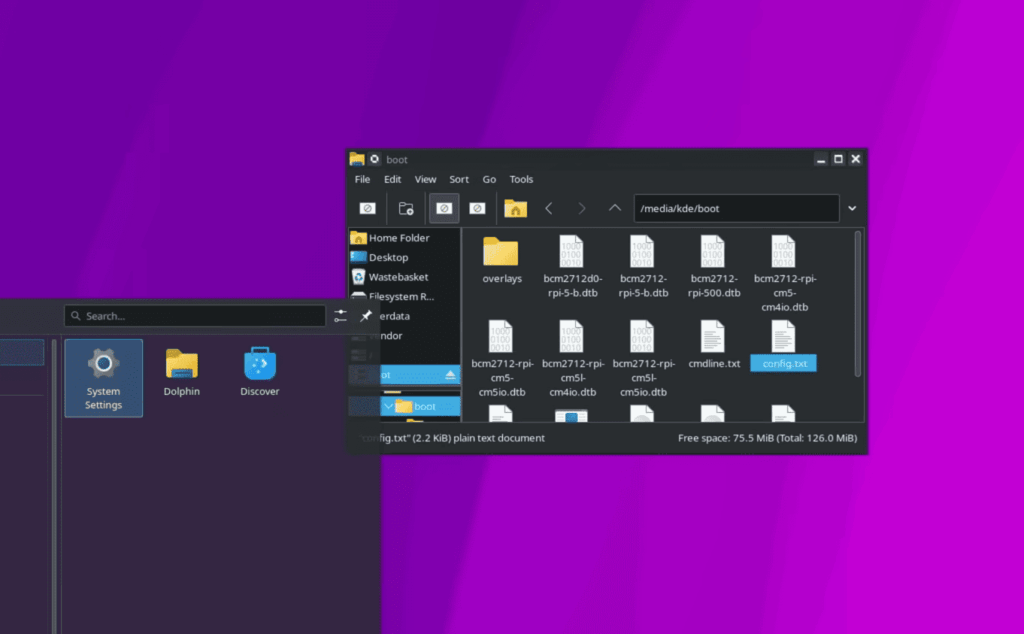
Configuring config.txt for USB or NVMe Boot
If you’ve written your system image to a USB drive or NVMe drive instead of an SD card, configuration changes are essential. Locate the config.txt file on your newly flashed storage device.
Open this file with any text editor and navigate to the boot configuration section. You’ll need to uncomment specific lines depending on your chosen storage method.
For USB boot, remove the “#” symbol from the USB line while adding it to the others. NVMe boot requires uncommenting the NVMe line and commenting out the top two lines.
This simple edit tells your device where to find the operating system. The emteria platform supports these advanced configurations across different versions.
Each storage type offers unique benefits. USB drives provide reliable performance with excellent compatibility. NVMe solutions deliver the fastest possible speeds for demanding applications.
Choosing the right drive depends on your performance needs and hardware capabilities. Both options outperform standard SD cards for running modern operating systems.
Conclusion
Your successful setup marks the beginning of an exciting journey into custom mobile computing. You’ve transformed affordable hardware into a versatile device capable of running thousands of applications.
The combination offers unique flexibility for creative projects that commercial devices can’t match. You now have open-source freedom with a familiar interface.
Remember that emteria’s free starter plan supports three devices with full features. This makes it economical for personal or commercial use. You can get free access without complex account requirements.
Join online communities where enthusiasts share their Raspberry Pi projects and solutions. These forums provide valuable support for your next steps.
Consider what you’ll build first—media centers, development platforms, or interactive tools. Your new skills in installation and configuration serve as a foundation for future innovations.