Modern entertainment systems deliver stunning visuals, but nearly 3 out of 4 viewers don’t unlock their setup’s full audio potential. Pairing your Denon receiver with a TV bridges this gap, creating immersive soundscapes for movies, shows, and gaming. The right setup turns living rooms into cinematic experiences.
Most devices today support HDMI or optical connections for seamless integration. Features like ARC and eARC simplify setups by allowing single-cable audio transmission. However, compatibility depends on your TV and receiver’s ports – a quick check avoids headaches later.
Optical cables remain a reliable alternative if HDMI isn’t an option. Both methods preserve crisp dialogue and dynamic effects. Identifying your equipment’s capabilities ensures you choose the best path for crystal-clear sound.
This guide skips the jargon and focuses on practical steps. You’ll learn to match ports, select cables, and troubleshoot common hiccups. Let’s turn that underwhelming audio into a room-shaking masterpiece.
Key Takeaways
- HDMI ARC/eARC simplifies setups with single-cable audio/video transmission
- Optical or digital coaxial connections work for non-ARC compatible devices
- Device port compatibility determines the ideal connection method
- Proper cable selection ensures high-quality audio performance
- Most modern entertainment systems support multiple connection options
Understanding HDMI ARC, eARC, and Optical Connections
Many viewers overlook the importance of matching their TV’s ports to their receiver’s capabilities. Modern setups demand careful pairing between your screen and sound system – especially when chasing theater-quality audio. Let’s break down the tech that makes it happen.
Identifying HDMI ARC/eARC Ports on Your TV
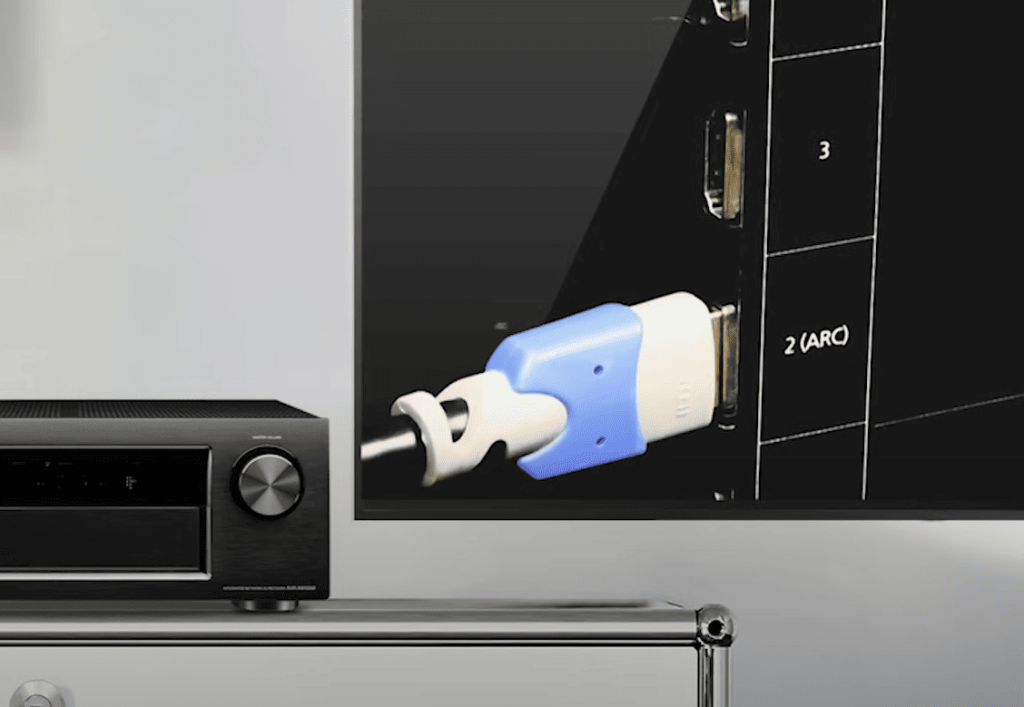
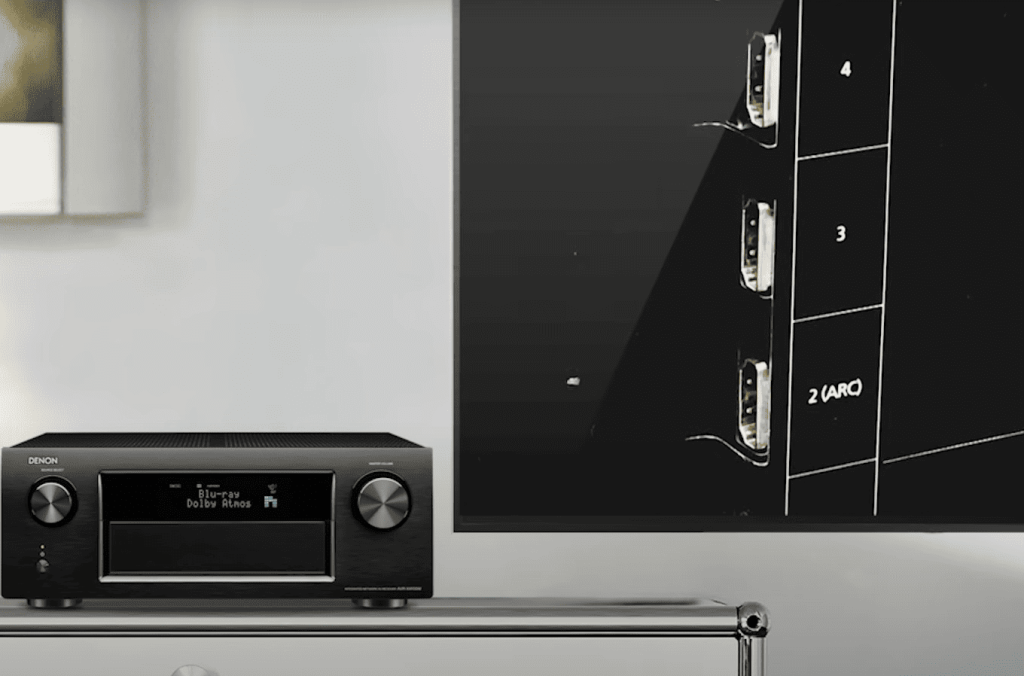
Your TV’s audio return channel compatibility starts with port inspection. Most models label ARC or eARC directly beside the equipped HDMI connector, usually on inputs 1 or 2. Can’t spot the markings? The manual holds answers.
Not all HDMI connectors support this feature. Manufacturers often reserve ARC for specific ports. Using a non-compatible HDMI connector means losing two-way audio communication.
Benefits of ARC Versus Optical Connections
ARC simplifies setups with single-cable convenience. It carries both video signals and crisp audio through a compatible HDMI connector. Bonus? Your TV remote can adjust receiver volume automatically.
Optical cables work when ARC isn’t available. They deliver solid digital audio but can’t handle advanced formats like Dolby Atmos. eARC upgrades the game – supporting higher bandwidth for immersive 3D soundscapes.
Choose based on your gear’s capabilities. Audio return channel tech shines with modern equipment, while optical remains a reliable backup for older devices.
How to Connect Denon Receiver to TV
Setting up your home theater doesn’t require advanced tech skills – just the right cables and a few minutes. Follow these methods to match your equipment’s capabilities while avoiding compatibility headaches.
HDMI ARC: The Streamlined Approach
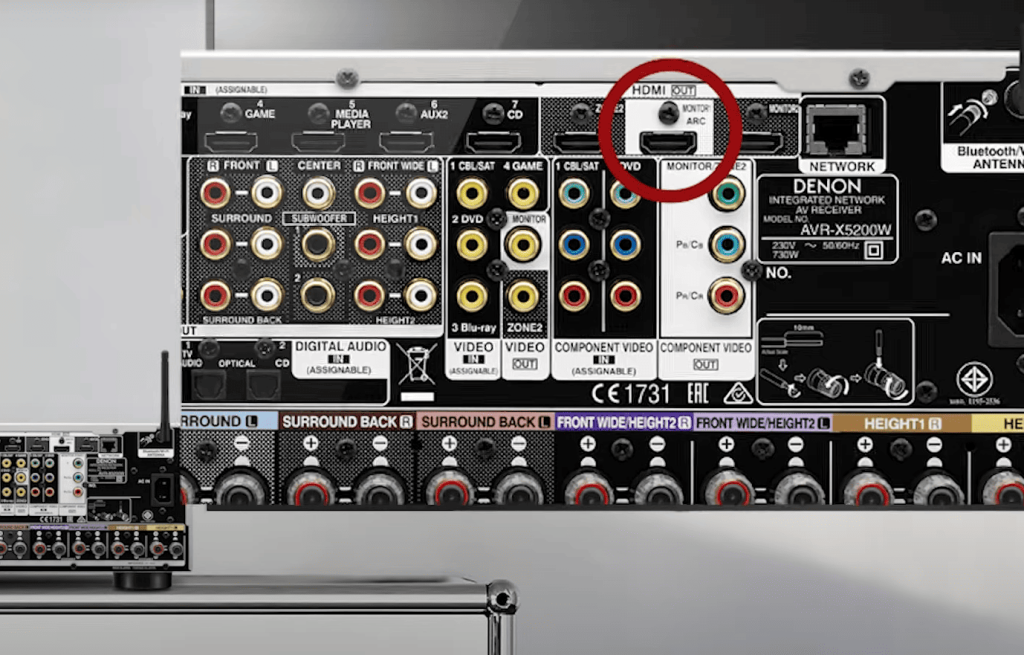
Locate the HDMI connector labeled ARC or eARC on your TV. Connect one end of an HDMI cable here, and the other to your receiver’s corresponding input. Power both devices after securing the connection.
Activate HDMI Control in your receiver’s settings for seamless operation. This lets your TV remote adjust volume automatically. Most systems detect the link instantly, but manual source selection might be needed.
Optical Audio: Classic Reliability
For receivers equipped without HDMI ARC, use the TV’s optical output. Insert the cable firmly until it clicks into place. Navigate to your receiver’s HDMI settings and disable CEC functionality to prioritize this connection.
Press the select button labeled TV Audio on your remote. This tells your system to prioritize the optical input over other sources.
When Silence Strikes
No sound? Check both ends of your cable. Ensure the TV’s audio output matches your connection type. Swap HDMI cables if needed – damaged wires often cause issues.
| Connection Type | Best For | Setup Steps | Limitations |
|---|---|---|---|
| HDMI ARC/eARC | Modern systems with surround sound | Single-cable connection Auto device control |
Requires compatible ports |
| Optical | Older receivers Basic stereo setups |
Manual input selection No video transmission |
No Dolby Atmos support |
Optimizing Audio and Video Settings
Your home theater’s true potential emerges after dialing in synchronization between devices. Proper configuration eliminates lip-sync delays and ensures remote commands work flawlessly. Let’s refine your setup for seamless operation.
Mastering Device Communication
HDMI Control acts as a universal translator between your gear. Enable this function in both devices’ menus when using ARC connections. Your TV remote then handles receiver volume and power states automatically.
Optical users face different rules. Disable HDMI Control completely through the receiver’s Video Settings menu. This prevents signal conflicts and activates the dedicated TV Audio source.
Input Source Precision
Mismatched sources create silent screens. Press the receiver remote’s TV Audio button for optical setups. HDMI users should verify the input assignment matches their ARC-labeled port.
Navigate to Input Selector in your receiver’s menu for advanced adjustments. Rename sources like “Streaming Box” or “Gaming Console” to avoid confusion later.
| Connection Type | HDMI Control | Preferred Source |
|---|---|---|
| HDMI ARC/eARC | Enabled | HDMI 1 (ARC) |
| Optical | Disabled | TV Audio |
Fine-tuning these controls transforms disjointed tech into a harmonious system. Your next movie night will thank you.
Conclusion
Transforming your living space into a cinematic escape hinges on one critical connection. Whether using HDMI’s streamlined tech or optical’s trusted reliability, your audio quality leaps from flat to multidimensional.
Modern devices offer flexibility – match your TV’s output connector to the receiver’s input for best results. ARC delivers smart remote control features, while optical cables keep older systems relevant. Both preserve crisp dialogue and thunderous effects.
Success lies in three steps: verify port compatibility, select appropriate cables, and configure settings correctly. Double-check HDMI Control toggles and source assignments to prevent silent screens.
Your effort now pays dividends for years. Explore surround sound modes, fine-tune bass levels, or stream music through newly empowered speakers. The right connection turns ordinary nights into immersive adventures – no tech degree required.