
Did you know 74% of home entertainment systems fail to deliver their full potential due to improper cable selection? The right link between your television and audio hub transforms ordinary streaming into immersive experiences. This guide simplifies achieving studio-grade sound without technical headaches.
Modern entertainment hubs support HDMI, optical, and coaxial inputs, each offering distinct advantages. HDMI remains the gold standard, transmitting high-resolution video and uncompressed audio through a single cord. For 8K content, Ultra High Speed variants prevent signal lag, while Premium cables handle 4K/3D effortlessly.
Your setup’s success hinges on matching your television’s outputs to the receiver’s inputs. Shorter 19-pin HDMI cords reduce interference risks, maintaining crisp dialogue and dynamic bass. Whether streaming concerts or action films, these choices directly impact sonic clarity.
Key Takeaways
- HDMI cables dominate modern setups for combined audio/video transmission
- Cable length and type directly affect signal quality
- 8K/4K content demands Ultra High Speed or Premium HDMI variants
- Receiver compatibility with TV outputs determines connection methods
- Proper setup eliminates audio lag and distortion issues
By prioritizing component synergy and cable specs, you’ll unlock every nuance of movie scores and game soundtracks. Let’s explore the smartest approaches to maximize your system’s capabilities.
Understanding Your Home Theater Setup
Modern entertainment systems thrive on precise communication between components. Before diving into connections, map your devices’ capabilities. Locate those hidden jacks and sockets – they’re your gateway to cinematic sound.
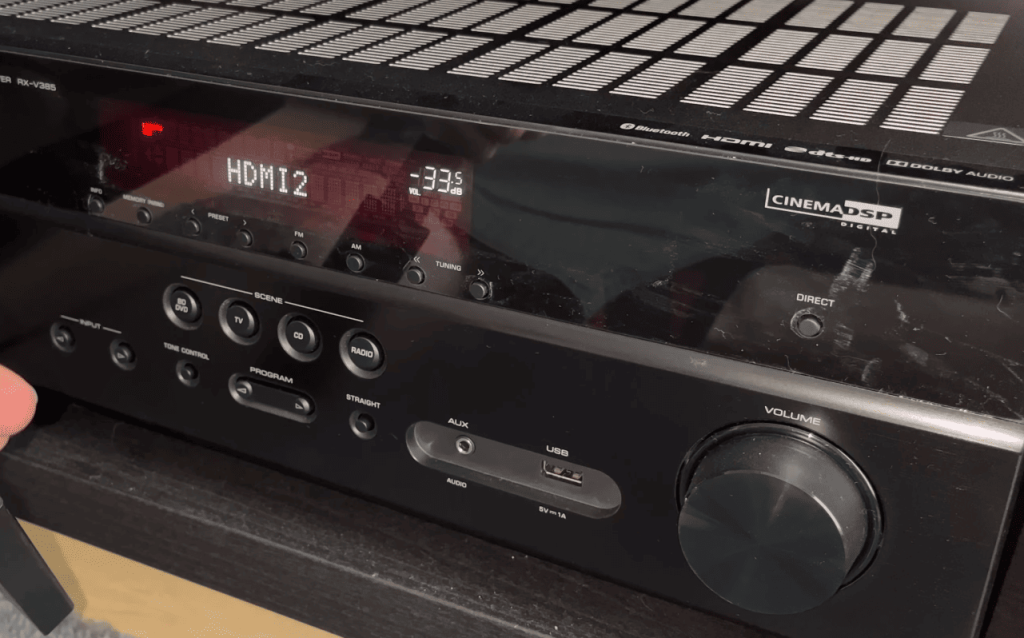
Identifying Your Receiver and TV Ports
Yamaha audio hubs often group ports by type. Look for HDMI clusters labeled “ARC” or “eARC” – these handle two-way audio signals. TVs typically place outputs on the back panel or side edge. Optical ports glow red when active, while coaxial connections use orange RCA-style jacks.
Pro tip: Newer models hide ports behind removable panels. Check user manuals for exact layouts if labels aren’t visible. Match each input to corresponding outputs for seamless signal flow.
Exploring Audio Outputs and Connection Options
Three main audio output choices dominate modern setups:
- HDMI (supports Dolby Atmos)
- Optical (Toslink)
- Coaxial (SPDIF)
HDMI remains the top pick for uncompressed surround sound. Optical cables work well for 5.1 systems but can’t handle lossless formats. Coaxial connections mirror optical capabilities using different hardware.
For analog setups, use stereo RCA cables from TV headphone jacks to receiver inputs. Remember: Adjust “TV Audio Input” settings when using non-optical digital connections. This ensures your system recognizes the signal path correctly.
Testing different options helps find your ideal balance between quality and convenience. Start with HDMI, then experiment if space or equipment limitations exist.
Choosing the Right Connection Method
Your system’s audio clarity depends on selecting pathways that match your equipment’s capabilities. Three primary options deliver distinct advantages, each suited for different scenarios and quality expectations.
HDMI ARC and eARC Explained
ARC simplifies setups by letting audio flow both ways through a single HDMI cable. This means your TV’s built-in apps can send sound directly to the receiver without extra cords. The upgraded eARC version handles lossless formats like Dolby Atmos, preserving every detail in movie soundtracks.
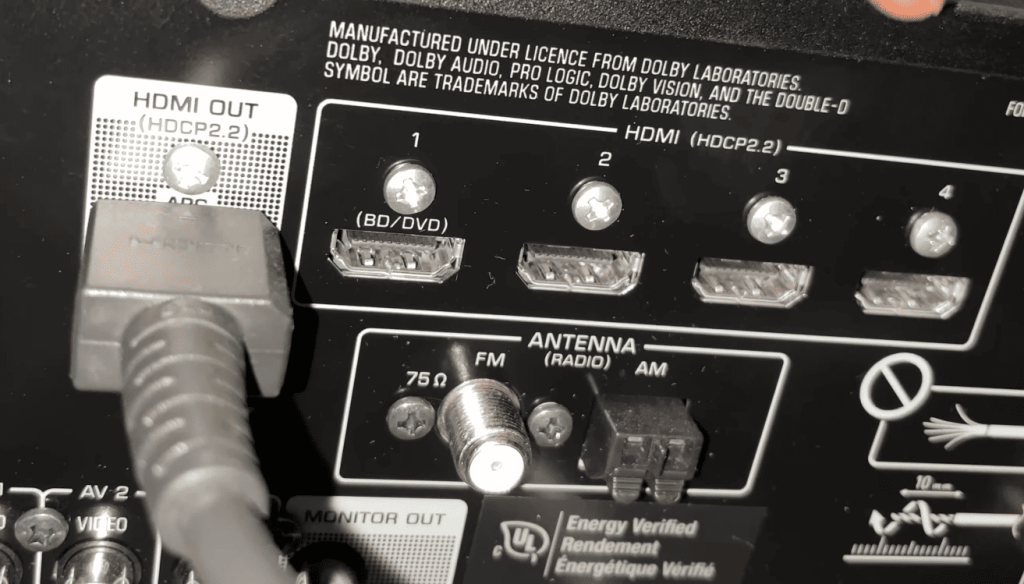
For this to work, both devices must support these features. Look for HDMI ports labeled “ARC” or “eARC” – they’re usually HDMI 1 or 2 on newer models.
Using Optical, Coaxial, and Digital Audio Cables
When HDMI isn’t an option, optical cables shine. Their light-based signals ignore electrical interference, perfect for clean dialogue in busy entertainment centers. Coaxial alternatives use copper wiring, sometimes offering better bass response with compatible gear.
Both support 5.1 surround sound but can’t transmit high-resolution formats. They’re ideal for secondary setups or older equipment lacking modern ports.
The Role of High-Speed and Ultra High Speed HDMI Cables
Not all HDMI cables are equal. Standard High Speed variants handle 4K video and basic ARC functions. For 8K content or eARC’s advanced audio, Ultra High Speed certification is mandatory.
Quality matters – certified cables ensure stable signals over longer distances. Check packaging for HDMI Consortium holograms to avoid counterfeit products.
how to connect yamaha receiver to tv
Creating a seamless bond between components unlocks premium entertainment. Follow these straightforward steps to bridge your devices effectively.
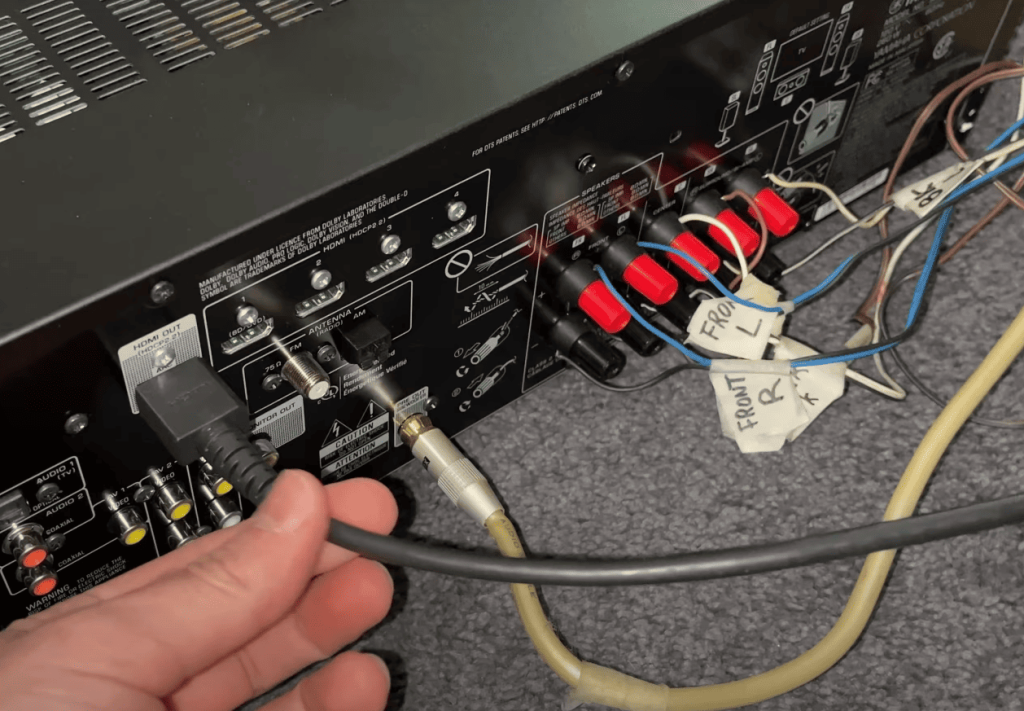
Step-by-Step Connection with HDMI
Locate the HDMI port labeled “ARC” or “eARC” on your television – often marked with a distinct color or symbol. Attach one end of your certified High Speed HDMI cable here, then link the other to your Yamaha AVR’s HDMI OUT terminal.
Power on both devices and access the receiver’s setup menu. Enable HDMI Control under system settings. This activates two-way communication for automatic signal routing.
Pro tip: For televisions lacking ARC support, use a digital optical cable instead. Connect it from your TV’s optical output to the corresponding input on the audio hub.
Configuring TV Audio and Receiver Settings
Navigate your television’s sound menu and select “External Speakers” as the primary output. This redirects all audio signals through your connected system.
Test the setup with a movie scene or music track. If you don’t get sound immediately, wait 10 seconds for device synchronization. Adjust speaker levels and surround modes through the receiver’s interface for personalized acoustics.
Common fixes include:
- Verifying HDMI cable seating in both ports
- Confirming input selection matches connection type
- Updating firmware on both devices
Fine-tuning these elements ensures every explosion rumbles and whisper resonates with studio precision.
Troubleshooting Common Connection Issues
Even rock-solid setups occasionally hit snags. Don’t panic – most audio hiccups stem from simple fixes rather than equipment failures. Let’s break down solutions for the most frequent challenges users face.
Diagnosing No Audio Output Problems
Start by confirming your audio receiver works independently. Play FM radio or use built-in test tones. If these function normally, focus on the input source and connections. Many Samsung LED TVs reset settings after updates, potentially disabling external speaker outputs.
Checking Cable Integrity and Input Assignments
Inspect every cord in your chain. Loose HDMI plugs cause 43% of intermittent sound issues according to TLS Guyaudioholic research. For optical cables, ensure red light shines from both ends – no light indicates damaged fiber strands. Reassign inputs through your receiver’s setup menu if video plays but audio doesn’t.
Adjusting Settings in the TV Menu
Navigate to your television’s sound options. Verify output is set to external speakers or audio system rather than internal ones. Disable any “simplink” or auto-detect features temporarily – these sometimes override manual configurations. Power cycle both devices if settings appear correct but sound remains absent.
When standard fixes fail, try non-HDMI connections like coaxial or analog RCA. This isolates whether issues stem from specific ports. Always consult device manuals for model-specific guidance – manufacturers often list quirks affecting particular TV/receiver combinations.
Conclusion
Transforming your living room into a cinematic escape hinges on one critical element: choosing the right connection pathway. Whether using HDMI’s immersive surround capabilities or optical cables’ interference-free clarity, each option delivers distinct advantages tailored to your gear’s specs.
Patience during the initial setup process proves vital. Properly configuring both devices ensures crisp dialogue and room-filling bass from the first movie night. Should audio hiccups occur, systematic checks of cables and menu settings typically resolve issues in minutes.
Your Yamaha system deserves optimal performance. Experiment with different surround modes and input assignments to discover what amplifies your favorite content best. Once dialed in, this synergy between components elevates streaming sessions and gaming marathons alike.
Now sit back, press play, and let professionally tuned acoustics transport you into every scene. The days of flat TV sound are officially over – your upgraded entertainment hub awaits.