
Did you know over 100 million vintage audio cassettes still sit in American homes today? Many hold irreplaceable memories—from mixtapes that defined generations to rare live recordings. Yet time hasn’t been kind to these analog treasures. Warped shells, tangled ribbon, and muffled playback threaten their survival.
This guide is your toolkit for rescuing those fading sounds. We’ll show you how to handle common issues like snapped ribbons or sticky mechanisms without fancy equipment. You’ll learn which household items work best for delicate fixes and how to avoid mistakes that could worsen damage.
Whether you’re reviving a high school playlist or preserving a family recording, our methods prioritize safety and simplicity. No prior experience needed—just patience and care for your audio keepsakes. Let’s turn back the clock on wear and tear.
Key Takeaways
- Identify common issues like ribbon snags or shell damage quickly
- Use basic tools like tweezers and rubbing alcohol for safe fixes
- Preserve audio quality by handling magnetic ribbon carefully
- Recognize when a professional restoration might be necessary
- Store repaired items properly to prevent future deterioration
Introduction to Cassette Tape Repair
Many vintage audio collections face similar challenges—snapped ribbons, sticky mechanisms, and detached components threaten playback quality. Recognizing these issues early can save your cherished recordings from permanent damage.
Typical Issues Found in Vintage Media
Four main problems plague aging magnetic media collections. First, complete ribbon splits create gaps in audio that require precise alignment. Second, loose reel connections cause uneven winding and playback errors. Third, missing pressure pads lead to muffled sound against playback heads. Finally, degraded lubricants create resistance that strains older players.
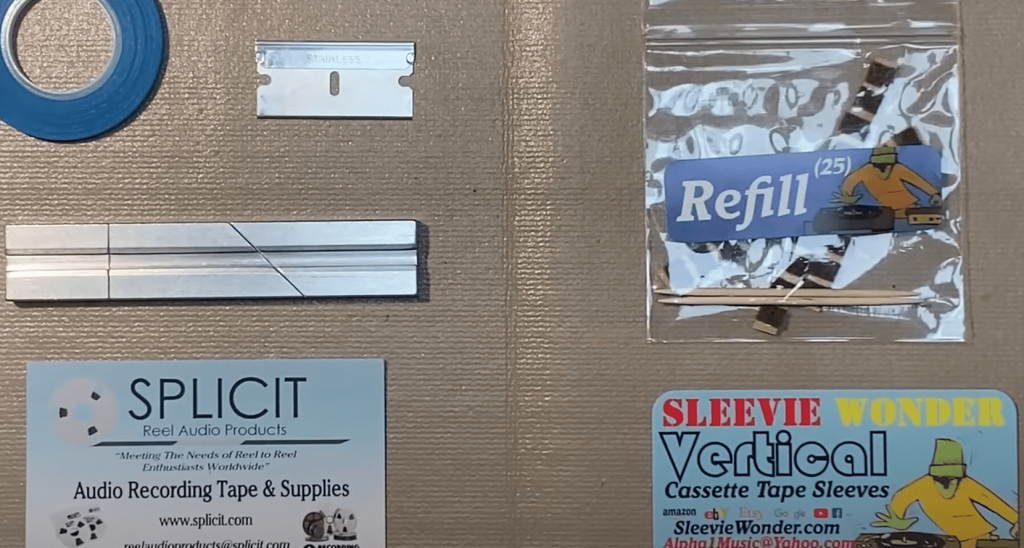
Essential Restoration Toolkit
For most home fixes, gather these household items:
- Non-magnetic screwdrivers (size #0 or #1)
- Archival-grade splicing strips
- 90% isopropyl alcohol and foam-tipped swabs
- Replacement shells for severe damage
Pro tip: Keep a pencil handy for manual winding adjustments. For stubborn grime, lightly dampen cotton buds with cleaning solution—never spray directly on components.
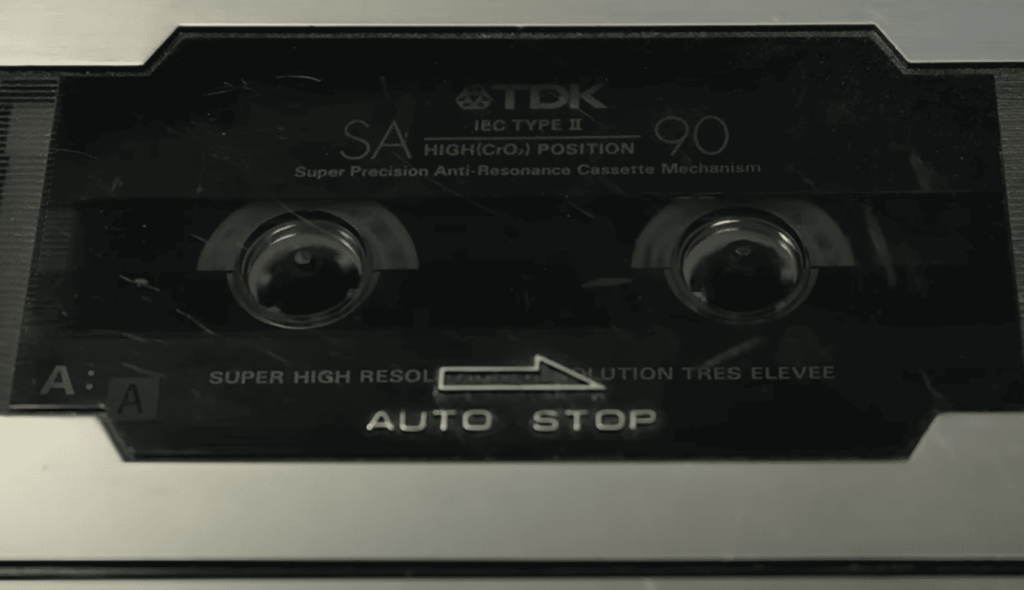
Understanding Your Cassette Shell Type
Your favorite mixtape’s survival starts with its protective casing. Two shell designs dominate analog media: screwed and welded. Knowing which you’re handling determines your repair strategy and success rate.
Entry Points: Screwed vs. Welded Designs
Screwed shells feature visible fasteners along their edges. These let you disassemble components without force. Count the screws—most have 1-5. “Always start with the obvious hardware,” advises audio restoration specialist Mark Tremonti. Welded versions require careful prying since manufacturers fused the plastic halves permanently.
| Feature | Screwed Shell | Welded Shell |
|---|---|---|
| Disassembly | Tool-free with screwdriver | Requires controlled cracking |
| Reusability | Fully reusable | Needs donor shell |
| Common Sources | Home recordings | Commercial releases |
Working Safely with Fragile Media
Wear protective eyewear when handling welded cases. Their plastic tends to shatter unpredictably. Essential tools include:
- Non-magnetic screwdrivers (prevents tape damage)
- Fine-tip tweezers for ribbon alignment
- Lint-free cloths for debris removal
“Magnetized tools erase audio data permanently—it’s like using an eraser on family photos.”
Work in bright light to spot hairline cracks. Keep adhesive strips handy for emergency splints. For welded shells, practice opening technique on worthless media first.
Preparing the Tape for Repair
Proper handling techniques can mean the difference between salvaging a cherished recording and losing it forever. Even minor oversights during preparation risk permanent damage to delicate media. Follow these foundational steps to create optimal conditions for successful restoration.
Cleaning and Handling the Tape Properly
Start by washing your hands with dish soap and drying them completely. Skin oils transfer easily to magnetic surfaces, creating long-term playback issues. Set up a bright workspace with enough room to maneuver tools without knocking over supplies.
Muffled or distorted playback often stems from dust buildup. Lightly dampen a cotton swab with 90% isopropyl alcohol and wipe the media surface in one direction. Let it air-dry fully before testing—rushing this step risks smearing debris.
Check your cassette player’s components too. Dirty heads or rollers distort audio even with clean media. Use a dry microfiber cloth to remove visible grime from these parts.
Handle the ribbon like fragile lace. Work in still air to prevent accidental tangling, and support loose sections with clean fingertips. “Treat each inch like it’s the only copy of your favorite song,” recommends audio historian Linda Fischer.
Take your time during this process. Rushed cleaning can scratch coatings or misalign delicate layers. The proper way to handle vintage audio ensures it works smoothly for years to come.
Essential Cassette Tape Repair Techniques
Every snap or wrinkle in your media threatens to silence decades-old memories trapped in analog form. Let’s explore practical methods to restore playability using common supplies.
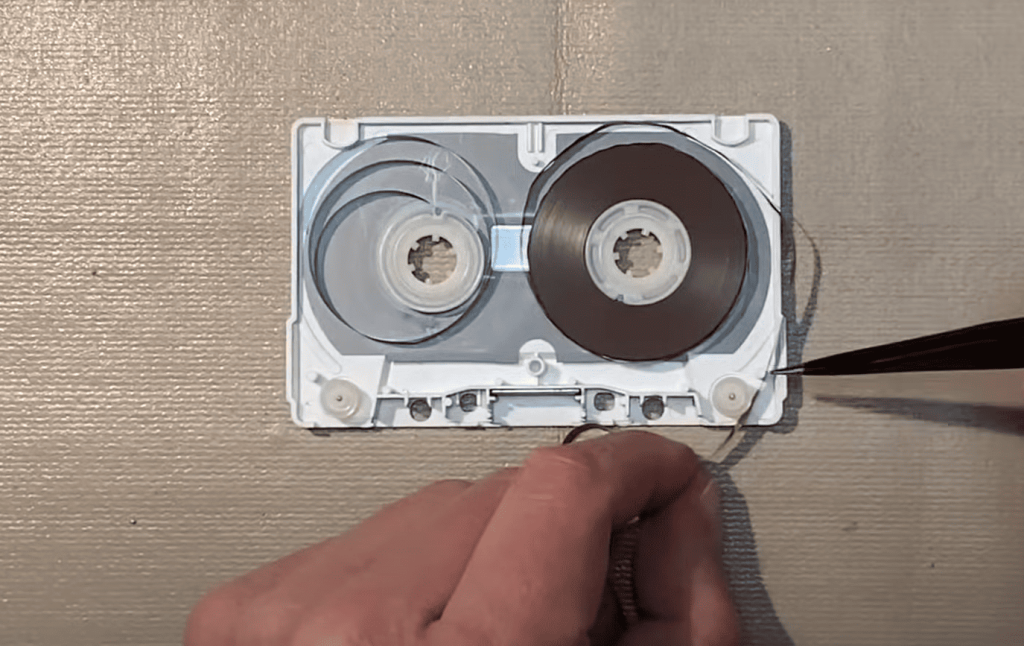
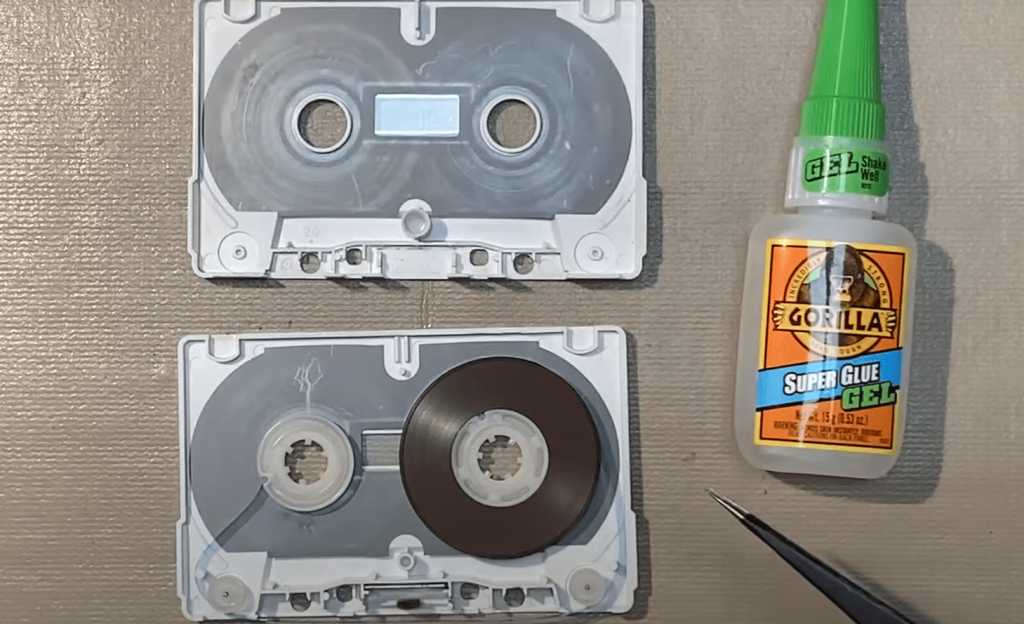
Mending Torn Ribbon Connections
Start by extracting six inches of loose material from each reel. This gives space to work while keeping orientation intact. Square cuts are critical—use sharp scissors for clean edges.
Place a Post-it note sticky-side up on your workspace. Lay the first piece playback-side down, aligning the second segment with minimal overlap. Secure with a narrow strip of invisible adhesive, trimmed to avoid edges.
“A perfect splice feels smooth under your fingertip—any bump risks player damage.”
Correcting Distorted Playback
Wrinkled sections often cause skips. Lay the affected area flat on a clean surface. Gently rub with a microfiber cloth using light pressure. For severe warping, consider removing the damaged portion entirely.
When cutting becomes necessary:
- Mark the problem area with a grease pencil
- Use precision shears for straight lines
- Apply splicing materials as directed above
While professional-grade supplies yield better results, quality invisible adhesive works for most home projects. Store repaired media wound tightly to prevent new creases.
Detailed Step-by-Step Repair Process
Opening vintage media requires precision and the right approach. Let’s break down safe methods for accessing internal components and restoring functionality.
Accessing Screwed Shells
Begin by laying the item flat on a clean surface. Remove all visible screws using a #0 Phillips head. Keep downward pressure while lifting the top half to prevent spills. Work slowly—sudden movements may dislodge internal rollers.
Handling Welded Designs
Secure brittle shells in a bench vise lined with soft cloth. Gradually tighten until seams crackle. Rotate 90 degrees and repeat. Always wear safety glasses—plastic fragments fly unpredictably.
| Method | Success Rate | Tool Requirements |
|---|---|---|
| Screwed Shell | 98% reusable | Basic screwdriver |
| Welded Shell | Requires donor parts | Vise + protective gear |
For detached leaders, locate the plastic clincher near the hub. Slide it off using tweezers and replace worn sections. “Fresh leader material should mirror the original length,” advises conservator Linda Fischer.
“Never force components—if resistance occurs, reassess your technique.”
Securing Loose Connections
Insert new leader ends into clinchers before pinching shut. Test tension by gently tugging—properly secured parts withstand moderate pressure. Store repaired media in climate-controlled environments to protect rollers and pads.
Maintaining and Preserving Your Cassette Collection
Your collection’s longevity depends on proactive care. Like vintage vinyl, analog media thrives with consistent attention. Let’s explore strategies to keep your audio treasures crisp for decades.
Smart Storage Solutions
Heat and light are magnetic media’s worst enemies. Store items in dry areas below 70°F—attics and garages often fail this test. Ideal spots include interior closets or temperature-controlled rooms.
| Storage Option | Protection Level | Cost |
|---|---|---|
| Plastic cases | Basic dust shield | $0.50-$2 each |
| Dedicated boxes | Full environmental defense | $15-$40 |
| Climate cabinets | Museum-grade preservation | $200+ |
Handle stuck media with care. If a deck resists ejecting, press stop immediately. Forcing it risks permanent mechanism damage. Most jams stem from warped shells or loose parts.
Monthly player maintenance prevents 80% of playback issues. Use these essentials:
- Head cleaner kits ($8-$15)
- Demagnetizing wands ($25-$60)
- Isopropyl alcohol for rollers
“Digitizing saves memories twice—once on ribbon, once in the cloud.”
Store media upright like books to prevent shell warping. Rotate collections annually to avoid flat spots on reels. For irreplaceable recordings, create digital backups before signs of wear appear.
Remember: Prevention costs less than restoration. A $20 storage box today could save hundreds in professional recovery services tomorrow.
When to Consider Professional Cassette Tape Repair
Deciding between DIY fixes and expert help can save both time and precious audio. While home methods work for minor issues, some situations demand specialized tools and skills.
Evaluating DIY vs. Professional Services
Basic fixes like cleaning or simple splicing often succeed with household supplies. But warped shells, multiple ribbon breaks, or degraded pressure pads may require pro attention. Services typically start around $20 and include reel realignment, shell replacement, and playback testing.
Professionals also convert analog recordings to digital formats—crucial for preserving fragile media. Their industrial-grade machines handle delicate ribbons better than consumer players, reducing further wear during transfers.
Consider expert help if your media has historical value or sentimental importance. Many shops offer same-week turnaround and warranties on their work. For common playback issues, try basic cleaning first. If problems persist after three attempts, it’s time to call in the specialists.