

In the world of microcontrollers like Arduino, saving data efficiently and reliably is a critical task. This article dives into the solution: using Arduino’s built-in EEPROM memory. EEPROM, or Electrically Erasable Programmable Read-Only Memory, is a non-volatile memory that retains its content even when power is lost.
It provides a small but vital space to store values that need to persist across restarts and power outages.
Whether you’re storing sensor data, counts, or device states, understanding how to utilize the EEPROM memory on your Arduino board can be a game-changer. Let’s explore how to save values directly onto the Arduino with EEPROM.
What Is the EEPROM Memory?
Unlike RAM, which can also store data and be read from, EEPROM retains its content when the power is switched off or lost temporarily. This makes it ideal for storing settings, states, or values that should persist across restarts and power outages.
EEPROM can be erased and reprogrammed through the application of electrical charge. This can be done byte by byte, making it possible to change specific bits without affecting others. This is different from other types of non-volatile memory, such as flash memory, which must be entirely erased before being rewritten.
EEPROM has a limited life – that is, the number of times it can be reprogrammed is finite. The exact number varies depending on the specific EEPROM used, but it’s typically in the range of 100,000 to 1 million write cycles. This makes EEPROM less suitable for applications where the data needs to be updated frequently.
Overall, EEPROM is a versatile and reliable form of non-volatile memory that is widely used in many types of electronic devices.
How Many Bytes Can You Store With EEPROM Memory?
The amount of data that you can store in EEPROM (Electrically Erasable Programmable Read-Only Memory) depends on the specific EEPROM chip you are using. EEPROM memory is non-volatile memory used for storing small amounts of data that need to be retained even when power is removed [2]. The storage capacity of EEPROM chips can vary widely, ranging from a few kilobytes (KB) to several megabytes (MB) or more.
Common EEPROM sizes include:
- 1 Kilobyte (1 KB) EEPROM: These are smaller EEPROM chips typically used for storing configuration settings, calibration data, or other small amounts of non-volatile data;
- 4 Kilobyte (4 KB) EEPROM: Slightly larger than the 1 KB EEPROM, these are also used for similar purposes;
- 16 Kilobyte (16 KB) EEPROM: These EEPROMs offer more storage space and can be used for storing moderate amounts of data;
- 64 Kilobyte (64 KB) EEPROM:These EEPROMs provide even more storage space and are suitable for applications requiring larger data storage;
- 256 Kilobyte (256 KB) EEPROM and larger: These EEPROMs are used when significant amounts of non-volatile data storage are required [3];
It’s important to check the datasheet or specifications of the specific EEPROM chip you are using to determine its storage capacity, as it can vary significantly between different manufacturers and models.
Keep in mind that EEPROM memory is typically used for storing relatively small amounts of data, such as configuration settings, user preferences, or calibration values, rather than large datasets.
If you need to store larger amounts of data, you may want to consider other types of memory, such as Flash memory or external storage devices like SD cards or USB drives.
Applications Of EEPROM in Arduino Projects
EEPROM (Electrically Erasable Programmable Read-Only Memory) is commonly used in Arduino projects for storing non-volatile data that needs to be retained even when the power is removed from the Arduino.
Here are some common applications of EEPROM in Arduino projects:
- Configuration Settings: You can store configuration settings or parameters in EEPROM memory. For example, in a weather station project, you might store user-defined settings for display units (Celsius or Fahrenheit) or update intervals;
- User Preferences:Save user preferences in EEPROM memory. In a home automation project, you could store user preferences for lighting, temperature control, or security settings;
- Calibration Data: Many sensor readings require calibration. You can store calibration data in EEPROM so that the Arduino can use it even after power cycles. This is common in projects involving temperature, humidity, or distance sensors;
- Counters and Statistics: EEPROM is useful for storing counters, such as the number of times an event has occurred, or statistics like the highest and lowest recorded values;
- Security Codes:In access control or security-related projects, you can store PIN codes or access keys in EEPROM memory;
- User Data: You can save user-generated data, such as text or custom patterns, for projects involving displays or LED matrices;
- Log Data: Store data logs or event logs. For example, in a data logger project, you can use EEPROM to store sensor readings at specific time intervals;
- Firmware Upgrades: Some Arduino projects may include the ability to update firmware. You can use EEPROM to store information about the firmware version or configuration to ensure compatibility during updates;
- Anti-Counterfeiting:EEPROM can be used to store unique IDs or keys that help verify the authenticity of a product or device;
- Historical Data: Store historical data for analysis or debugging purposes. For example, in a weather station, you might save past weather data for reference [4];
Here’s an example of Arduino code to read and write data to EEPROM:
#include <EEPROM.h>
void setup() {
// Initialize the EEPROM library
EEPROM.begin(512); // Adjust the size as per your EEPROM size
// Write data to EEPROM
EEPROM.write(0, 42); // Write the value 42 to address 0
EEPROM.commit(); // Save changes to EEPROM
}
void loop() {
// Read data from EEPROM
int value = EEPROM.read(0); // Read the value stored at address 0
// Do something with the read data
}
Keep in mind that EEPROM has a limited number of write cycles (usually in the thousands or tens of thousands), so avoid frequent writes, and use it primarily for data that doesn’t change often.
An Example Of Arduino EEPROM Projects
1) Components you’ll need:
- Arduino board (e.g., Arduino Uno);
- Keypad module;
- Servo motor (or an LED);
- Jumper wires;
Here are the steps to create this project:
2) Wire up the components:
- Connect the keypad to the Arduino. You can use the Keypad library to simplify this;
- Connect a servo motor or an LED to the Arduino for the locking mechanism or indication;
3) Code the Arduino:
Below is an example code for this project. Make sure to install the Keypad library if you haven’t already.
#include <Keypad.h>
#include <EEPROM.h>
#include <Servo.h>
const byte ROWS = 4; //four rows
const byte COLS = 4; //four columns
char keys[ROWS][COLS] = {
{‘1′,’2′,’3′,’A’},
{‘4′,’5′,’6′,’B’},
{‘7′,’8′,’9′,’C’},
{‘*’,’0′,’#’,’D’}
};
byte rowPins[ROWS] = {9, 8, 7, 6}; //connect to the row pinouts of the keypad
byte colPins[COLS] = {5, 4, 3, 2}; //connect to the column pinouts of the keypad
Keypad keypad = Keypad( makeKeymap(keys), rowPins, colPins, ROWS, COLS );
Servo myservo; // create servo object to control a servo
char code[5]; // to store the entered code
char masterCode[5] = “1234”; // the master unlock code
void setup() {
myservo.attach(10); // attaches the servo on pin 10
myservo.write(0); // initialize the servo at locked position
Serial.begin(9600);
}
void loop() {
char key = keypad.getKey();
if (key) {
if (strlen(code) < 4) {
code[strlen(code)] = key; // add the key to the code
Serial.print(“*”); // print a ‘*’ to indicate a key press
}
if (strlen(code) == 4) { // code is complete
if (strcmp(code, masterCode) == 0) { // compare entered code to the master code
Serial.println(“\nUnlocking…”);
myservo.write(90); // unlock the servo (rotate 90 degrees)
delay(2000); // wait for 2 seconds
myservo.write(0); // lock the servo (rotate back to 0 degrees)
Serial.println(“Locked.”);
} else {
Serial.println(“\nIncorrect code. Try again.”);
}
memset(code, 0, sizeof(code)); // reset the code buffer
}
}
}
In this example, the code is “1234” (you can change it). When the correct code is entered on the keypad, it unlocks the servo motor (or you can replace it with an LED for indication) for a brief period before locking it again [5].
4) Upload the code to your Arduino
Test the project: Enter the correct code on the keypad, and you should see the servo unlock briefly.
This is a basic example, but it demonstrates how EEPROM can be used to store a master code securely even when the power is turned off. You can extend this project by adding more features, such as multiple user codes, a timeout period, or a log of keypad entries stored in EEPROM.
How to Permanently Store Data on an Arduino’s Built-in EEPROM:
Supported Arduino Boards
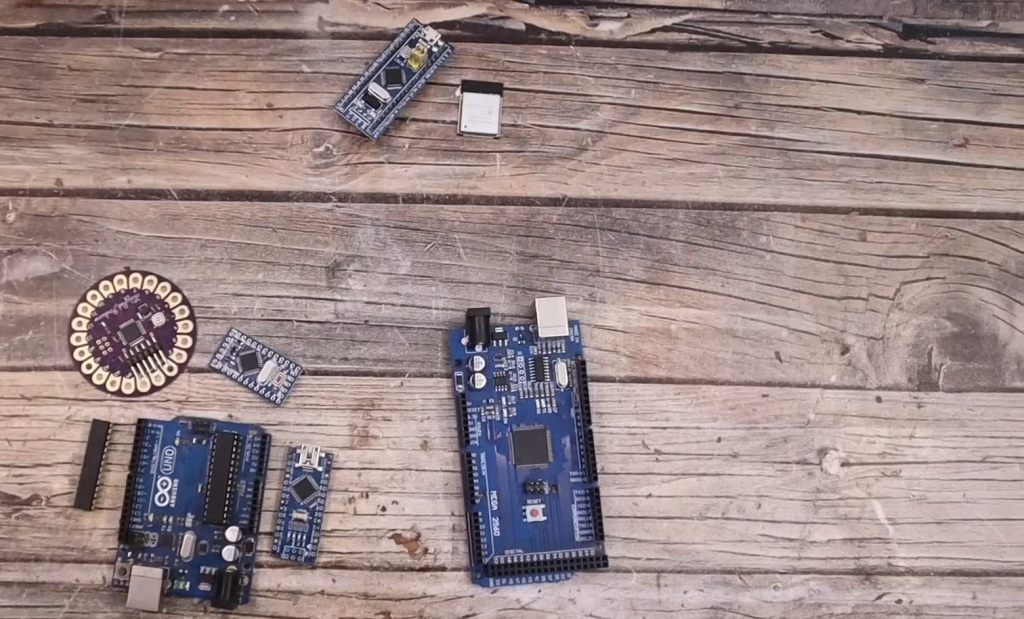
Before diving into the details of EEPROM usage, it’s essential to know which Arduino boards support built-in EEPROM.
While not all Arduino boards have EEPROM, many popular ones do, such as:
- Arduino Uno: This classic board features 1 KB of EEPROM storage;
- Arduino Nano:Most versions of the Arduino Nano come equipped with 1 KB of EEPROM;
- Arduino Mega: The Mega 2560 boasts 4 KB of EEPROM space, making it suitable for projects that require more storage;
- Arduino Leonardo:The Leonardo offers 1 KB of EEPROM storage;
- Arduino Due: With a whopping 32 KB of EEPROM, the Due is ideal for data-intensive applications;
- Arduino MKR Series:Various boards in the MKR series feature EEPROM, including the MKR Zero and MKR1000;
It’s important to check your specific Arduino board’s documentation to verify its EEPROM capacity. Keep in mind that the EEPROM size varies across different models and might impact the amount of data you can store.
Microcontroller/Usable EEPROM Space
Here are a few pointers regarding microcontroller-specific EEPROM space:
- Arduino Uno: The ATmega328P microcontroller has a 1 KB EEPROM. The bootloader occupies some space, so you have approximately 1000 bytes of usable EEPROM;
- Arduino Mega: The ATmega2560 microcontroller features a 4 KB EEPROM. After accounting for the bootloader and system settings, you have around 4000 bytes for storing data;
- Arduino Due:The AT91SAM3X8E microcontroller boasts a spacious 32 KB EEPROM. However, the bootloader and system settings consume a portion, leaving you with about 30,000 bytes of usable storage [6];
It’s crucial to plan your data storage carefully, considering the microcontroller’s limitations to prevent running out of space or conflicting with system functions.

What To Do If Your MCU / Arduino Is Not On the List?
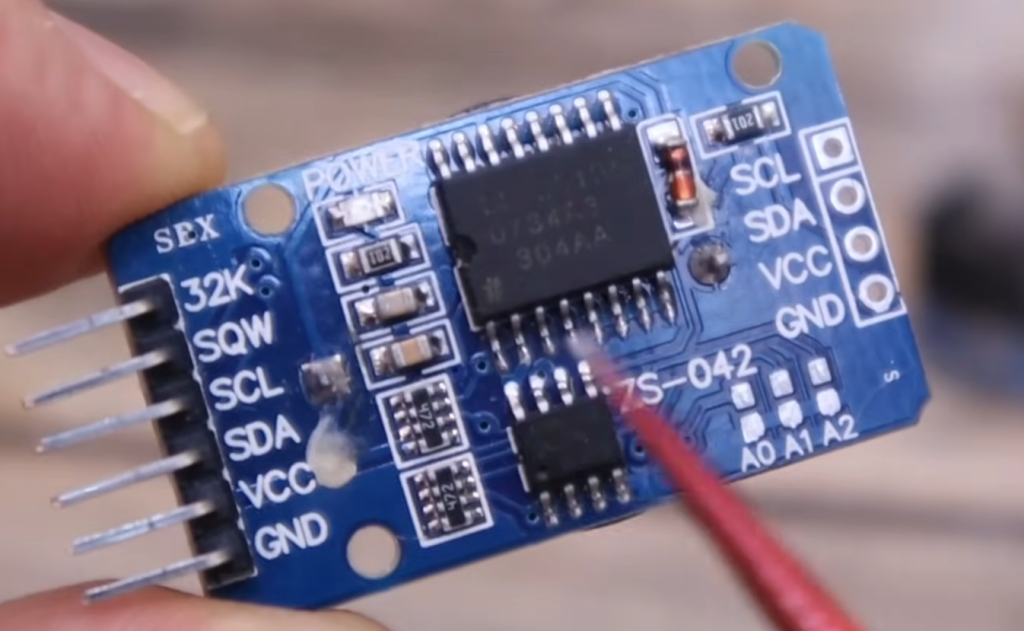
If your Arduino board or microcontroller doesn’t appear on the list of supported boards or if it doesn’t have a built-in EEPROM, all hope is not lost. You can still store data persistently by using external EEPROM modules or other non-volatile storage solutions. These modules typically communicate with your Arduino through I2C or SPI interfaces.
To use an external EEPROM module, you’ll need to:
- Connect the module to your Arduino, ensuring proper wiring;
- Install the relevant libraries for the external EEPROM on your Arduino IDE;
- Adapt your code to use the external EEPROM’s functions and memory addressing;
While external EEPROM modules offer greater storage capacity, they may require more complex setup and coding than the built-in EEPROM.
How to Write Data to the Arduino’s Built-in EEPROM?
Writing data to the built-in EEPROM of your Arduino is a straightforward process. EEPROM data is stored byte by byte, and you can write and overwrite individual bytes as needed.
Here’s a step-by-step guide on how to write data to the EEPROM:
- Include the EEPROM Library: To access EEPROM functions, you need to include the EEPROM library in your Arduino sketch. Add the following line at the beginning of your code: #include <EEPROM.h>;
- Define the EEPROM Address:Choose a memory address within the EEPROM where you want to store your data. Addresses are numbered from 0 to the maximum EEPROM size minus one;
- Write Data to EEPROM: To write data to the EEPROM, use the write() function. Here’s an example of how to write an integer value to EEPROM:
int valueToStore = 42;
int addressToStore = 0; // Choose an address
EEPROM.write(addressToStore, valueToStore);
- Commit Changes:After writing data, make sure to call the commit() function to save the changes to EEPROM: EEPROM.commit();
It’s essential to note that EEPROM has a limited number of write cycles (typically around 100,000). Frequent writes can wear out the EEPROM over time, so it’s best suited for storing configuration settings and other infrequently changing data.
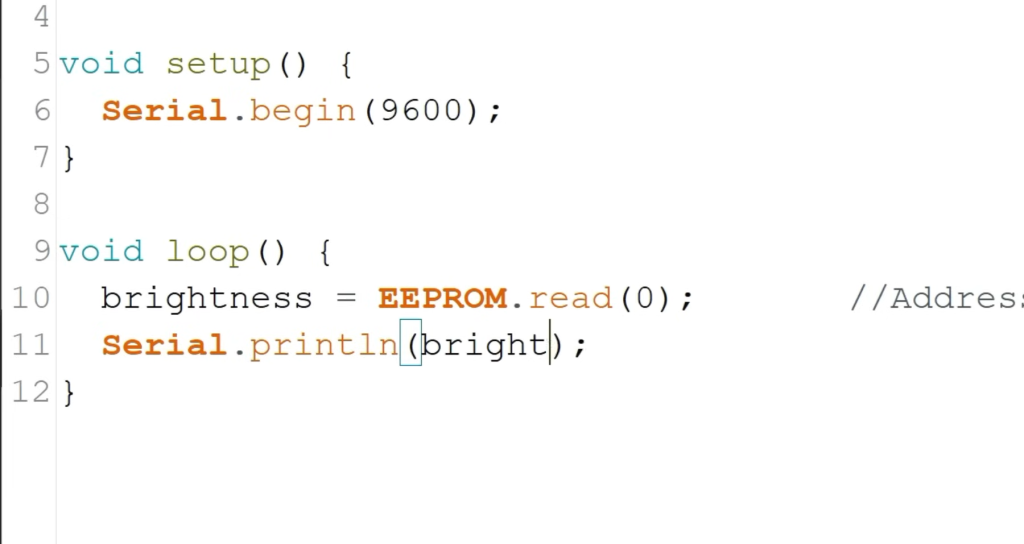
How to Read Data Stored in the Arduino’s Built-in EEPROM?
Reading data from the EEPROM is as straightforward as writing it. You can retrieve data from a specific EEPROM address using the read() function.
Here’s a step-by-step guide on how to read data from the EEPROM:
Include the EEPROM Library: Just as when writing data, include the EEPROM library at the beginning of your code: #include <EEPROM.h>;
Define the EEPROM Address: Identify the memory address within the EEPROM from which you want to read data;
Read Data from EEPROM: Use the read() function to retrieve the data from the specified EEPROM address. For example, to read an integer value:
int addressToRead = 0; // Choose the same address used for writing
int retrievedValue = EEPROM.read(addressToRead);
Now, the variable retrievedValue contains the data stored at the specified EEPROM address [7].
Use the Read Data: You can use the retrievedValue variable in your code as needed. For instance, you might use it to configure your Arduino project based on the stored value.
Remember that data stored in EEPROM remains intact even after power cycles, making it suitable for storing configuration settings, calibration data, and more.
Delete the Contents of the EEPROM
There may be situations where you need to clear the contents of the EEPROM, either to reset your project or remove old data. To erase the EEPROM data, you can follow these steps:
- Include the EEPROM Library: As always, start by including the EEPROM library in your sketch: #include <EEPROM.h>;
- Clear the EEPROM: Use a loop to write zeros (or any other value) to each EEPROM address, effectively erasing the data. Here’s an example of how to clear the EEPROM:
void clearEEPROM() {
for (int i = 0; i < EEPROM.length(); i++) {
EEPROM.write(i, 0);
}
EEPROM.commit();
}
Invoke the Clear Function: Call the clearEEPROM() function when needed to wipe the EEPROM clean. This function iterates through all EEPROM addresses, setting each byte to zero;
Commit Changes: Don’t forget to call commit() after clearing the EEPROM to ensure the changes are saved: EEPROM.commit() [8];
Arduino EEPROM Tips & Tricks:
When working with EEPROM (Electrically Erasable Programmable Read-Only Memory) in Arduino projects, there are several tips and tricks you can employ to maximize its utility and efficiency.
Here are some handy tips and best practices:
Understand EEPROM Limitations
Before diving into EEPROM usage, it’s crucial to understand its limitations. EEPROM has a limited number of write cycles, typically in the range of 100,000 to 1,000,000 cycles, depending on the manufacturer and model. Frequent writes can wear out EEPROM over time, so use it sparingly for data that doesn’t change often.
Plan Data Storage Carefully
Given the limited EEPROM space on most Arduino boards, plan your data storage carefully. Avoid storing large datasets or continuously changing data in EEPROM. Reserve it for configuration settings, calibration data, and other critical but infrequently updated information.
Use Structs for Complex Data
When storing complex data structures, consider using C++ structs. Structs allow you to organize related data fields into a single structure and store them as a unit in EEPROM. This can simplify both writing and reading operations.
struct Configuration {
int threshold;
float gain;
char description[20];
};
Configuration config;
Implement Data Versioning
In long-term projects, it’s wise to implement data versioning. Include a version identifier in your stored data structures. When you update your code and need to change the data structure, you can check the version and handle data migration if necessary.
struct Configuration {
int version;
int threshold;
float gain;
};
Configuration config;
// Check the version when reading data
if (config.version == 1) {
// Handle migration from version 1 to the current version
}
Use a Checksum or CRC
To ensure data integrity when reading from EEPROM, consider adding a checksum or cyclic redundancy check (CRC) value to your data structures. When reading data, calculate the checksum and compare it with the stored value to detect corruption.
Avoid Frequent EEPROM Writes
Minimize the number of write operations to EEPROM. You can do this by buffering changes in RAM and only writing to EEPROM when necessary. For example, write data to EEPROM only when the user changes a setting, not after every change.
Implement Wear Leveling
If you anticipate a high volume of writes to a specific EEPROM address, consider implementing wear leveling. This technique distributes writes evenly across multiple EEPROM addresses to prolong the overall lifespan.
Protect Critical Data
Critical data, such as calibration values or security keys, should be protected against accidental or malicious modification. You can implement mechanisms to lock or password-protect specific EEPROM locations to prevent unauthorized changes.
Document Data Structure
Maintain clear documentation of your data structure in comments or a separate document. Include information about data types, sizes, and the purpose of each stored value. This makes it easier to maintain and update your code in the future.
Backup and Recovery
Consider implementing backup and recovery mechanisms for EEPROM data. Create backups of essential data periodically, and implement recovery procedures in case of data corruption or accidental erasure.
Use Non-Volatile Storage Modules
For projects that require extensive data storage or where frequent EEPROM writes are a concern, consider using external non-volatile storage modules, such as EEPROM ICs or microSD cards. These modules offer more significant storage capacity and may have higher endurance [9].
Test and Verify
Always test your EEPROM read and write operations thoroughly. Use serial communication to print debug information and verify that data is stored and retrieved correctly.

FAQ:
How data is written on EPROM?
EPROM (Erasable Programmable Read-Only Memory) is a type of non-volatile memory that allows data to be written using a process called “programming”. Unlike EEPROM, EPROM requires exposure to ultraviolet (UV) light to erase and reprogram data.
Here’s how data is typically written to EPROM:
- Programming:To write data to an EPROM, you need to apply electrical voltage to specific memory cells using a programming device called a programmer. This process uses higher voltage levels to charge the floating gate transistors, trapping electrons inside and altering their electrical properties;
- Verification:After programming, the data is verified to ensure it was written correctly. This verification step is crucial for data integrity;
- UV Erasure:To erase data from an EPROM, it must be exposed to UV light for a specified duration. UV light clears the trapped electrons, resetting the memory cells to their default state;
- Reprogramming:After erasing, the EPROM can be reprogrammed with new data using the same programming process [10];
It’s important to note that EPROM is not practical for frequent data updates, as the erasure process involves UV exposure and can be time-consuming. EEPROM and flash memory are more suitable for modern applications that require frequent data changes.
What is the default value of EEPROM in Arduino?
In Arduino, EEPROM memory does not have a default value. When you read from an EEPROM address that has not been written to previously, you will typically get a value of 255 (0xFF in hexadecimal). This is because EEPROM memory is not initialized or cleared when the Arduino is powered on; it retains whatever values were last written to it.
If you want specific default values in your EEPROM, you need to initialize them explicitly in your code during the setup phase.
Is EEPROM permanent?
EEPROM (Electrically Erasable Programmable Read-Only Memory) is considered non-volatile memory, which means it retains data even when power is removed. However, EEPROM is not entirely permanent. It has a limited number of write and erase cycles, typically ranging from 100,000 to 1,000,000 cycles [11], depending on the specific EEPROM chip. After reaching this limit, EEPROM can become unreliable, and data may be lost.
While EEPROM provides a means of semi-permanent data storage suitable for settings and small amounts of infrequently changing data, it is essential to use it judiciously to avoid exceeding its write cycle limit.
Is EEPROM reusable?
Yes, EEPROM is reusable to a certain extent, depending on the number of write and erase cycles it can endure. EEPROM memory is designed for multiple read and write operations throughout its lifespan.
However, it is crucial to be mindful of the write cycle limit, which varies among different EEPROM chips but is finite. Once you approach or exceed this limit, the EEPROM may become less reliable or eventually fail.
To maximize the reusability of EEPROM, consider the following practices:
- Use EEPROM primarily for data that changes infrequently;
- Implement wear leveling techniques to distribute write cycles evenly across EEPROM addresses;
- Plan your data storage strategy carefully to minimize unnecessary writes;
Why use EEPROM instead of Flash?
EEPROM and flash memory serve different purposes in an Arduino project, and the choice between them depends on the specific requirements of your application.
EEPROM:
- Suitable for storing small amounts of non-volatile data that needs to be retained even when power is removed;
- Limited write cycle endurance (typically 100,000 to 1,000,000 cycles);
- Faster write and read operations compared to flash memory;
- Typically smaller storage capacity compared to flash memory;
- Often used for storing configuration settings, calibration data, and other critical but infrequently updated information;
Flash Memory:
- Ideal for storing larger amounts of data;
- Higher write cycle endurance compared to EEPROM;
- Slower write and read operations compared to EEPROM;
- Used for storing program code (the Arduino sketch) and larger data sets like images or log files;
- Flash memory is typically used for code and program storage, not for frequently updated data;
Useful Video: Permanently Save Values on your Arduino using EEPROM!
References:
- https://roboticsbackend.com/how-to-save-values-on-arduino-with-eeprom/
- https://randomnerdtutorials.com/arduino-eeprom-explained-remember-last-led-state/
- https://www.norwegiancreations.com/2017/02/using-eeprom-to-store-data-on-the-arduino/
- https://www.engineersgarage.com/how-to-save-a-sensor-value-in-the-eeprom-of-the-arduino-part-19-49/
- https://www.tutorialspoint.com/how-to-write-data-into-eeprom-with-arduino
- https://electronoobs.com/eng_arduino_tut167.php
- https://www.best-microcontroller-projects.com/arduino-eeprom.html
- https://handsontec.com/index.php/arduino-5-storing-data-in-arduino-eeprom-memory/
- https://www.teachmemicro.com/how-to-save-and-retrieve-a-string-to-arduino-eeprom/
- https://www.digikey.com/en/maker/blogs/2021/how-to-permanently-store-data-on-an-arduinos-built-in-eeprom
- https://www.electroschematics.com/arduino-eeprom-tips-tricks/