
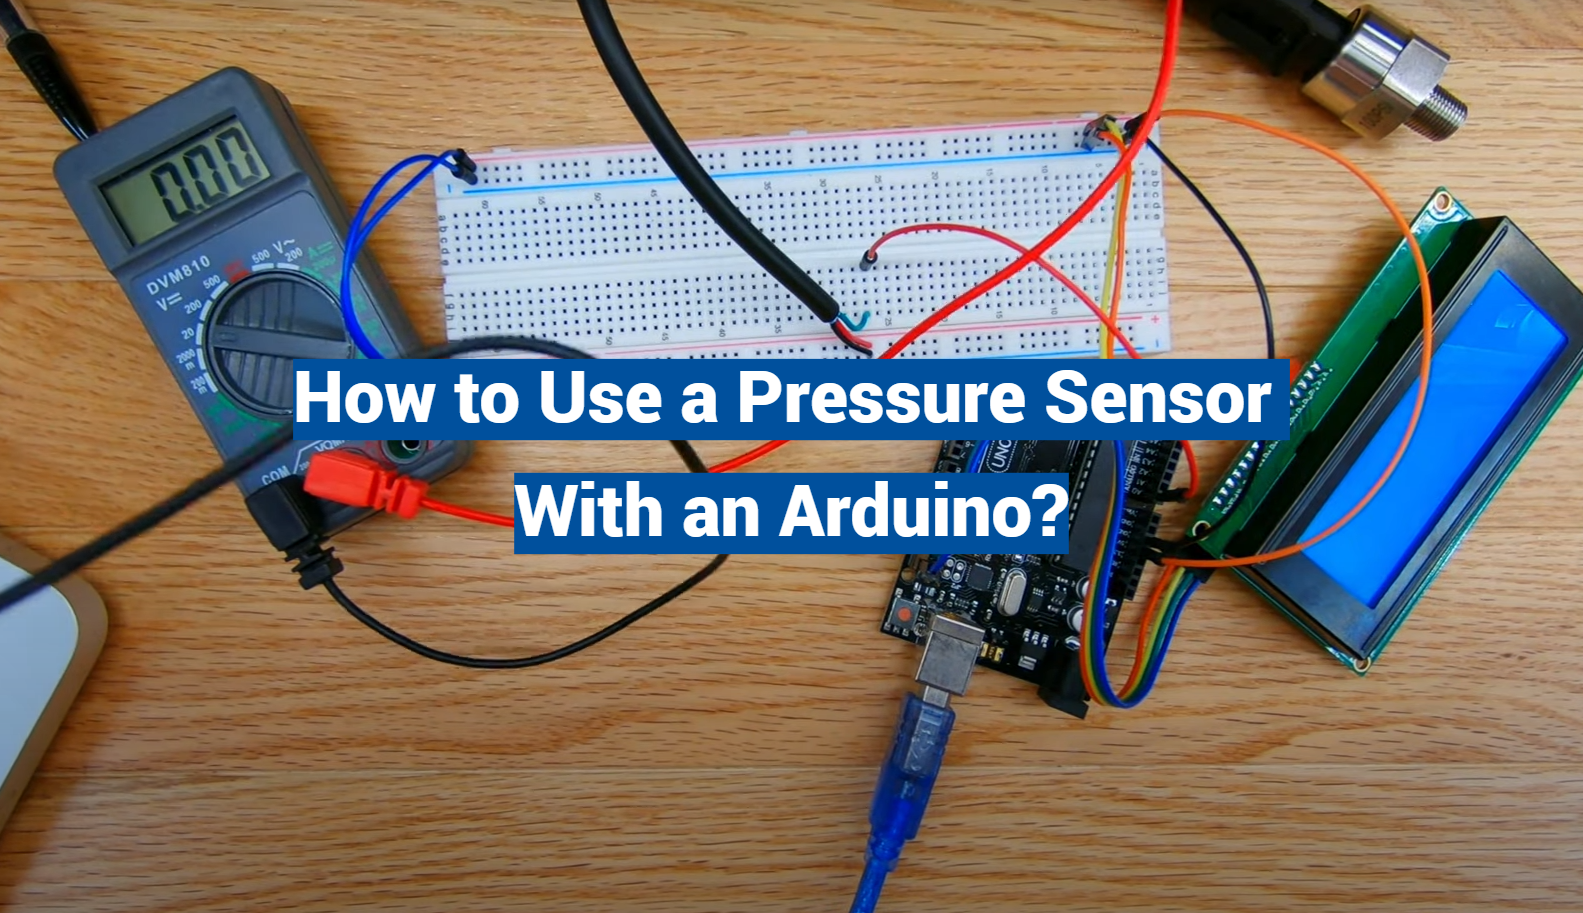
Pressure sensors are integral components in a multitude of projects, providing critical data to systems across various domains. Whether it’s for home automation, weather stations, or health monitoring, understanding how to integrate a pressure sensor with an Arduino is essential.
This article provides a comprehensive guide on how to use a pressure sensor with an Arduino. We’ll explore the connection process, dive into reading pressure sensor values using Arduino’s analog functions, and walk through a real-world example using the MPX5010 Differential Pressure Sensor.
So, whether you’re a seasoned engineer or a novice maker, this guide will equip you with the knowledge you need to successfully implement pressure sensor technology into your Arduino projects.
What Is A Pressure Sensor?
How Do Pressure Sensors Work?
Pressure sensors, also known as pressure transducers or pressure transmitters, are designed to convert a physical force into an electrical signal that can be measured and processed. They operate based on the fundamental principles of physics, such as Boyle’s law, which describes the inverse relationship between the pressure and volume of a gas at constant temperature.
The most common type of pressure sensor is the piezoresistive sensor, which relies on changes in electrical resistance to measure pressure. When pressure is applied to the sensor, it deforms slightly, causing a change in resistance. This change is then converted into an electrical signal, typically in the form of voltage or current, which can be interpreted and used for various applications.
Types of Pressure Sensors
There are several types of pressure sensors available, each suited to specific applications and operating conditions.
Some of the most common types include:
- Strain Gauge Pressure Sensors: These sensors use a strain gauge element to measure pressure-induced strain on a diaphragm. The change in resistance of the strain gauge is proportional to the applied pressure [2];
- Piezoelectric Pressure Sensors: Piezoelectric sensors generate an electrical charge when subjected to mechanical deformation, making them highly sensitive and suitable for dynamic pressure measurements;
- Capacitive Pressure Sensors: These sensors utilize changes in capacitance between two conductive plates when subjected to pressure, resulting in a change in electrical output;
- Optical Pressure Sensors: Optical sensors use changes in the optical properties of a material, such as refractive index or absorption, to measure pressure;
- Resonant Pressure Sensors: Resonant sensors rely on changes in the resonance frequency of a vibrating element under pressure, allowing for accurate pressure measurements;
Pressure Measurement Units
Pressure can be measured using various units, depending on the application and location.
Some common pressure units include:
- Pascal (Pa): The SI unit of pressure, equal to one newton per square meter (N/m²);
- Bar: A non-SI unit of pressure commonly used in Europe, equal to 100,000 pascals (Pa);
- Atmosphere (atm): The average atmospheric pressure at sea level, approximately 101.3 kPa;
- Pound per Square Inch (psi): A unit commonly used in the United States, equal to approximately 6,895 pascals (Pa);
The Necessity Of Using A Pressure Sensor With An Arduino
Pressure sensors find numerous applications across industries, and their integration with Arduino microcontrollers has become increasingly popular. Arduino boards provide an accessible and versatile platform for building projects that require pressure measurements.
Here’s why using a pressure sensor with an Arduino is a valuable combination:
1. Precision and Accuracy
Arduino microcontrollers offer precise control over the sensors they interface with, ensuring accurate pressure readings. This precision is especially crucial in applications such as weather stations, where accurate atmospheric pressure measurements are essential for weather forecasting.
2. Versatility
Arduino boards can interface with a wide range of pressure sensors, accommodating various pressure measurement requirements. Whether you need to measure low-pressure differentials in a ventilation system or high-pressure levels in hydraulic systems, there is a compatible pressure sensor for your project.
3. Data Processing and Analysis
Arduino’s processing capabilities enable real-time data processing and analysis. This is invaluable in applications like altitude measurement, where pressure readings must be converted into altitude values. The microcontroller can perform these calculations efficiently.
4. Integration with Other Sensors
Arduino’s modular design allows for easy integration with other sensors, such as temperature sensors, humidity sensors, or GPS modules. Combining pressure data with data from these sensors enables comprehensive environmental monitoring and control systems.
5. Cost-Effective Solutions
Arduino boards are cost-effective and readily available, making them an attractive choice for both hobbyists and professionals. This affordability extends to pressure sensors, making the overall cost of projects relatively low [3].
Use Cases Of Pressure Sensors With An Arduino:
Weather Station
A DIY weather station is a popular project for Arduino enthusiasts. By connecting a pressure sensor to an Arduino board, you can measure atmospheric pressure, which is a key parameter in weather forecasting. Combining this data with temperature and humidity measurements allows you to create a basic weather monitoring system that can provide real-time weather updates.
Altitude Measurement
Depth Sensing
Pressure sensors play a critical role in underwater applications, such as depth measurement in scuba diving or aquatic research. When coupled with an Arduino, pressure sensors can be used to create underwater depth gauges or assist in remotely operated underwater vehicles (ROVs).
Industrial Automation
In industrial settings, pressure sensors are indispensable for monitoring and controlling processes involving liquids and gases. Integrating pressure sensors with Arduino controllers allows for efficient monitoring of hydraulic systems, pneumatic systems, and industrial pipelines. Any deviations in pressure can trigger automated responses, preventing costly failures or accidents.
Medical Devices
Pressure sensors have vital applications in the medical field. They are used in devices like ventilators, blood pressure monitors, and infusion pumps. Arduino-based medical devices can be developed for research purposes or to provide affordable healthcare solutions in resource-limited settings.
Environmental Monitoring
Environmental scientists and researchers use pressure sensors in environmental monitoring systems. These sensors can be employed to measure water pressure in rivers, lakes, and oceans, aiding in the study of water levels and currents. When connected to an Arduino, they enable remote data collection and analysis.
Automotive Applications
In the automotive industry, pressure sensors are used for a wide range of purposes, including tire pressure monitoring systems (TPMS), engine control, and airbag deployment. By integrating pressure sensors with Arduino-based automotive projects, enthusiasts can experiment with custom TPMS or performance-enhancing modifications.
Smart Agriculture
Modern agriculture is becoming increasingly data-driven, with precision agriculture techniques aimed at optimizing crop yields and resource utilization. Pressure sensors connected to Arduino boards can monitor soil compaction, enabling farmers to make informed decisions regarding planting and irrigation [4].
Robotics
Robotic systems often require pressure sensors to ensure safety and control. By incorporating pressure sensors and Arduino microcontrollers into robotic designs, developers can create robots capable of gripping delicate objects without causing damage or navigating complex environments with adaptive pressure sensing.
Consumer Electronics
Pressure sensors are also used in consumer electronics, such as smartphones and tablets, to measure barometric pressure for weather forecasting and altitude estimation. DIY enthusiasts can experiment with integrating pressure sensors into their electronic projects, such as GPS trackers or smart wearables.
Arduino Pressure Measuring and Logging:
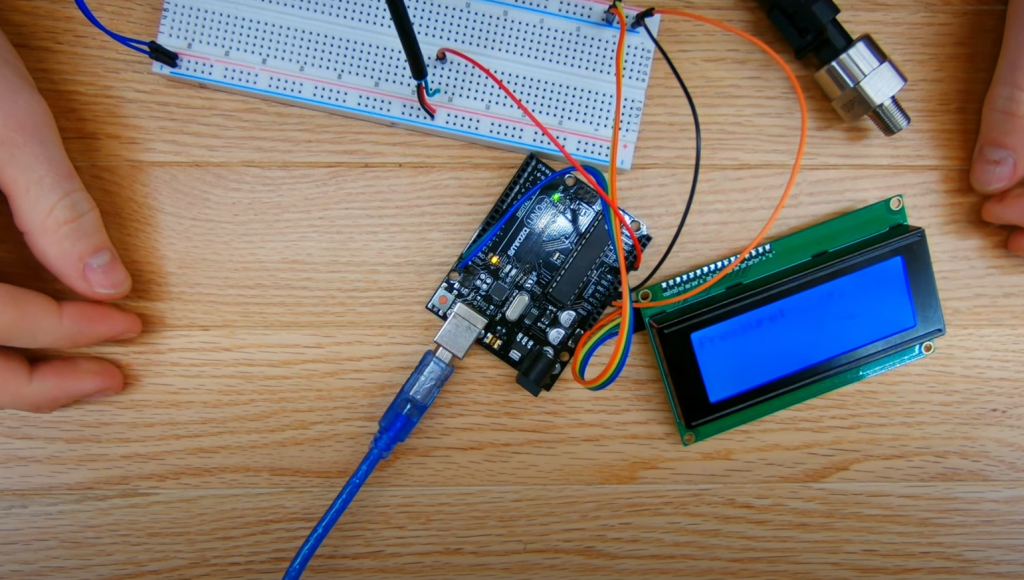
Schematics
Before you begin, it’s essential to have a clear understanding of the components you’ll be using and how they will be connected. Here’s a basic schematic overview of the components involved in this project:
In This Diagram:
- Pressure Sensor (SKU237545): This is the heart of our project, responsible for measuring pressure. Connect its output pin to one of the analog input pins on the Arduino;
- LCD Display: The LCD screen will provide real-time pressure readings and data logging status. It’s connected to the Arduino using the necessary wires, typically involving both data and control pins;
- SD Card Module: This module allows us to record pressure data onto an SD card. Connect it to the Arduino via the SPI (Serial Peripheral Interface) pins;
Soldering Together
Now that you have a clear schematic in mind, it’s time to assemble the hardware.
Follow these steps for a successful soldering process:
- Prepare Your Workspace: Ensure you have a clean and well-lit workspace with all the necessary tools and components within reach;
- Connect the Pressure Sensor: Solder wires to the pressure sensor’s pins, taking care to correctly identify the power, ground, and signal connections. Use heat shrink tubing to insulate the connections and prevent short circuits;
- Prepare the LCD Display: If your LCD screen requires soldering, carefully attach the wires to the designated pins on the display module. Again, be mindful of the power, ground, and data connections;
- Wire the SD Card Module: Connect the SD card module to the Arduino using jumper wires, ensuring that the SPI pins (MISO, MOSI, SCK, and CS) are correctly aligned;
- Double-Check Connections: Before proceeding, double-check all your soldered connections to ensure there are no loose wires or solder bridges that could cause issues later [5];
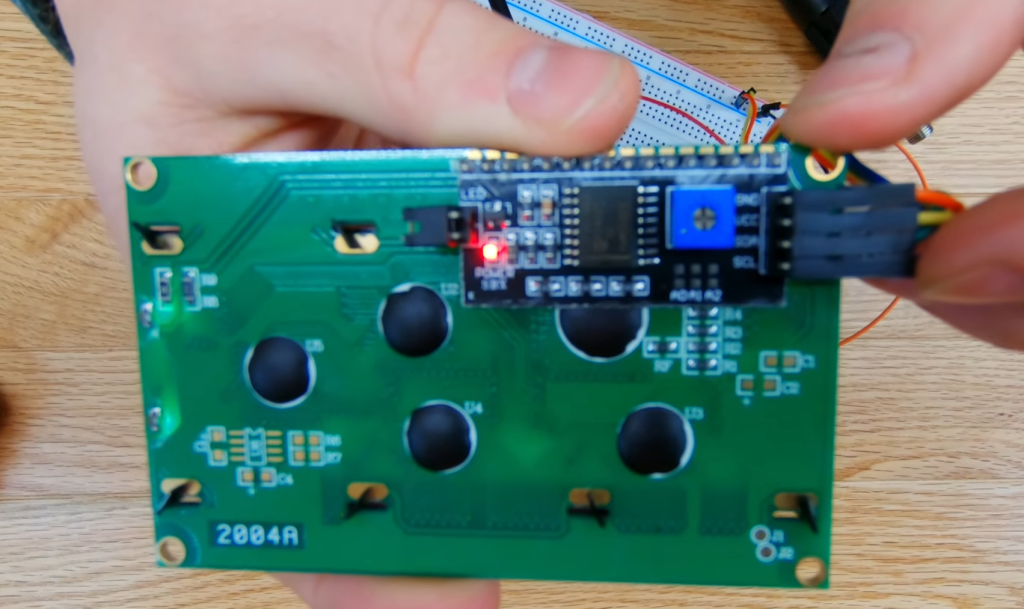
Attach LCD
Now that you have soldered the components together, it’s time to attach the LCD display to the Arduino.
Here’s how to do it:
- Identify LCD Pins: Check the datasheet or documentation for your specific LCD model to identify the pinout. Common pins include VCC (power), GND (ground), SDA (data), SCL (clock), and sometimes additional control pins;
- Connect the LCD to the Arduino: Use jumper wires to connect the LCD pins to the corresponding pins on the Arduino. Pay careful attention to the data and control pins, ensuring they match your schematic;
- Install Necessary Libraries: To control the LCD, you’ll likely need to install a specific Arduino library for your LCD model. You can usually find these libraries on the Arduino Library Manager;
- Upload the LCD Test Code: Upload a simple LCD test code to verify that your connections are correct. This code should display a message on the LCD, indicating that it’s working correctly;
Attach SKU237545 to the Arduino
Now, let’s connect the pressure sensor (SKU237545) to the Arduino:
- Identify Pressure Sensor Pins: Review the datasheet or documentation for the pressure sensor to determine the pinout. Typically, you’ll have power, ground, and an analog output pin;
- Connect the Pressure Sensor: Use jumper wires to connect the pressure sensor pins to the Arduino. Connect the power and ground to the appropriate pins on the Arduino for your voltage requirements (usually 5V or 3.3V). Connect the analog output to an analog input pin on the Arduino;
- Double-Check Connections: Confirm that all connections are secure, and there are no loose wires or incorrect connections;
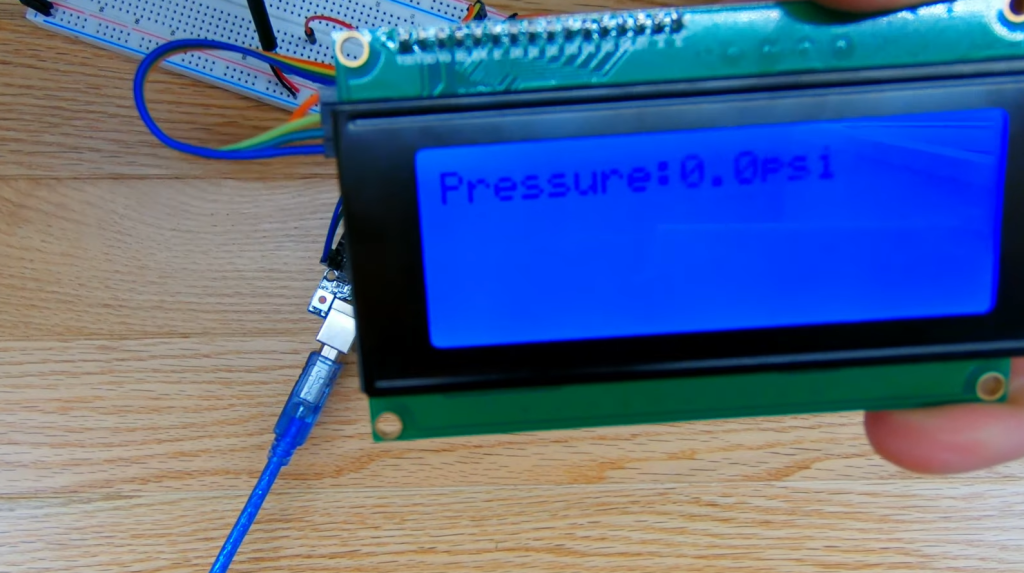
Check LCD Displays Correctly After Setting Time And Date
Before proceeding with data logging, it’s essential to ensure that your LCD displays the information correctly.
Follow these steps to verify its functionality:
- Load LCD Code: Write or download an Arduino sketch that initializes the LCD and displays some test text or information. Make sure the code includes any necessary libraries for your specific LCD model;
- Set Time and Date: If your project involves recording time-stamped pressure data, set the time and date on your Arduino, or include real-time clock (RTC) modules for accurate timekeeping;
- Upload and Test: Upload the code to your Arduino and observe the LCD display. It should show the test information or time and date if you’ve set up an RTC;
- Troubleshoot: If the LCD doesn’t display as expected, double-check your connections and code. Ensure that you’ve correctly addressed the LCD in your code and that the library is loaded;
Check SD Card Recording And Serial Monitor Output
The final step is to test data recording on the SD card and verify output on the Serial Monitor:
- Prepare SD Card: Ensure that your SD card is formatted correctly and has enough free space for data logging;
- Write Data Logging Code: Write an Arduino sketch that reads pressure data from the sensor and records it on the SD card. Make sure the code includes functions to create and write to a file on the SD card. You can also include serial print statements for debugging;
- Upload the Code: Upload the code to your Arduino;
- Check Serial Monitor: Open the Arduino IDE’s Serial Monitor and set the baud rate to match the one specified in your code. You should see debug information and data being printed to the Serial Monitor. This helps you verify that the Arduino is recording data correctly;
- Inspect the SD Card: After running the code for a while, remove the SD card and check if the recorded data is stored as expected. You can use a computer to read and analyze the data from the SD card [6];
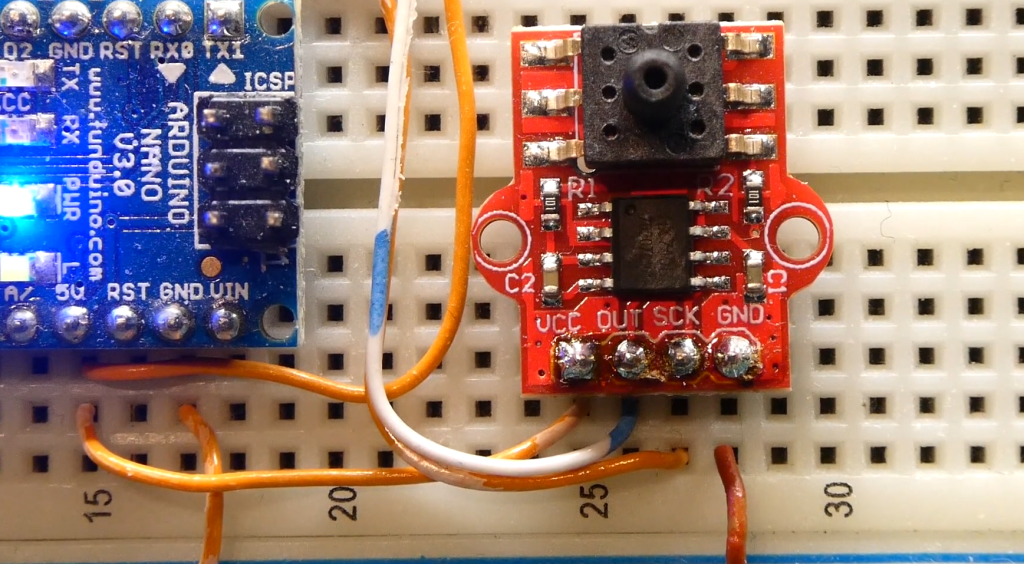
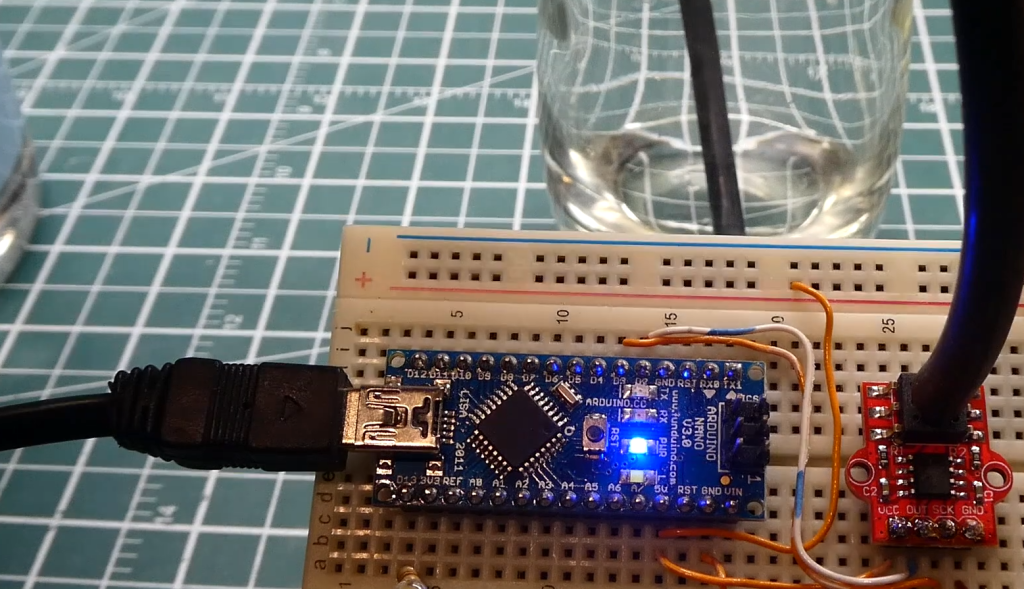
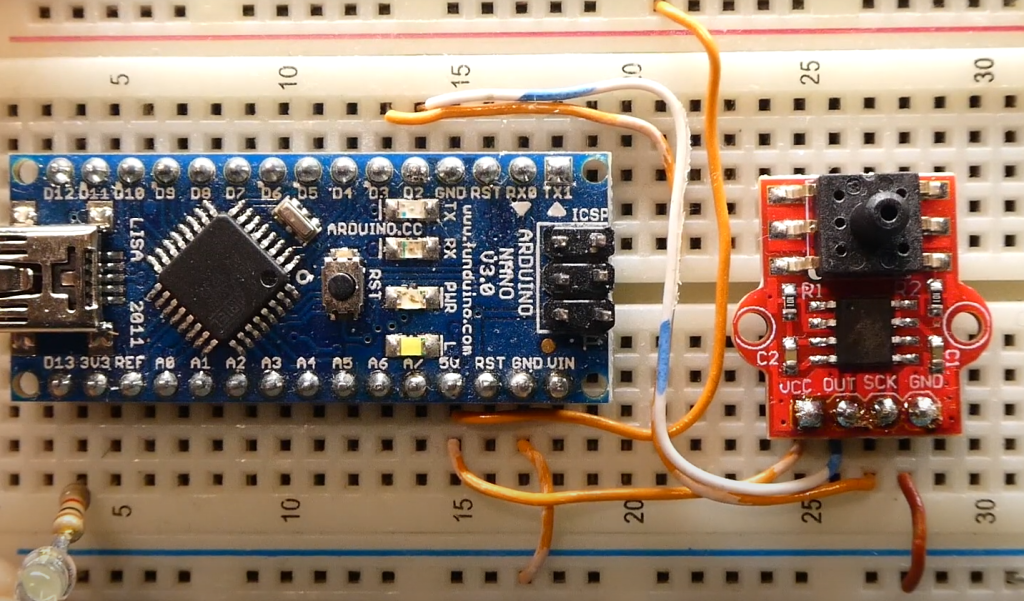
How To Connect A Pressure Sensor To An Arduino?
Connecting a pressure sensor to an Arduino is a relatively straightforward process. Pressure sensors typically have three main connections: power (VCC), ground (GND), and signal (analog or digital output).
Here’s a step-by-step guide on how to connect a pressure sensor to an Arduino:
Materials You’ll Need:
- Arduino board (e.g., Arduino Uno, Arduino Nano);
- Pressure sensor (e.g., a piezoresistive pressure sensor);
- Jumper wires (male-to-female or male-to-male, depending on your sensor and breadboard setup);
- Breadboard (optional but recommended for prototyping);
Step 1: Gather Information
Before you start, it’s crucial to gather information about your specific pressure sensor. Check the datasheet or documentation that came with the sensor. You’ll need to know:
- The sensor’s power supply voltage (VCC);
- The ground (GND) connection;
- The type of output it provides (analog voltage, digital, I2C, SPI, etc.);
- The operating range and sensitivity of the sensor (pressure range and output voltage);
Step 2: Connect Power and Ground
Connect the power and ground connections as follows:
- Connect VCC (Power): Use a jumper wire to connect the sensor’s VCC (power) pin to one of the 5V pins on your Arduino if the sensor operates at 5V. If the sensor operates at 3.3V, connect it to a 3.3V pin on your Arduino;
- Connect GND (Ground): Use a jumper wire to connect the sensor’s GND (ground) pin to one of the GND pins on your Arduino;
Step 3: Connect the Signal (Analog) Output
If your pressure sensor provides an analog output, follow these steps:
- Connect Signal (Analog) Output: Use a jumper wire to connect the sensor’s analog output pin to one of the analog input pins (A0, A1, A2, etc.) on your Arduino. Take note of which pin you connect it to; you’ll need this information in your Arduino code;
Step 4: Write Arduino Code
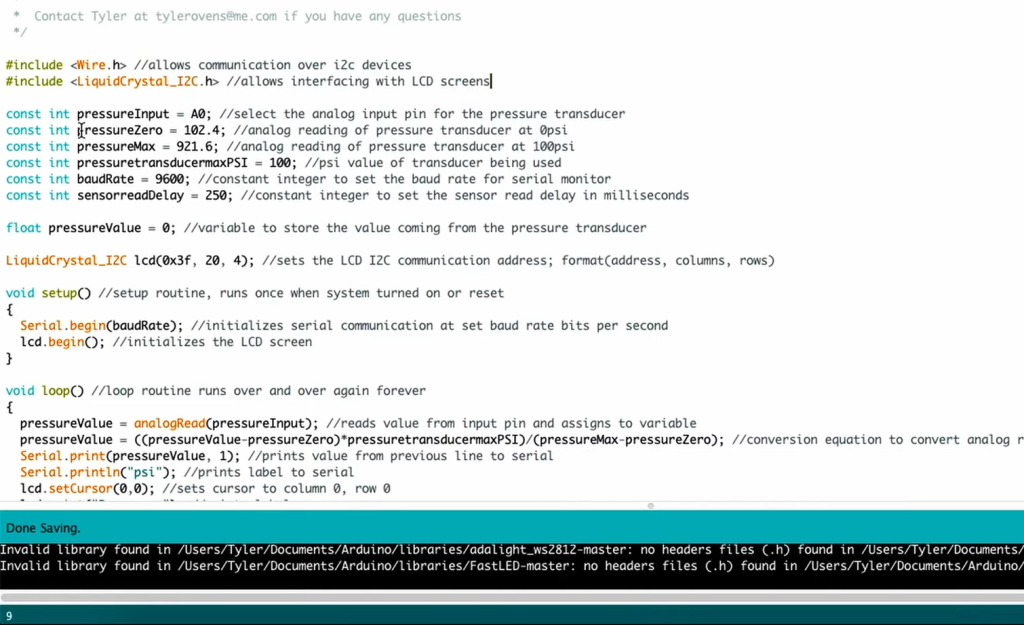
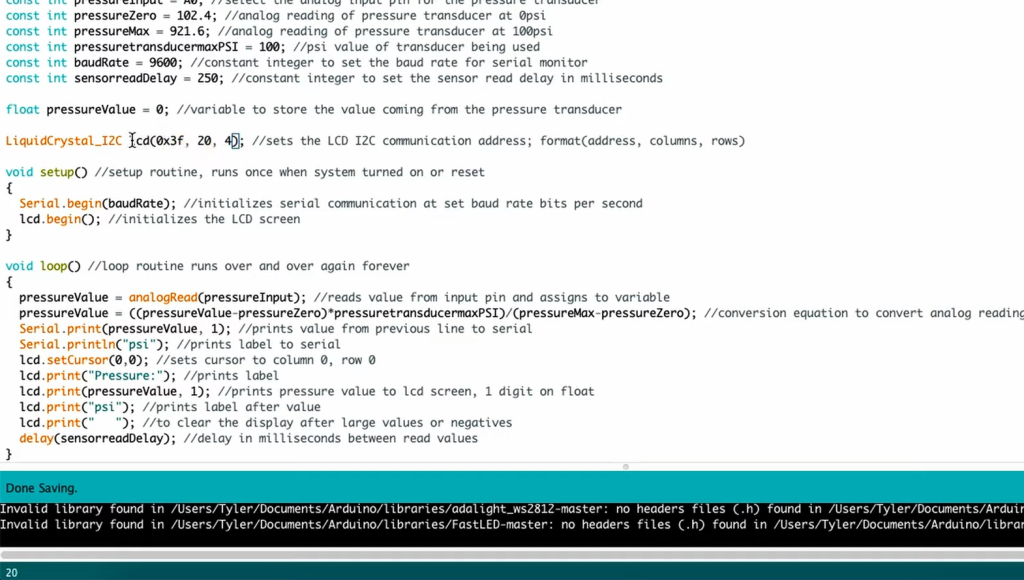
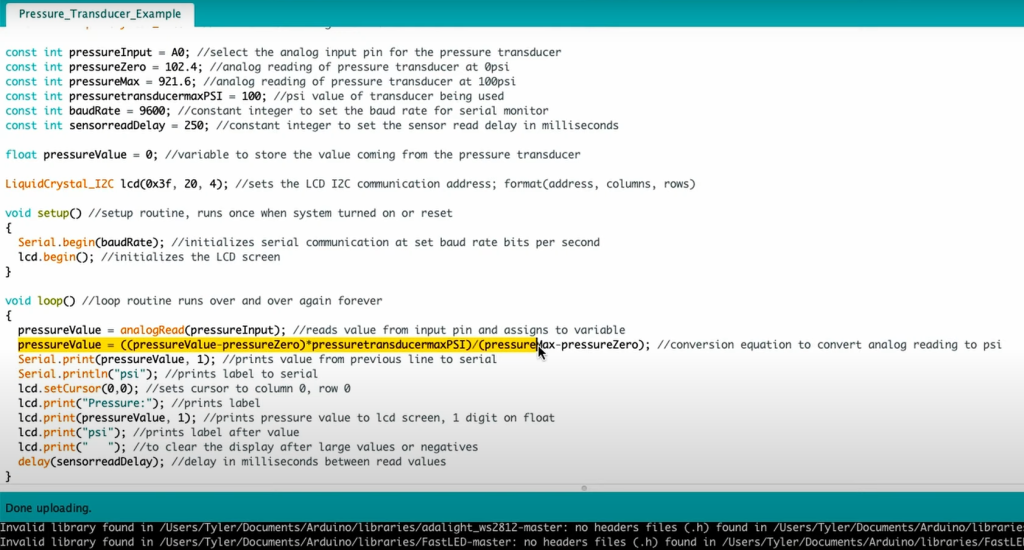
Now that your sensor is connected physically, you need to write Arduino code to read and interpret the data from the pressure sensor. Here’s a simplified example for reading analog data from the sensor:
// Define the analog input pin connected to the pressure sensor
const int sensorPin = A0;
void setup() {
// Initialize serial communication for debugging
Serial.begin(9600);
}
void loop() {
// Read the analog value from the sensor
int sensorValue = analogRead(sensorPin);
// Print the sensor value to the Serial Monitor
Serial.println(“Pressure Sensor Value: ” + String(sensorValue));
// You can convert the sensorValue to pressure using the sensor’s calibration data.
// Add a delay for stability (adjust as needed)
delay(1000);
}
In this example, the Arduino reads the analog signal from the pressure sensor, prints it to the Serial Monitor, and adds a delay for stability. You may need to convert the analog value to pressure using the calibration data provided in your sensor’s documentation [7].
Step 5: Upload and Monitor
Upload the code to your Arduino using the Arduino IDE. Open the Serial Monitor (Tools -> Serial Monitor) to view the pressure sensor readings. You should see the sensor’s output values displayed in the Serial Monitor.
Keep in mind that this example assumes you are using a simple analog output pressure sensor. If your sensor has a digital output or uses a different communication protocol (such as I2C or SPI), you’ll need to adapt the connections and code accordingly.
With these steps, you can successfully connect a pressure sensor to an Arduino and start collecting pressure data for your projects or applications.
How to Read A Pressure Sensor Using An Arduino?
Reading a pressure sensor using an Arduino involves connecting the sensor to the Arduino and writing code to read and interpret the sensor’s output.
Here’s a step-by-step guide on how to read a pressure sensor using an Arduino:
Materials You’ll Need:
- Arduino board (e.g., Arduino Uno, Arduino Nano);
- Pressure sensor (e.g., a piezoresistive pressure sensor);
- Jumper wires (male-to-female or male-to-male, depending on your sensor and breadboard setup);
- Breadboard (optional but recommended for prototyping);
Step 1: Gather Information
Before you begin, gather essential information about your specific pressure sensor by referring to its datasheet or documentation. You’ll need to know:
- The sensor’s power supply voltage (VCC);
- The ground (GND) connection;
- The type of output it provides (analog voltage, digital, I2C, SPI, etc.);
- The operating range and sensitivity of the sensor (pressure range and output voltage);
Step 2: Connect Power and Ground
Connect the power and ground connections as follows:
- Connect VCC (Power): Use a jumper wire to connect the sensor’s VCC (power) pin to one of the 5V pins on your Arduino if the sensor operates at 5V. If the sensor operates at 3.3V, connect it to a 3.3V pin on your Arduino;
- Connect GND (Ground): Use a jumper wire to connect the sensor’s GND (ground) pin to one of the GND pins on your Arduino;
Step 3: Connect the Signal (Analog) Output
If your pressure sensor provides an analog output, follow these steps:
Connect Signal (Analog) Output: Use a jumper wire to connect the sensor’s analog output pin to one of the analog input pins (A0, A1, A2, etc.) on your Arduino. Take note of which pin you connect it to; you’ll need this information in your Arduino code.
Step 4: Write Arduino Code
Now that your sensor is connected physically, write Arduino code to read and interpret the data from the pressure sensor. Here’s a simplified example for reading analog data from the sensor:
// Define the analog input pin connected to the pressure sensor
const int sensorPin = A0;
void setup() {
// Initialize serial communication for debugging
Serial.begin(9600);
}
void loop() {
// Read the analog value from the sensor
int sensorValue = analogRead(sensorPin);
// Print the sensor value to the Serial Monitor
Serial.println(“Pressure Sensor Value: ” + String(sensorValue));
// You can convert the sensorValue to pressure using the sensor’s calibration data.
// Add a delay for stability (adjust as needed)
delay(1000);
}
In this example, the Arduino reads the analog signal from the pressure sensor, prints it to the Serial Monitor, and adds a delay for stability. You may need to convert the analog value to pressure using the calibration data provided in your sensor’s documentation.
Step 5: Upload and Monitor
Keep in mind that this example assumes you are using a simple analog output pressure sensor. If your sensor has a digital output or uses a different communication protocol (such as I2C or SPI), you’ll need to adapt the connections and code accordingly.
With these steps, you can successfully read a pressure sensor using an Arduino and start collecting pressure data for your projects or applications.
FAQ:
1. What pressure sensor is compatible with Arduino?
Arduino is compatible with a wide range of pressure sensors, including but not limited to:
- Piezoresistive Pressure Sensors: These sensors change their electrical resistance in response to pressure. They provide analog output, making them suitable for Arduino’s analog input pins;
- Piezoelectric Pressure Sensors: These sensors generate an electrical charge when subjected to mechanical stress. They can be interfaced with Arduino for dynamic pressure measurements;
- Capacitive Pressure Sensors: These sensors change their capacitance in response to pressure variations. They often require additional signal conditioning circuitry when used with Arduino;
- Digital Pressure Sensors: Some pressure sensors have a built-in analog-to-digital converter (ADC) and communicate with Arduino via digital interfaces like I2C or SPI;
To determine compatibility, refer to the sensor’s datasheet or documentation, which should provide details on the required voltage levels, communication protocols, and pin configurations.
2. How to use any sensor with an Arduino?
To use any sensor with an Arduino, follow these general steps:
- Gather Information: Read the sensor’s datasheet or documentation to understand its specifications, operating voltage, output type (analog, digital), and communication protocol (if any);
- Power Supply: Provide the required power supply voltage to the sensor. Connect the sensor’s VCC (power) and GND (ground) pins to the appropriate pins on the Arduino;
- Read Sensor Output: Depending on the sensor type, connect its output pin(s) to the appropriate pin(s) on the Arduino. Analog sensors connect to analog input pins, while digital sensors may use digital pins or a communication protocol like I2C or SPI;
- Write Arduino Code: Develop Arduino code to read and process data from the sensor. Use the Arduino IDE and relevant libraries if needed;
- Upload Code: Upload the Arduino code to your Arduino board using a USB cable;
- Monitor Output: Use the Serial Monitor in the Arduino IDE to view sensor readings and debug your code;
3. How can a pressure sensor be used?
A pressure sensor can be used in various applications, including:
- Weather Stations: Pressure sensors measure atmospheric pressure for weather forecasting;
- Altitude Measurement: Pressure sensors can estimate altitude based on changes in atmospheric pressure;
- Industrial Automation: Monitoring pressure in pneumatic and hydraulic systems for control and safety;
- Medical Devices: Measuring blood pressure, ventilation pressure, and more in healthcare equipment;
- Environmental Monitoring: Monitoring water pressure in rivers and oceans for research;
- Aerospace: Monitoring cabin and external pressures in aircraft;
- Consumer Electronics: Detecting touch or force on touchscreens or buttons;
- Robotics: Ensuring grip force in robotic arms and pressure in soft robotics;
- Automotive: Tire pressure monitoring systems (TPMS) and engine control;
- Smart Agriculture: Soil compaction measurement for precision farming;
The specific usage depends on the type of pressure sensor and its capabilities.
4. What sensor is used to detect pressure?
Pressure sensors are used to detect pressure. There are various types of pressure sensors, including piezoresistive, piezoelectric, capacitive, and others, each suited for different pressure ranges and applications.
5. How does Arduino read a pressure sensor?
Arduino reads a pressure sensor by connecting the sensor’s output (analog or digital) to one of its input pins. For analog sensors, Arduino uses the analogRead() function to read the voltage level. For digital sensors, it communicates using protocols like I2C, SPI, or UART. The Arduino code interprets the sensor’s output and converts it into a meaningful measurement, such as pressure in pascals or psi.
6. How does Arduino communicate with sensors?
Arduino communicates with sensors through various interfaces:
- Analog Input: For analog sensors, Arduino uses analog input pins and the analogRead() function to measure voltage levels;
- Digital Pins: Some digital sensors communicate using simple high/low logic levels on digital pins;
- I2C: Arduino can communicate with I2C sensors using the Wire library;
- SPI: For SPI sensors, Arduino uses the SPI library;
- UART (Serial): Serial communication is used for sensors that send data in a serial format;
- OneWire: This is a protocol for communication with 1-Wire devices like temperature sensors;
Arduino libraries and example code are often available for specific sensor types, simplifying communication.
7. Can Arduino read 4-20mA?
Yes, Arduino can read 4-20mA current signals using an external current-to-voltage (I/V) converter, such as a precision resistor and an operational amplifier (op-amp). The voltage output of the I/V converter can then be measured by an Arduino’s analog input pin. This allows Arduino to read sensors that output a 4-20mA current loop signal, commonly used in industrial applications.
8. Is a pressure sensor analog or digital?
Pressure sensors can be either analog or digital, depending on their design. Analog pressure sensors provide a continuous voltage or current output proportional to the sensed pressure. Digital pressure sensors, on the other hand, provide a discrete digital signal, often using communication protocols like I2C, SPI, or UART to transmit pressure data.
9. Is a pressure sensor active or passive?
Pressure sensors can be both active and passive, depending on their operating principles. Active pressure sensors, such as piezoelectric sensors, generate an electrical signal in response to applied pressure and are considered active sensors. Passive pressure sensors, like strain gauge sensors, rely on changes in electrical resistance due to pressure and are considered passive.
10. Why is digital better than analog?
Digital sensors offer advantages over analog sensors in terms of accuracy, noise immunity, and ease of integration. Digital signals are less susceptible to interference and can transmit data more reliably over longer distances. Additionally, digital sensors often provide precise and easy-to-process measurements directly, eliminating the need for external analog-to-digital conversion.
11. What are the four types of pressure sensors?
The four common types of pressure sensors are:
- Piezoresistive Pressure Sensors: These sensors change resistance in response to pressure;
- Piezoelectric Pressure Sensors: These sensors generate electrical charge when subjected to pressure;
- Capacitive Pressure Sensors: These sensors measure pressure-induced changes in capacitance;
- Strain Gauge Pressure Sensors: These sensors rely on changes in electrical resistance due to pressure;
12. What is the maximum distance for a 4-20mA signal?
The maximum distance for a 4-20mA current loop signal depends on factors like wire resistance, voltage supply, and the impedance of the receiving device. In industrial applications, a 4-20mA signal can typically travel several thousand feet (hundreds of meters) without significant voltage drop or signal degradation. However, to ensure reliable communication over long distances, it’s essential to consider factors like wire gauge and loop voltage.
13. How do you wire an Arduino pressure sensor to a switch?
To wire an Arduino pressure sensor to a switch, follow these steps:
Connect Power and Ground:
- Connect the sensor’s VCC (power) pin to a suitable voltage source on the Arduino (5V or 3.3V);
- Connect the sensor’s GND (ground) pin to any GND pin on the Arduino;
Connect Sensor Output:
Connect the sensor’s output pin (analog or digital) to one of the Arduino’s analog or digital input pins, depending on the sensor type.
Connect the Switch:
Connect one terminal of the switch to the same voltage source used for the sensor’s VCC (e.g., 5V).
Connect the other terminal of the switch to one of the digital input pins on the Arduino.
Write Arduino Code:
Write Arduino code to read both the sensor’s output and the state of the switch. You can use the digitalRead() function to check the switch state and analogRead() or appropriate digital reading functions for the sensor.
Upload and Monitor:
Upload the code to your Arduino and open the Serial Monitor to view the sensor data and switch state.
14. How many sensors can be connected to an Arduino board?
The number of sensors that can be connected to an Arduino board depends on factors such as the available pins, power supply capacity, and the specific Arduino model being used. Common Arduino models like the Arduino Uno have a limited number of analog and digital pins, which can restrict the number of sensors that can be directly connected.
However, you can expand the number of sensors using techniques like multiplexing or by using additional hardware, such as I2C or SPI multiplexers or analog multiplexers.
15. How accurate is a pressure sensor?
The accuracy of a pressure sensor varies depending on the sensor’s type, quality, and calibration. High-quality pressure sensors can provide accuracies ranging from a fraction of a percent to a few percent of the full-scale pressure range. For precise applications, it’s essential to select a sensor with the appropriate accuracy and calibrate it as needed.
16. How sensitive is a pressure sensor?
The sensitivity of a pressure sensor also varies depending on the sensor type and design. Sensitivity is typically defined as the change in output (e.g., voltage or current) per unit change in pressure (e.g., pascals or psi). Pressure sensors can have sensitivities ranging from millivolts per pascal to volts per pascal, depending on their design and intended application.
17. Does a pressure sensor detect weights?
Pressure sensors can indirectly detect weights when used in certain configurations. For example, a pressure sensor placed beneath a surface can measure the pressure applied to that surface, which can be correlated with the weight of an object resting on it.
However, the sensor itself does not directly measure weight; it measures the pressure exerted on it due to the object’s weight. Weight is the force exerted by an object due to gravity, while pressure is force per unit area. To convert pressure measurements to weight, you need to consider the area over which the force is applied and the local gravitational acceleration.
Useful Video: Pressure Sensor – Arduino
References:
- https://forum.arduino.cc/t/how-to-connect-a-pressure-sensor-to-an-arduino/354674
- https://www.hackster.io/Fillbee/arduino-pressure-measuring-and-logging-42189b
- https://arduino.stackexchange.com/questions/44905/reading-pressure-sensor-using-arduino-analog
- https://pijaeducation.com/arduino/sensor/pressure-sensor-with-arduino/
- https://circuits4you.com/2016/05/13/arduino-pressure-measurement/
- http://futurecnc.code.arc.cmu.edu/assignment02/arduino-for-io/
- https://www.reddit.com/r/ElectricalEngineering/comments/11azm2o/how_to_read_a_pressure_sensor_using_an_arduino/