
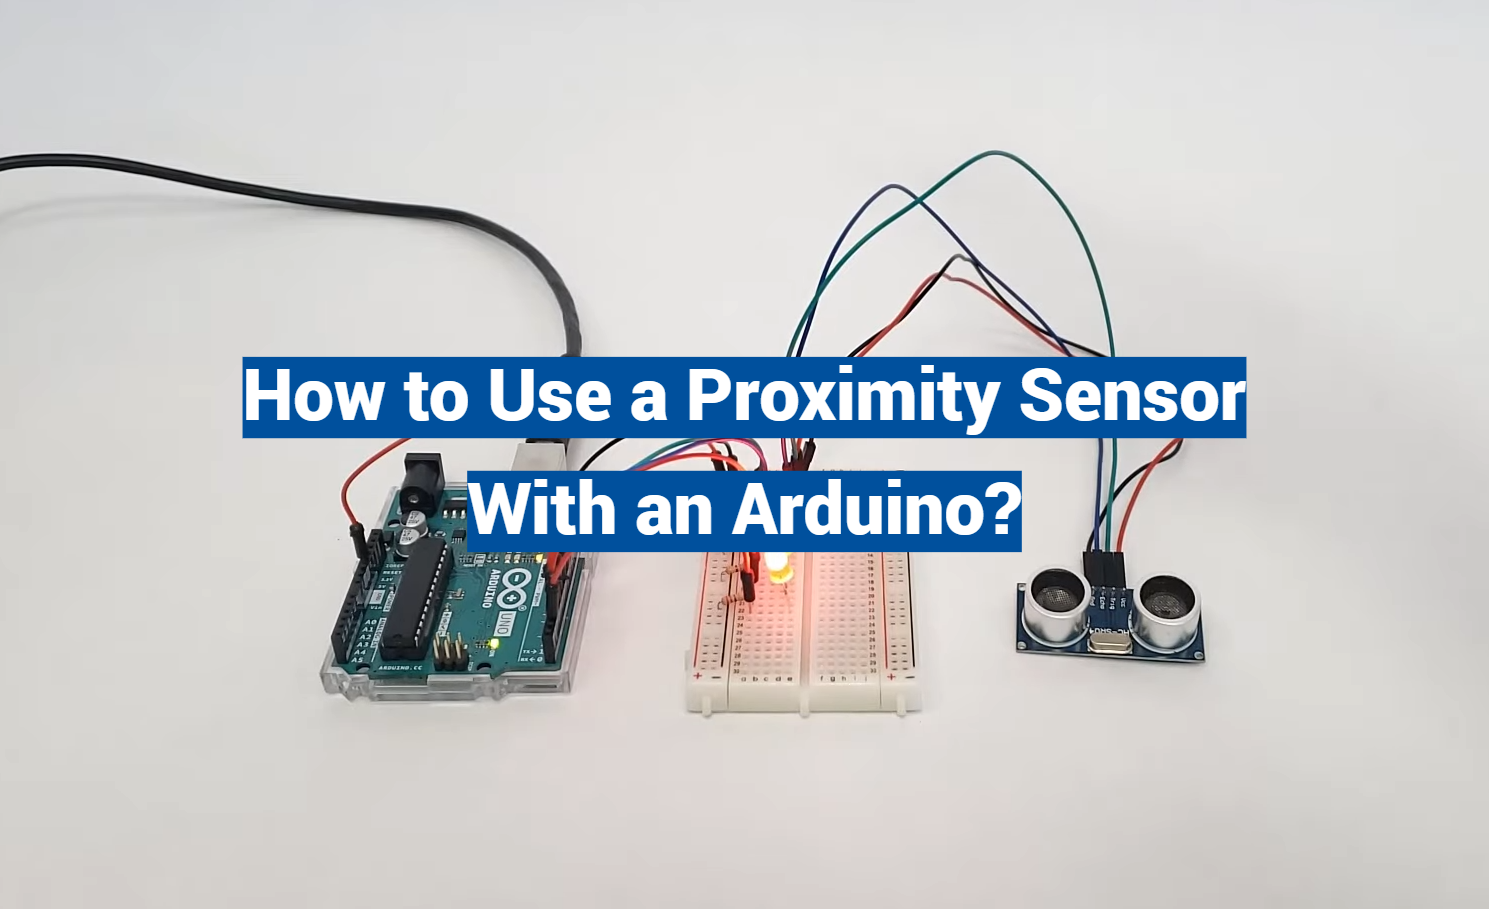
Arduino is a versatile open-source platform that allows hobbyists and professionals to create interactive electronic objects. One of the many components you can use with an Arduino is a proximity sensor, which detects the presence or absence of objects within a certain range without physical contact.
This article will provide a comprehensive guide on how to use a proximity sensor with an Arduino. We will explore different types of proximity sensors, their working principles, and step-by-step instructions on interfacing them with Arduino.
Whether you’re using a VCNL4010 library, the APDS9960 library, or working with inductive and capacitive sensors, this article has got you covered
What Is An Arduino Proximity Sensor?

There are various types of proximity sensors that can be used with Arduino, and they operate on different principles. Here are some common types:
- Infrared (IR) Proximity Sensors: These sensors use infrared light to detect objects. They typically consist of an infrared emitter and a receiver. The emitter emits infrared light, and if an object is in close proximity, it reflects the light back to the receiver. The Arduino can then detect this reflection and determine the presence of an object;
- Ultrasonic Proximity Sensors: Ultrasonic sensors use sound waves to measure distance. They emit high-frequency sound waves and measure the time it takes for the sound waves to bounce off an object and return to the sensor. The Arduino calculates the distance based on the time it takes for the sound wave to travel;
- Capacitive Proximity Sensors: Capacitive sensors can detect the presence of an object by measuring changes in capacitance. When an object comes close to the sensor, it alters the capacitance of the sensor’s electrodes, and the Arduino can detect this change;
- Inductive Proximity Sensors: Inductive sensors detect metal objects by generating an electromagnetic field. When a metal object enters this field, it induces eddy currents in the object, which can be detected by the sensor. Arduino can be used to read the output of these sensors;
- Laser Proximity Sensors: These sensors use laser beams to detect the distance to an object. They work on the principle of time-of-flight, where the time it takes for a laser pulse to bounce off an object and return is used to calculate distance;
Types of Proximity Sensors
Proximity sensors are devices designed to detect the presence, absence, or distance of an object within their sensing range without the need for physical contact. There are several types of proximity sensors, each operating on different principles and suitable for various applications.
Here are some common types of proximity sensors:
1) Inductive Proximity Sensors:
- Operating Principle: These sensors use electromagnetic induction to detect the presence of metallic objects within their range;
- Application: Used in industrial automation for detecting metal parts, object counting, and position sensing [2];
2) Capacitive Proximity Sensors:
- Operating Principle: Capacitive sensors detect changes in capacitance when an object (even non-metallic) enters its electric field;
- Application: Used for detecting the presence of liquids, powders, and even some solid objects in industrial and consumer applications;
3) Ultrasonic Proximity Sensors:
- Operating Principle: Ultrasonic sensors emit high-frequency sound waves and measure the time it takes for the waves to bounce back from an object to calculate distance;
- Application: Commonly used for distance measurement, object detection, and obstacle avoidance in robotics and automation;
4) Infrared (IR) Proximity Sensors:
- Operating Principle: IR proximity sensors emit infrared light and detect the reflection or interruption of this light by nearby objects;
- Application: Widely used in consumer electronics (e.g., smartphones), robotics, and home automation for object detection and gesture recognition;
5) Laser Proximity Sensors:
- Operating Principle: Similar to IR sensors, laser proximity sensors use laser beams instead of infrared light for accurate distance measurement;
- Application: Precise distance measurement in industrial applications, such as material handling and quality control;
6) Photoelectric Sensors:
- Operating Principle: Photoelectric sensors use light (typically visible or infrared) to detect the presence or absence of an object
- Application: Used in various industries for object counting, position sensing, and conveyor belt control;
7) Magnetic Proximity Sensors:
- Operating Principle: Magnetic proximity sensors detect changes in magnetic fields when a magnetic object enters their range;
- Application: Used in automotive, industrial, and security systems for detecting the position of doors, valves, and other moving parts;
8) Hall Effect Sensors:
- Operating Principle: Hall effect sensors detect changes in magnetic fields and are often used to detect the presence of magnets or measure the strength of magnetic fields;
- Application: Used in automotive applications (e.g., wheel speed sensors), industrial controls, and robotics;
9) Strain Gauge Sensors:
- Operating Principle: Strain gauges measure deformation or strain in materials when subjected to mechanical force
- Application: Used in load cells for measuring weight, force, and pressure in various industrial and scientific applications;
10) Radar Proximity Sensors:
- Operating Principle: Radar sensors use radio waves to detect the presence and position of objects;
- Application: Commonly used in automotive radar systems for adaptive cruise control and collision avoidance;
The choice of proximity sensor depends on factors such as the type of objects to be detected, the required sensing range, environmental conditions, and the specific application’s demands. Each type of sensor has its advantages and limitations, making it essential to select the most appropriate sensor for a given task.
The Working Principle of Proximity Sensors
Proximity sensors work on various principles depending on their type. Each type of proximity sensor detects the presence or absence of objects or measures their distance based on specific physical phenomena [3].
Here’s an overview of the working principles of common types of proximity sensors:
Inductive Proximity Sensors:
- Working Principle: These sensors generate an electromagnetic field from an internal coil. When a metallic object enters the sensor’s detection range, it disrupts the electromagnetic field. This disruption causes a change in the sensor’s impedance, which is detected electronically;
- Application: Inductive proximity sensors are primarily used for detecting the presence of metal objects and are commonly used in industrial automation;
Capacitive Proximity Sensors:
- Working Principle: Capacitive sensors emit an electric field. When an object (even non-metallic) enters the sensor’s field, it changes the capacitance of the sensor. This change is detected, and the sensor registers the object’s presence;
- Application: Capacitive sensors are used for detecting various materials, including liquids, powders, plastics, and even some solid objects. They are used in industries like food processing and packaging;
Ultrasonic Proximity Sensors:
- Working Principle: Ultrasonic sensors emit high-frequency sound waves (ultrasound). The sensor measures the time it takes for the sound waves to bounce off an object and return to the sensor. Using the speed of sound, the sensor calculates the distance to the object;
- Application: Ultrasonic sensors are commonly used for distance measurement, object detection, and obstacle avoidance in robotics and automation;
Infrared (IR) Proximity Sensors:
- Working Principle: IR proximity sensors emit infrared light. They detect the presence or absence of objects by measuring the reflection or interruption of the emitted light when it encounters an object;
- Application: IR sensors are used in various applications, including object detection in consumer electronics (e.g., smartphones), robotics, and home automation;
Laser Proximity Sensors:
- Working Principle: Laser proximity sensors use a laser beam instead of infrared light. They operate similarly to IR sensors but offer greater precision and accuracy in distance measurement;
- Application: Laser sensors are used in applications requiring highly accurate distance measurement, such as industrial automation and quality control;
Photoelectric Sensors:
- Working Principle: Photoelectric sensors use visible or infrared light to detect the presence or absence of an object. They rely on the interruption or reflection of the emitted light to trigger a response;
- Application: Photoelectric sensors are widely used for object counting, position sensing, and conveyor belt control in various industries [4];
Magnetic Proximity Sensors:
- Working Principle: Magnetic proximity sensors detect changes in magnetic fields when a magnetic object enters its range. They use the Hall effect or other magnetic sensing techniques;
- Application: These sensors are used in applications like automotive systems (e.g., detecting door positions) and industrial controls;
Hall Effect Sensors:
- Working Principle: Hall effect sensors detect changes in magnetic fields and convert them into electrical signals. They are often used to detect the presence of magnets or measure the strength of magnetic fields;
- Application: Hall effect sensors are used in automotive applications (e.g., wheel speed sensors), industrial controls, and robotics;
The choice of a specific type of proximity sensor depends on the requirements of the application, including the type of objects to be detected, the desired sensing range, and environmental conditions. Each type of sensor has its advantages and limitations, making it essential to select the most suitable sensor for a particular task.
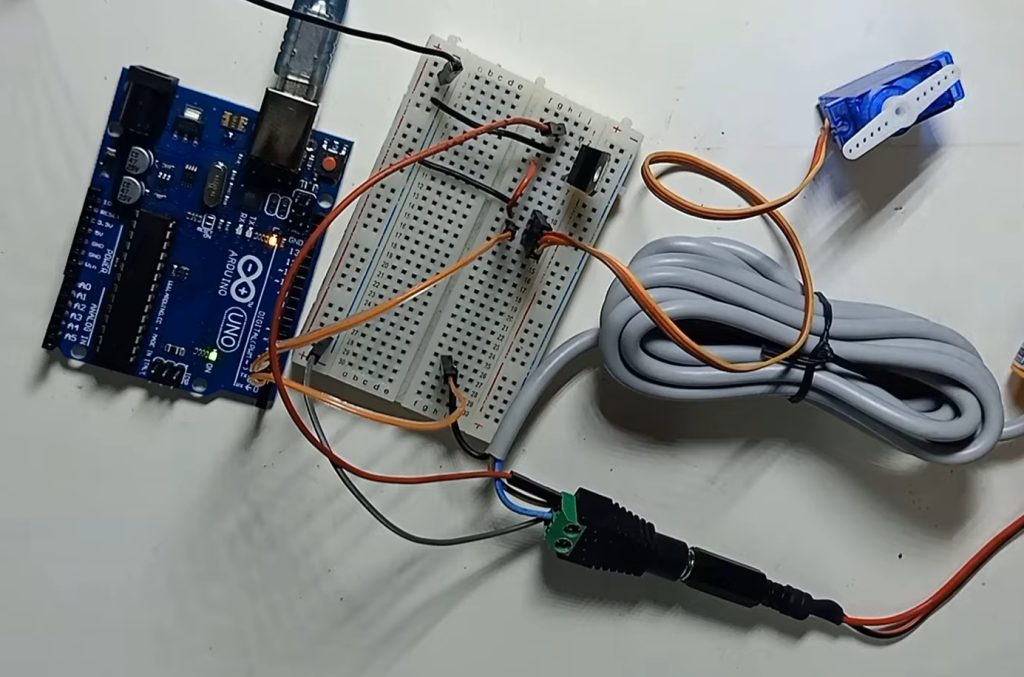
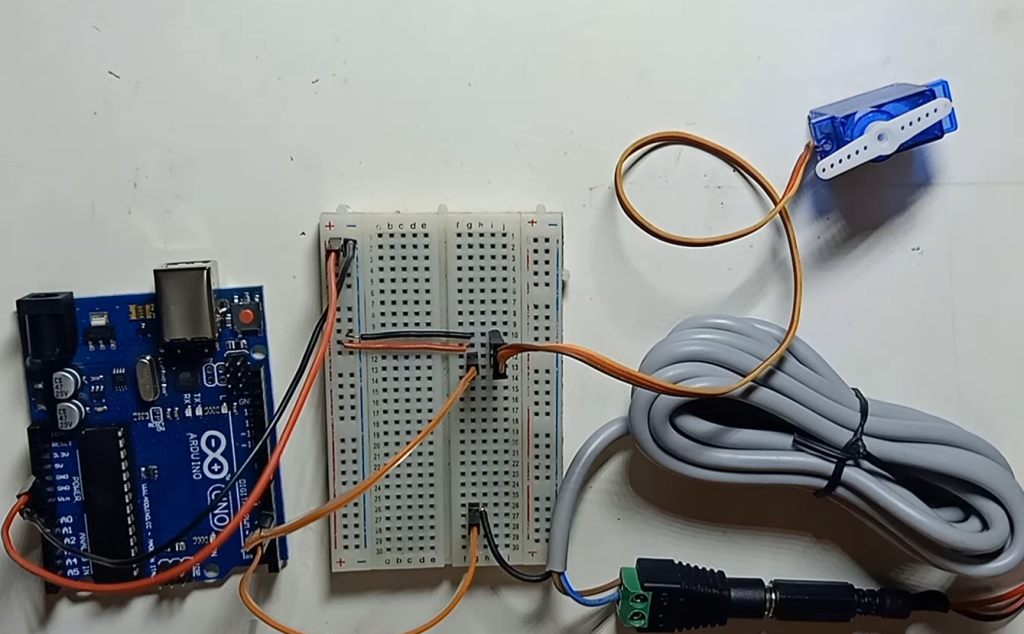
How to Use a Proximity Sensor With an Arduino Uno:
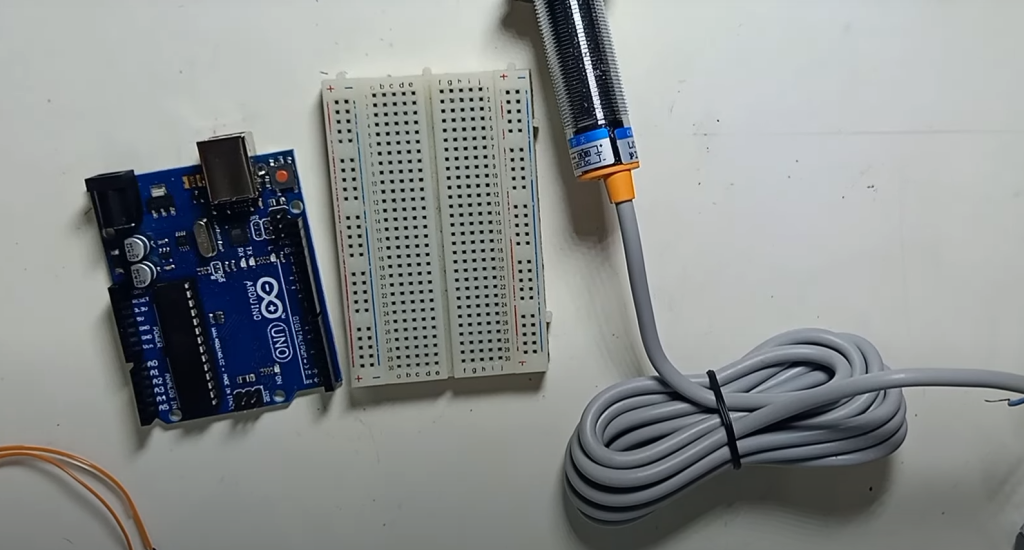
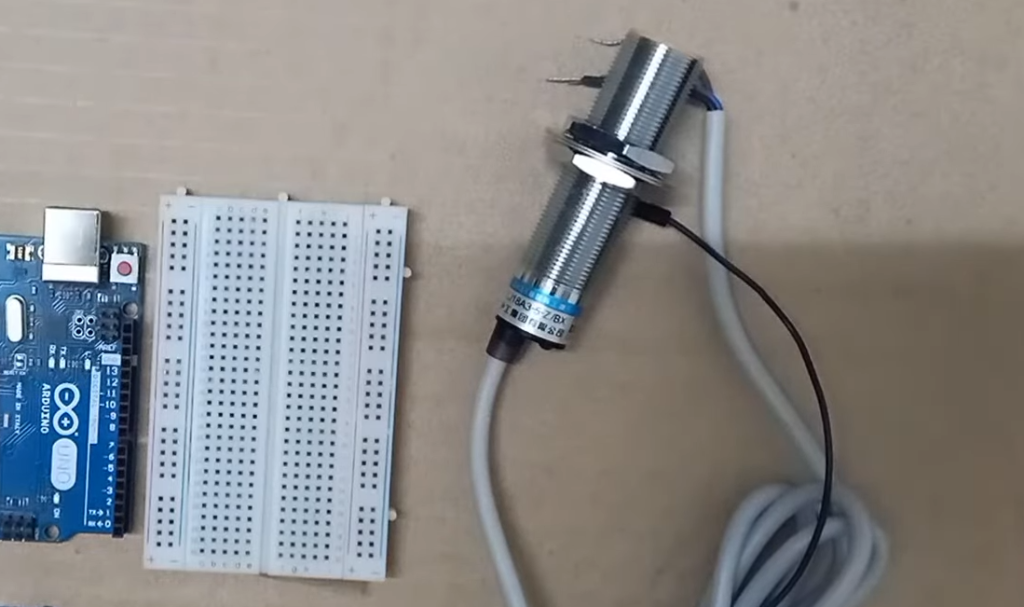
Required Materials and Equipment:
Hardware:
- Arduino Uno board;
- Proximity sensor (e.g., VCNL4010, commonly used);
- Breadboard and jumper wires;
- Resistor (optional, if needed for the specific sensor);
- USB cable for Arduino power and programming;
Tools:
- Computer with Arduino IDE installed;
- USB cable for connecting the Arduino to your computer;
Software:
- Arduino IDE (download and install it from the official Arduino website);
Choosing the Right Sensor:
For this example, we’ll use the VCNL4010 proximity sensor. Ensure you have the datasheet for your specific sensor to understand its pinout, voltage requirements, and communication protocol (e.g., I2C, SPI) [5].
Circuit Diagram:
Here’s a basic circuit diagram for connecting the VCNL4010 sensor to an Arduino Uno:
VCNL4010 Sensor Arduino Uno
————— ————-
VCC (Power) 3.3V
GND (Ground) GND
SDA (Data) A4 (for I2C communication)
SCL (Clock) A5 (for I2C communication)
If your sensor requires a different voltage level, make sure to connect it to the appropriate power source (e.g., 5V or 3.3V), and adjust the connections accordingly. Additionally, some sensors may require a pull-up resistor between the SDA and VCC pins; consult the datasheet for your specific sensor for such details.
VCNL4010 Power Pins:
- VCC: Connect to 3.3V (or the appropriate voltage level for your sensor);
- GND: Connect to Arduino GND;
Data Pins Explanation:
- SDA (Serial Data): Connect to Arduino A4 for I2C communication;
- SCL (Serial Clock): Connect to Arduino A5 for I2C communication;
Installing the Library:
- Open the Arduino IDE on your computer;
- Go to “Sketch” > “Include Library” > “Manage Libraries…”;
- In the Library Manager, type “VCNL4010” into the search bar;
- Click the “Install” button to install the Adafruit VCNL4010 library, which provides functions to interface with the sensor;
Trying the Demo:
Now, let’s write a simple Arduino sketch to read proximity data from the VCNL4010 sensor.
Use the following example code as a starting point:
#include <Wire.h>
#include <Adafruit_VCNL4010.h>
Adafruit_VCNL4010 vcnl;
void setup() {
Serial.begin(9600);
if (!vcnl.begin()) {
Serial.println(“Failed to find VCNL4010 sensor, please check your connections!”);
while (1);
}
Serial.println(“VCNL4010 found!”);
}
void loop() {
uint16_t proximity = vcnl.readProximity();
Serial.print(“Proximity: “);
Serial.println(proximity);
delay(500); // You can adjust the delay as needed
}
Connect your Arduino Uno to your computer using the USB cable.
Select the correct board and port under the “Tools” menu in the Arduino IDE.
Upload the sketch to the Arduino [6].
Open the Arduino IDE’s Serial Monitor (Tools > Serial Monitor) to view the proximity data from the sensor.
With this code, you should see proximity readings printed in the Serial Monitor. Adjust the delay as needed for your application.
This is a basic example to get you started with a proximity sensor. Depending on your project, you can use the sensor’s data for various purposes, such as controlling LEDs, triggering actions, or creating interactive projects. Be sure to refer to the sensor’s datasheet and library documentation for more advanced features and configurations specific to your sensor model.

How to Make a Simple Proximity Sensor Using Arduino?
Required Materials and Equipment:
Hardware:
- Arduino board (e.g., Arduino Uno);
- Infrared (IR) emitter (IR LED);
- Infrared (IR) receiver module (IR photodiode or IR sensor);
- Resistor (220-330 ohms);
- Jumper wires;
- Breadboard;
Tools:
- Computer with Arduino IDE installed;
- USB cable for connecting the Arduino to your computer;
Circuit Connections:
IR Emitter (IR LED):
- Connect the longer lead (anode) of the IR LED to a digital output pin on the Arduino (e.g., Pin 9);
- Connect the shorter lead (cathode) of the IR LED to a current-limiting resistor (220-330 ohms);
- Connect the other end of the resistor to the Arduino’s GND (Ground) pin;
IR Receiver Module (IR Photodiode):
- Connect the receiver’s VCC (Power) pin to 5V on the Arduino;
- Connect the receiver’s GND (Ground) pin to GND on the Arduino;
- Connect the receiver’s OUT (Output) pin to an analog input pin on the Arduino (e.g., A0);
Arduino Sketch (Code):
// Define the pins
const int irEmitterPin = 9; // Digital pin connected to the IR emitter
const int irReceiverPin = A0; // Analog pin connected to the IR receiver
void setup() {
pinMode(irEmitterPin, OUTPUT);
digitalWrite(irEmitterPin, LOW); // Turn off the IR emitter initially
Serial.begin(9600);
}
void loop() {
// Turn on the IR emitter
digitalWrite(irEmitterPin, HIGH);
delay(10); // Allow time for the emitter to stabilize
// Read the analog value from the IR receiver
int irValue = analogRead(irReceiverPin);
// Print the sensor value to the Serial Monitor
Serial.println(irValue);
// Turn off the IR emitter
digitalWrite(irEmitterPin, LOW);
// Wait before taking the next reading
delay(1000); // Adjust the delay as needed
}
Instructions:
- Connect the components as described in the “Circuit Connections” section;
- Open the Arduino IDE on your computer;
- Copy and paste the provided Arduino sketch into the IDE;
- Select the correct board type and COM port under the “Tools” menu;
- Upload the sketch to your Arduino;
- Open the Serial Monitor in the Arduino IDE to see the analog values from the IR receiver module. You should see values change when you place an object close to the IR emitter and receiver [7];
How It Works:
The IR emitter (IR LED) emits infrared light when turned on.
The IR receiver module (IR photodiode) detects the infrared light. When an object is placed close to the IR emitter and reflects the IR light back to the receiver, the receiver’s output voltage changes.
The analogRead() function in the Arduino sketch reads the voltage from the IR receiver, which is converted to a digital value.
The Arduino then prints this digital value to the Serial Monitor, allowing you to see changes in the sensor’s reading when an object is nearby.
The delay between readings (1 second in this example) can be adjusted as needed for your specific application.
FAQ:
1. Can we connect the proximity sensor with Arduino?
Yes, you can connect a proximity sensor to an Arduino. Proximity sensors typically have output pins that can be connected to Arduino’s digital or analog input pins, depending on the type of sensor. You may also need to provide the sensor with the appropriate power supply voltage [8].
2. What is a magnetic proximity sensor?
A magnetic proximity sensor, also known as a magnetic proximity switch, is a sensor that detects the presence or absence of a magnetic field. When a magnetic field is within its detection range, it triggers the sensor to change its state, indicating proximity. These sensors are commonly used to detect the opening and closing of doors, windows, or lids in various applications.
3. What is a capacitive proximity sensor?
A capacitive proximity sensor is a sensor that detects the presence or proximity of an object based on changes in capacitance. When an object enters the sensor’s electromagnetic field, it alters the capacitance, triggering a response. Capacitive proximity sensors are used in touchscreens, liquid-level detection, and object-detection applications.
4. Where are proximity sensors used?
Proximity sensors are used in various applications, including:
- Industrial automation for object detection and positioning;
- Automotive systems for obstacle detection, parking assistance, and collision avoidance;
- Mobile devices for touchscreens and proximity detection;
- Home automation for motion sensing and security systems;
- Robotics for object detection and navigation;
- Gaming controllers for motion sensing;
- Elevators for floor detection and door control [9];
5. How to use an inductive proximity sensor with Arduino?
To use an inductive proximity sensor with Arduino, follow these general steps:
- Connect the sensor’s power supply pins to the appropriate voltage source (usually 5V or 12V);
- Connect the sensor’s ground pin to Arduino’s ground;
- Connect the sensor’s output pin to one of Arduino’s digital input pins
- Write Arduino code to read the digital input and take action based on sensor output changes;
6. What does a proximity sensor do in Arduino?
A proximity sensor in Arduino detects the presence or absence of objects within its sensing range. Arduino can read the sensor’s output and use this information to trigger actions or make decisions in various projects, such as turning on lights when someone approaches, detecting obstacles, or triggering alarms.
7. How to use a 24v sensor with Arduino?
To use a 24V sensor with Arduino, you’ll typically need a voltage level shifter or voltage divider to step down the sensor’s output voltage to the 5V or 3.3V range that Arduino can safely handle. Additionally, ensure you have a common ground connection between the sensor and Arduino.
8. What is the best proximity sensor for Arduino?
The choice of the best proximity sensor for Arduino depends on your specific project requirements. Some popular types of proximity sensors for Arduino include ultrasonic sensors, infrared (IR) sensors, capacitive sensors, and inductive sensors. The best sensor will vary based on factors such as sensing range, object material, and environmental conditions.
9. Is a proximity sensor an input or output?
A proximity sensor is typically an input device. It detects external stimuli, such as the presence or absence of an object, and provides this information as input to a microcontroller or other electronic system for processing.
10. How are proximity sensors used?
Proximity sensors are used to detect changes in their sensing environment, such as the presence or absence of an object within their specified range. They convert this information into an electrical signal, which is then processed by a microcontroller or other control system to trigger specific actions or responses.
11. How to transmit IR signals with Arduino?
To transmit IR (infrared) signals with Arduino, you can use an IR LED and an IR transmitter module. You need to:
- Connect the IR LED to an Arduino output pin;
- Install and use an IR library like “IRremote” to generate IR codes for the specific device you want to control;
- Use the library to send the IR codes through the IR LED to control your target device, like a TV or air conditioner [10];
12. What is the distance of the proximity sensor in Arduino?
The distance that a proximity sensor can detect objects varies depending on the type and model of the sensor. Ultrasonic sensors, for example, can detect objects at distances ranging from a few centimeters to several meters, while infrared or capacitive sensors typically have shorter detection ranges, often within a few centimeters.
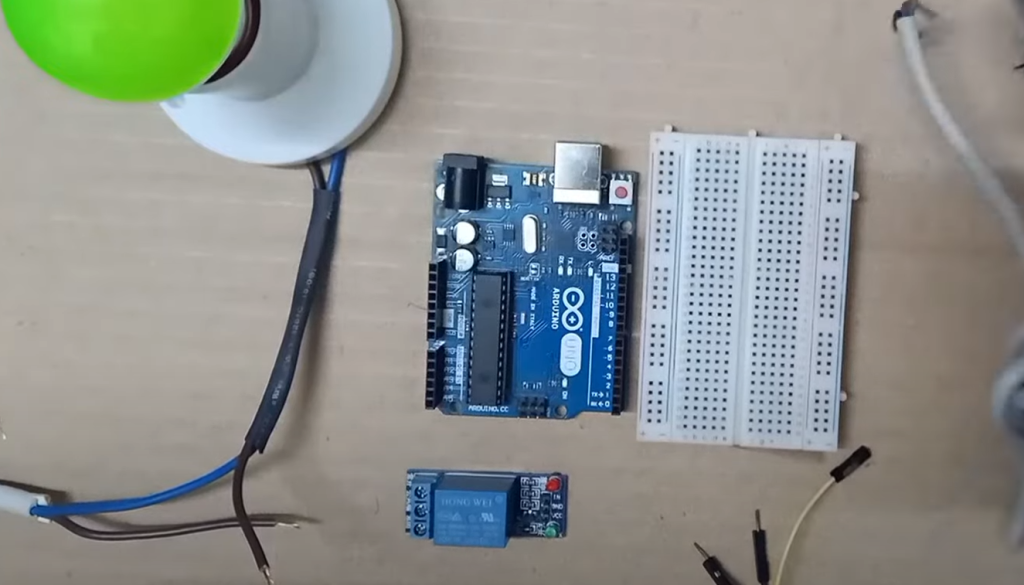
13. How do you connect a proximity sensor to a relay?
To connect a proximity sensor to a relay, follow these steps:
- Connect the power supply for the proximity sensor to a suitable voltage source;
- Connect the sensor’s ground to the common ground with the relay and the control electronics;
- Connect the sensor’s output to a digital or analog input of a microcontroller, if needed;
- Connect the relay’s control input to an output pin of the microcontroller;
- Write code to monitor the sensor’s output and trigger the relay based on the desired conditions;
14. What are the 4 types of proximity sensors?
The four main types of proximity sensors are:
- Inductive Proximity Sensors: Detect metal objects by generating electromagnetic fields;
- Capacitive Proximity Sensors: Detect objects based on changes in capacitance;
- Ultrasonic Proximity Sensors: Use sound waves to measure distance and detect objects;
- Infrared (IR) Proximity Sensors: Emit and detect infrared light to sense nearby objects;
15. Is a proximity sensor analog or digital?
Proximity sensors can be both analog and digital, depending on their design and output. Some proximity sensors provide analog output signals, typically voltage or current levels that vary proportionally with proximity. Others offer digital output, changing between distinct states (e.g., high and low) based on proximity thresholds.
16. How do you control a proximity sensor?
You can control a proximity sensor by interfacing it with a microcontroller or control circuit. Write code to monitor the sensor’s output, set threshold values for proximity detection, and trigger actions or responses when the sensor detects objects within its range. The specific control method may vary depending on the sensor type and the requirements of your application.
17. Do proximity sensors need power?
Yes, proximity sensors require power to operate. Most proximity sensors are powered by a supply voltage (e.g., 5V or 12V) and have ground connections. Some sensors may also require additional power for their outputs or internal circuitry.
18. How to connect a sensor to Arduino Wireless?
To connect a sensor to Arduino wirelessly, you can use wireless communication modules like Bluetooth, Wi-Fi, or RF transceivers.
Here are the general steps:
- Connect the sensor to Arduino as usual using appropriate pins;
- Add a wireless communication module to your Arduino setup;
- Write code to read data from the sensor and transmit it wirelessly;
- On the receiving end (another Arduino or a computer), receive and process the wireless data;
- The choice of wireless module depends on your range and data rate requirements;
Useful Video: Inductive Proximity Sensor with Arduino Uno
References:
- https://robocraze.com/blogs/post/interfacing-proximity-sensors-with-ardunio
- https://maker.pro/arduino/tutorial/how-to-use-a-proximity-sensor-with-an-arduino-uno
- https://www.electroniclinic.com/proximity-sensors-inductive-and-capacitive-proximity-sensors-with-arduino/
- https://docs.arduino.cc/tutorials/nano-33-ble-sense/proximity-sensor
- https://www.tutorialspoint.com/interface-proximity-sensor-with-arduino
- https://electropeak.com/learn/interfacing-inductive-proximity-sensor-lj12a3-4-z-3-wire-with-arduino/
- https://www.instructables.com/Simple-IR-proximity-sensor-with-Arduino/
- https://www.wellpcb.com/arduino-proximity-sensor.html
- https://www.wikihow.tech/Make-a-Simple-Proximity-Sensor-Using-Arduino
- https://community.element14.com/challenges-projects/project14/iot-in-the-cloud/b/blog/posts/proximity-sensor-hidden-ir-detection-using-arduino