
Sound sensors, also known as sound detectors or sound modules, are essential components in the world of electronics and robotics. They play a crucial role in capturing and processing audio signals, enabling devices to respond to sound stimuli. In this comprehensive article, we will delve into the world of sound sensors, exploring their components, pinout, and how they work. Furthermore, we will examine the diverse applications of sound sensors in the realm of Arduino-based projects.
What Is A Sound Sensor?
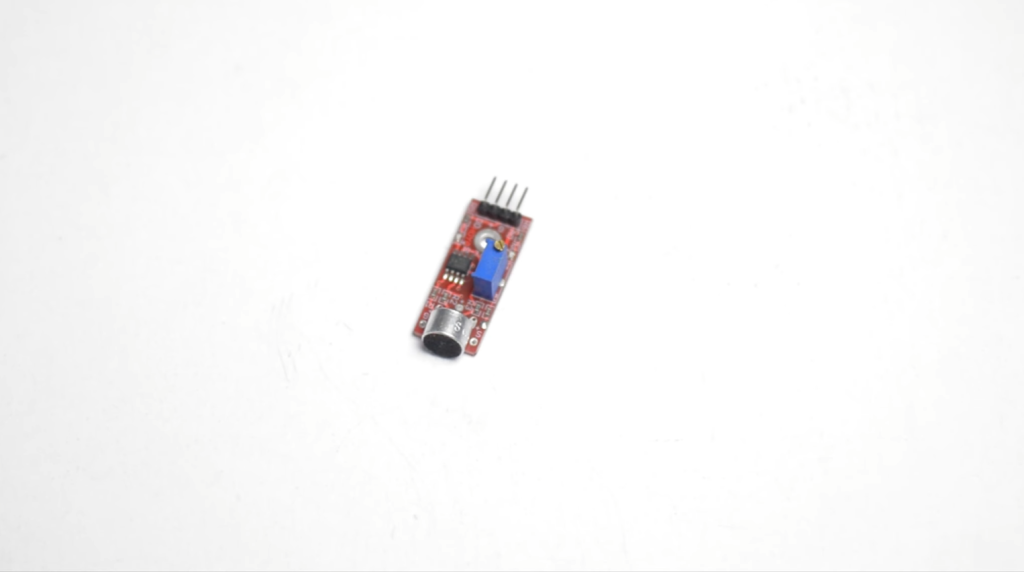
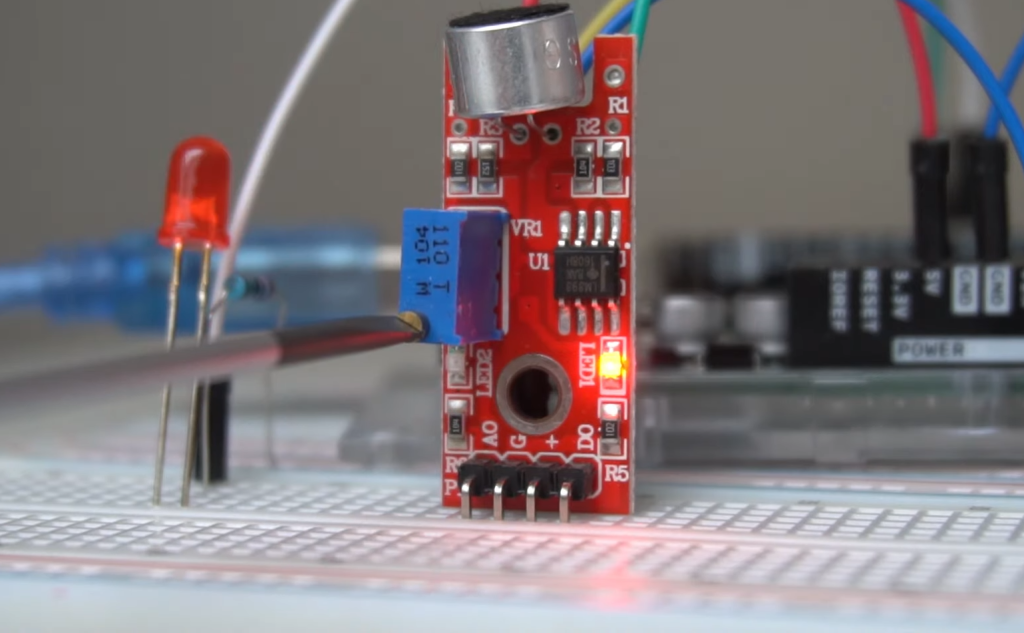
Sound Sensor Module: Parts
Sound sensor modules typically consist of several key components that work together to capture and process sound. Understanding these components is essential for anyone working with sound sensors in their projects.
Here are the main parts you’ll find in a typical sound sensor module:
Microphone
At the heart of a sound sensor module lies the microphone, which is responsible for capturing sound waves from the environment. These microphones are usually small and sensitive, allowing them to pick up a wide range of frequencies and amplitudes.
Amplifier
Sound signals captured by the microphone are often quite weak and need to be amplified for further processing. The amplifier in a sound sensor module boosts the signal’s amplitude while maintaining its integrity.
Comparator
A comparator is a vital component that helps determine if the incoming sound exceeds a predefined threshold. When the sound level crosses this threshold, the comparator triggers an output signal, which can be used to activate other components or trigger specific actions in a microcontroller.
Potentiometer
To adjust the sensitivity of the sound sensor, a potentiometer is often included. This allows you to fine-tune the threshold at which the sensor responds to sound, making it adaptable to different environments and sound levels.
Output Signal
The sound sensor module produces an output signal, often in the form of a digital or analog voltage, depending on the module’s design and configuration. This signal indicates the presence of sound and its intensity.
Sound Sensor Pinout
To effectively utilize a sound sensor module, it’s crucial to understand its pinout, which describes the purpose of each pin and how they connect to other components or a microcontroller like Arduino.
Although specific sound sensor modules may have variations, a typical sound sensor pinout consists of the following pins:
VCC (Voltage)
This pin provides the supply voltage needed to power the sound sensor module. It is typically connected to a 5V source when used with Arduino [2].
GND (Ground)
The GND pin is the common ground reference for the module, ensuring proper electrical connectivity with the microcontroller.
OUT (Output)
The OUT pin carries the output signal generated by the sound sensor. Depending on the module, this signal can be digital (high or low) or analog (a varying voltage level).
NC (Not Connected)
In some modules, you may find an NC pin, which is not connected to anything and can be left unconnected.
Now that we have a clear understanding of the components and pinout of a sound sensor module, let’s explore how these modules work and the principles behind their operation.
How Does a Sound Sensor Module Work?
Sound sensors operate on the fundamental principle of converting acoustic waves, or sound signals, into electrical signals that can be processed by microcontrollers like Arduino.
The following steps elucidate the inner workings of a sound sensor module:
Sound Capture
The process begins with the microphone, which captures sound waves from the environment. These sound waves consist of varying air pressure levels corresponding to the sound’s amplitude and frequency [3].
Signal Amplification
The captured sound signal is typically weak and needs to be strengthened for effective processing. This is where the amplifier comes into play. It boosts the amplitude of the sound signal while maintaining its fidelity.
Threshold Comparison
After amplification, the signal is passed through a comparator, which compares it to a predefined threshold level. If the signal’s amplitude exceeds this threshold, the comparator generates an output signal.
Output Generation
The output signal, usually available at the OUT pin of the sound sensor module, signifies the presence of sound and its intensity. This signal can be either digital or analog, depending on the module’s configuration.
Microcontroller Integration
To utilize the data provided by the sound sensor, it is often interfaced with a microcontroller like Arduino. The microcontroller can then process the sound input, make decisions based on programmed logic, and initiate actions or display information accordingly.
Sound sensors can be adjusted for sensitivity using the potentiometer, allowing you to customize their response to different sound levels and environmental conditions. This adjustability makes them versatile tools for various applications.
Use Cases Of Arduino Sound Sensors
Arduino sound sensors find extensive applications across different fields and industries due to their ability to detect and respond to sound stimuli.
Here are some prominent use cases where sound sensors play a pivotal role:
Sound-Activated Lighting Systems
Sound sensors can be used to create interactive lighting systems that respond to music or ambient sound. In entertainment venues, home automation, or art installations, sound-activated lights can add a dynamic and engaging element.
Noise Monitoring and Control
Sound sensors are employed in noise pollution monitoring systems. These sensors can continuously measure sound levels in urban areas, factories, or construction sites, helping authorities enforce noise regulations and ensure public health.
Home Security
Sound sensors can enhance home security systems by detecting unusual sounds, such as breaking glass or forced entry. When integrated with an alarm system, they can trigger alerts and notifications in case of suspicious noise.
Voice-Activated Devices
Voice recognition technology relies on sound sensors to capture and process spoken commands. These sensors help enable voice-activated devices like smart speakers, virtual assistants, and voice-controlled appliances.
Industrial Automation
In industrial settings, sound sensors are used to monitor equipment and machinery for unusual sounds that may indicate faults or maintenance needs. This proactive approach helps prevent costly breakdowns and downtime.
Robotics and Autonomous Vehicles
Sound sensors are utilized in robotics and autonomous vehicles to detect and navigate based on sound cues, such as following sound beacons or avoiding obstacles with sound-producing elements.
Musical Instruments and Synthesizers
Sound sensors can be integrated into musical instruments and synthesizers to create electronic music that responds to external sound inputs or ambient noise, enabling unique musical compositions.
Environmental Monitoring
Researchers use sound sensors in environmental monitoring applications to study and analyze natural soundscapes, track wildlife, and conduct bio-acoustic research.
Healthcare
Sound sensors are employed in medical devices such as hearing aids and cochlear implants to capture and process sound for individuals with hearing impairments.
Smart Transportation
Sound sensors can be used in smart transportation systems to detect sirens, horns, or other emergency vehicle sounds, helping to improve traffic management and safety.
In each of these use cases, Arduino sound sensors play a crucial role in capturing and responding to sound, enabling a wide range of applications that enhance convenience, safety, and efficiency.
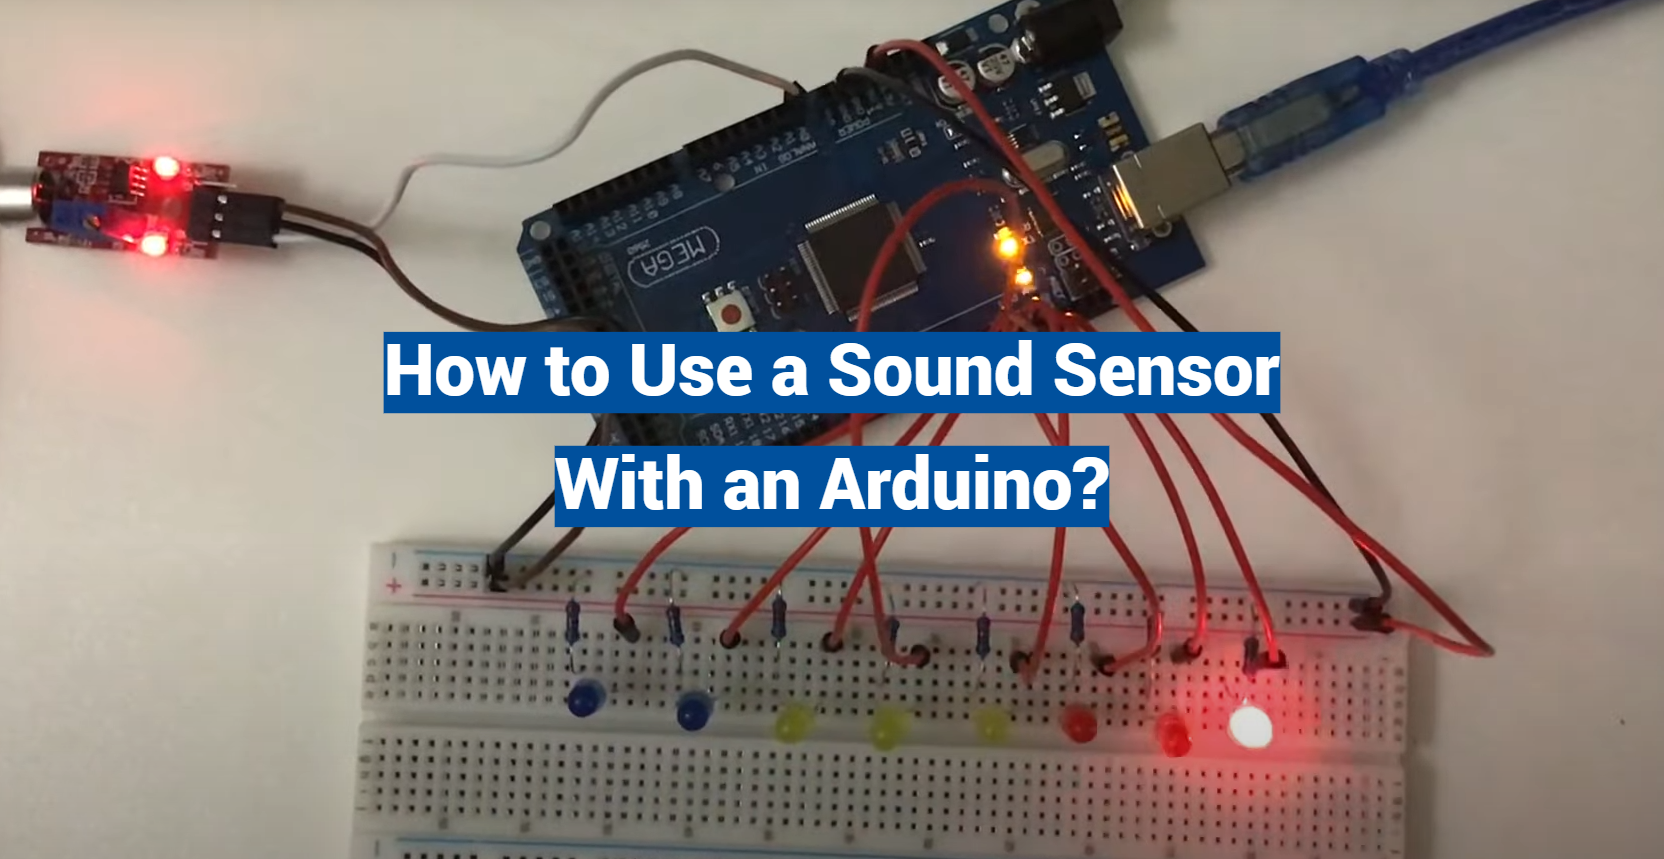
How To Interface A Sound Sensor With Arduino:
Circuit Diagram for Sound Sensor Module
Before you start interfacing your sound sensor with Arduino, it’s essential to have a clear understanding of the circuit connections [4].
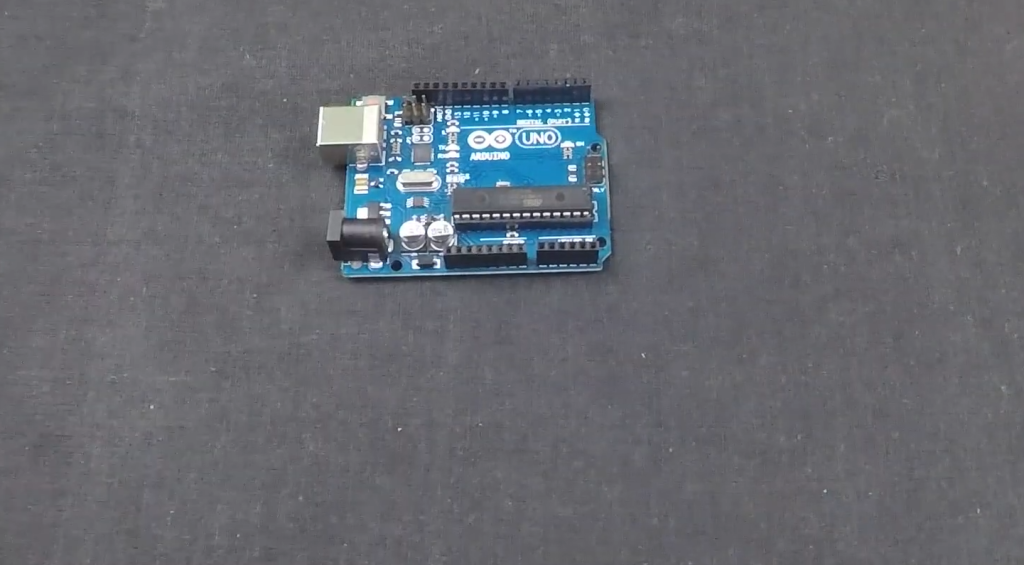
Sound Sensor with Arduino UNO – Connection Diagram
To ensure a successful connection between the sound sensor module and Arduino UNO, follow this connection diagram:
- VCC (Voltage): Connect the VCC pin of the sound sensor module to the 5V output on the Arduino UNO board;
- GND (Ground):Connect the GND pin of the sound sensor module to any of the GND (ground) pins on the Arduino UNO;
- OUT (Output):Connect the OUT pin of the sound sensor module to any digital input pin on the Arduino UNO. You can choose any available digital pin, but remember to adjust the pin number in your Arduino code accordingly;
Additionally, if you want to include a speaker or buzzer to produce sound output based on the sensor’s readings, connect it to one of the digital output pins (e.g., pin 8) and the GND pin on the Arduino UNO. Make sure to adjust the pin number in your code to match the one you’ve used.
Arduino Sound Sensor Code
To interface the sound sensor with Arduino, you’ll need to write a simple Arduino sketch.
Here’s an example code snippet to get you started:
// Define the pin for the sound sensor’s output
int soundSensorPin = 2; // Change this to the appropriate pin number
void setup() {
// Initialize the serial communication for debugging
Serial.begin(9600);
// Set the sound sensor pin as an input
pinMode(soundSensorPin, INPUT);
}
void loop() {
// Read the value from the sound sensor
int soundValue = digitalRead(soundSensorPin);
// Print the sound sensor value to the serial monitor
Serial.println(soundValue);
// You can add your logic here based on the sound sensor’s value
// For example, trigger an action when the sound level exceeds a threshold
// Add a short delay to avoid rapid readings
delay(100);
}
In this code, we read the digital value from the sound sensor and print it to the serial monitor. You can customize the code to perform specific actions or trigger events based on the sound sensor’s readings [5].
Working of the Sound Sensor Module
The sound sensor module functions by capturing sound waves from the environment and converting them into electrical signals.
Here’s a brief overview of how it works:
- Sound Capture:The microphone in the sound sensor captures sound waves, which are variations in air pressure caused by sound events;
- Signal Amplification: The captured sound signal is weak, so it passes through an amplifier to boost its amplitude while maintaining its fidelity;
- Threshold Comparison: The amplified signal is compared to a predefined threshold level using a comparator. When the sound level crosses this threshold, the module generates an output signal;
- Output Signal:The output signal is available at the OUT pin of the sound sensor module. It can be either digital (high or low) or analog (a varying voltage level), depending on the module’s configuration;
By interfacing the sound sensor with Arduino, you can capture and process these signals, enabling you to respond to sound events in your projects.
Projects Using Arduino and Sound Sensor Module
Now that you know how to interface a sound sensor with Arduino, here are some exciting project ideas to inspire your creativity:
Clap-Activated Lights
Create a lighting system that turns on or changes colors when it detects a series of claps or specific sound patterns.
Sound-Responsive Music Visualizer
Build a music visualizer that displays colorful patterns or animations on an LED matrix or RGB LED strip in sync with the beat of the music.
Smart Doorbell
Enhance your doorbell with a sound sensor to detect and notify you when someone rings the doorbell, even when you’re not at home.
Noise Level Monitor
Develop a noise level monitoring system for your workspace or home. It can provide real-time feedback on noise levels and remind you to keep it down when it gets too loud.
Wildlife Sound Recorder
Create a device that records and analyzes wildlife sounds, helping you identify different species in your area.
Voice-Controlled Home Automation
Integrate sound sensors with voice recognition to control lights, appliances, and other smart devices in your home using voice commands [6].
Sound-Based Alarm System
Design an alarm system that triggers an alarm when it detects unusual sounds or disturbances during the night.
Interactive Art Installation
Build an interactive art installation that responds to visitors’ voices or other ambient sounds with visual effects or animations.
Sound-Activated Camera Shutter
Develop a camera trigger that takes photos when it detects a specific sound, such as a handclap or a spoken word.
Sound-Enabled Robot
Create a robot that navigates based on sound cues, moving towards sources of sound or responding to voice commands.
Supporting Files
To assist you with interfacing a sound sensor with Arduino and implementing the projects mentioned above, we’ve provided some supporting files and resources:
- Arduino Sound Sensor Code: Download the Arduino code template to get started with your sound sensor projects;
- Sound Sensor Datasheet:Access the datasheet for your specific sound sensor module to understand its technical specifications and pinout details;
- Project Tutorials: Explore detailed tutorials and step-by-step guides for specific sound sensor projects on Arduino’s official website and various online electronics communities;
How to Use a Sound Sensor With Arduino:
Parts
Before you begin using a sound sensor with Arduino, ensure you have the following components:
- Sound Sensor Module: This is the main sensor unit responsible for capturing sound signals;
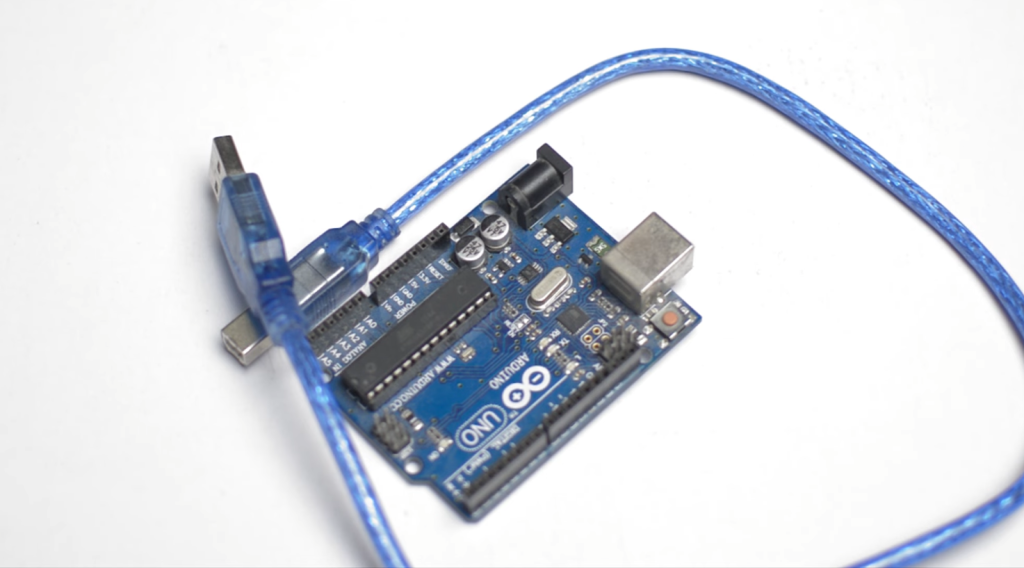
- Arduino Board: You can use popular Arduino boards like Arduino Uno, Arduino Nano, or others;
- Jumper Wires: These will be used to establish connections between the sound sensor module and Arduino;
- Breadboard (optional):If you’re using a breadboard, it can help you make temporary connections;
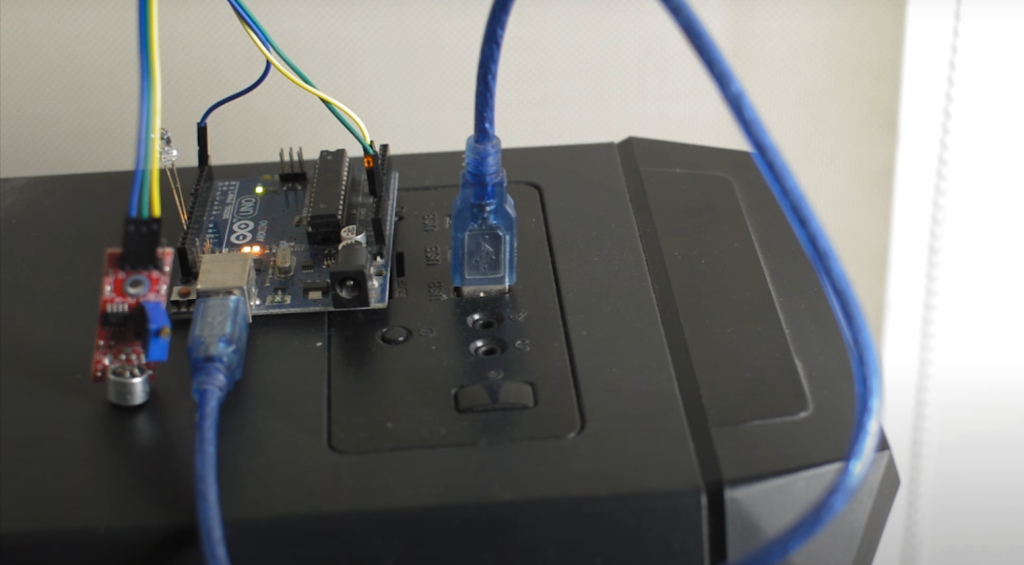
Connections
Properly connecting the sound sensor module to your Arduino is crucial. Here’s how to do it.
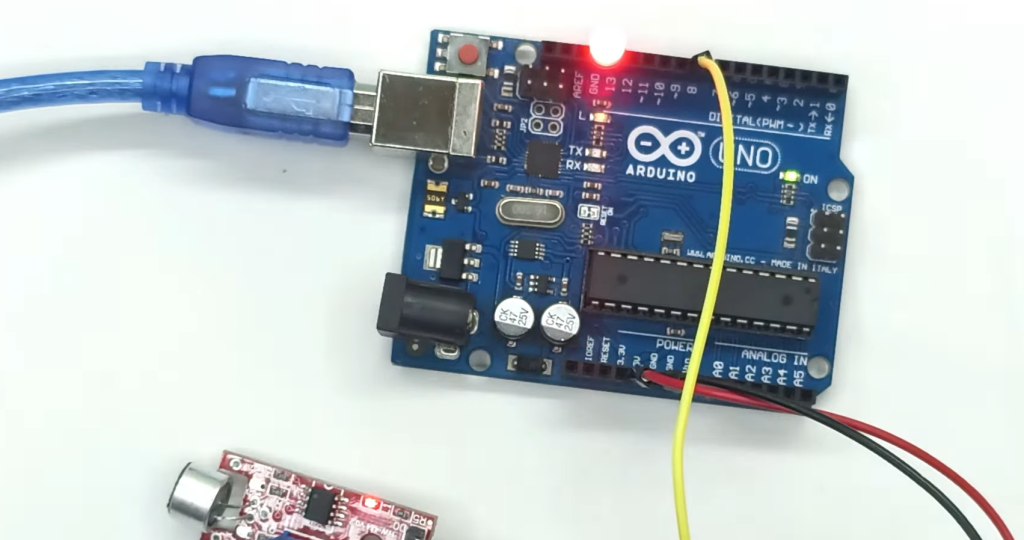
1) Connect VCC and GND:
Connect the VCC (Voltage) pin of the sound sensor module to the 5V output on your Arduino.
Connect the GND (Ground) pin of the sound sensor module to any GND pin on your Arduino.
2) Connect OUT Pin:
Connect the OUT (Output) pin of the sound sensor module to a digital input pin on your Arduino. You can choose any available digital pin, but remember to note the pin number for programming [7].
3) Connect a Speaker or Buzzer (if desired):
- Connect the positive (usually red) lead of the speaker or buzzer to a digital output pin on your Arduino (e.g., pin 8);
- Connect the negative (usually black) lead of the speaker or buzzer to a GND pin on your Arduino;
Programming the Arduino
Now that you have connected the sound sensor to your Arduino, you need to write an Arduino sketch to read and respond to sound sensor data.
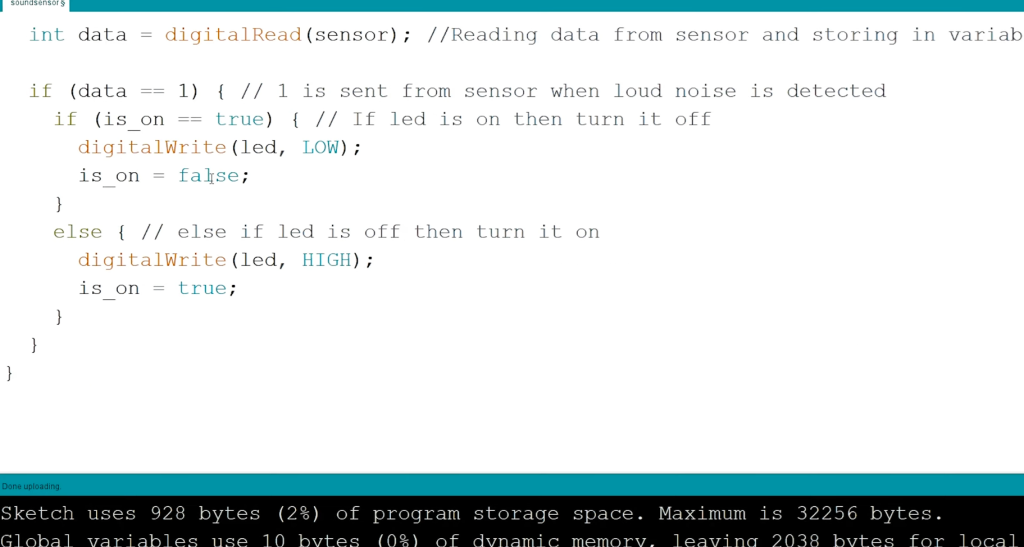
Here’s a basic example code to get you started:
// Define the pin for the sound sensor’s output
int soundSensorPin = 2; // Change this to the appropriate pin number
void setup() {
// Initialize the serial communication for debugging
Serial.begin(9600);
// Set the sound sensor pin as an input
pinMode(soundSensorPin, INPUT);
}
void loop() {
// Read the value from the sound sensor
int soundValue = digitalRead(soundSensorPin);
// Print the sound sensor value to the serial monitor
Serial.println(soundValue);
// You can add your logic here based on the sound sensor’s value
// For example, trigger an action when the sound level exceeds a threshold
// Add a short delay to avoid rapid readings
delay(100);
}
This code reads the digital value from the sound sensor and prints it to the serial monitor. You can customize the code to perform specific actions or trigger events based on the sound sensor’s readings.
Adjusting the Sensitivity of the Sound Sensor
The sensitivity of a sound sensor can be adjusted using a potentiometer, which is often present on the module.
To adjust the sensitivity:
- Locate the potentiometer on the sound sensor module;
- Use a small screwdriver to turn the potentiometer clockwise to increase sensitivity or counterclockwise to decrease sensitivity;
- Experiment with different sensitivity levels until you achieve the desired response to sound events;
Troubleshooting
If you encounter issues while using a sound sensor with Arduino, consider the following troubleshooting steps:
- Check Connections: Ensure all connections are secure and correctly made. Loose or incorrect connections can lead to problems;
- Power Supply: Verify that the sound sensor is receiving the correct voltage (usually 5V) and is properly grounded;
- Code Errors: Review your Arduino code for syntax errors or logical mistakes. Double-check pin assignments and sensor readings;
- Serial Monitor:Use the Arduino IDE’s Serial Monitor to debug and print sensor values. Check if the sensor is providing expected readings;
- Sensitivity Adjustment:If the sensor is not responding as expected, try adjusting the sensitivity using the potentiometer;
- Sensor Health: Ensure that the sound sensor module is in good condition. Inspect for any physical damage or loose components;
- Environmental Factors: Consider external factors that might affect the sensor, such as excessive noise or interference;
- Library Usage:If you’re using a specific library with your sound sensor, ensure that it is correctly installed and compatible with your hardware [8];
FAQ:
Does Arduino have a sound sensor?
Arduino boards do not come with built-in sound sensors, but you can easily connect external sound sensors to Arduino for various applications that involve sound detection and analysis.
How to make sound using Arduino?
To generate sound using Arduino, you can connect a buzzer or speaker to one of its digital pins. Then, you can use an Arduino library like “tone()” to create different frequencies and durations of sound, allowing you to play melodies or produce specific sounds.
How to connect a microphone sensor to Arduino?
To connect a microphone sensor to Arduino, follow these steps:
- Connect the VCC pin of the microphone sensor to 5V on Arduino;
- Connect the GND pin of the microphone sensor to one of the GND pins on Arduino;
- Connect the OUT pin of the microphone sensor to an analog or digital pin on Arduino, depending on your sensor’s type [9];
- Can an Arduino measure sound frequency?
Arduino can measure sound intensity or volume, but it cannot directly measure sound frequency. You would need a more specialized sensor like a sound spectrum analyzer for precise frequency measurements.
How do you calibrate a sound sensor?
To calibrate a sound sensor, you typically adjust its sensitivity using a potentiometer on the sensor module. You can monitor sensor readings in your Arduino code and adjust the potentiometer until it responds appropriately to the desired sound levels in your environment.
How to make Arduino beep?
To make an Arduino beep, you can connect a buzzer or speaker to one of its digital pins. Then, use the “tone()” function in your Arduino code to produce a beep or specific sound. You can specify the frequency and duration of the beep.
Can Arduino generate sound?
Yes, Arduino can generate sound using external components like buzzers, speakers, or sound modules. By controlling the voltage applied to these components with Arduino’s digital pins, you can produce various sound patterns and frequencies.
What is the difference between a 3-pin and a 4-pin sound sensor?
A 3-pin sound sensor typically includes VCC, GND, and OUT pins. It provides an analog output proportional to the sound intensity. A 4-pin sound sensor includes additional pins for digital output, allowing it to provide both analog and digital sound intensity readings, making it more versatile.
How does Arduino read a sensor?
Arduino reads a sensor by sending voltage or pulling it to a particular level and then measuring the response, either in analog voltage levels (analog sensors) or as a digital high/low signal (digital sensors). The sensor’s output is typically read using the “analogRead()” or ‘digitalRead()” functions in your Arduino code.
How can sound be used to detect objects?
Sound can be used for object detection by emitting sound waves and measuring the time it takes for the sound waves to bounce back (echo) after hitting an object. Ultrasonic sensors, like HC-SR04, use this principle to determine the distance to an object based on the time delay.
Can Arduino be used as an audio amplifier?
Arduino itself is not suitable for audio amplification, as it lacks the necessary power and components for high-quality audio output. However, you can use external audio amplifiers and interface them with Arduino to control audio playback and volume.
How to connect a Bluetooth sensor to Arduino?
To connect a Bluetooth sensor to Arduino, you typically use a Bluetooth module like HC-05 or HC-06. You connect the module’s TX pin to Arduino’s RX pin and the RX pin to Arduino’s TX pin. Additionally, connect VCC to 5V and GND to GND. After connecting, you can communicate with the sensor via serial communication in your Arduino code.
Can an ultrasonic sensor detect humans?
Yes, ultrasonic sensors can detect humans. They emit sound waves that bounce off objects, including humans, and measure the time it takes for the waves to return. By analyzing this time delay, you can determine the distance to the detected object, including a human.
How to use an ultrasonic sensor and buzzer with Arduino?
To use an ultrasonic sensor and buzzer with Arduino, connect the sensor as described in its datasheet, and connect the buzzer to a digital output pin. Use the ultrasonic sensor to measure distances, and if an object is detected within a certain range, trigger the buzzer to produce a sound alert.
How do sound sensors work?
Sound sensors work by capturing sound waves from the environment using a microphone. They amplify the weak sound signals, compare them to a threshold, and generate an output signal when the sound level exceeds the threshold. This output signal can be analog or digital, depending on the sensor type.
What are the disadvantages of sound sensors:
- Limited Frequency Range: Sound sensors may have limited frequency response, which can affect their ability to detect certain sounds;
- Sensitivity to Environmental Noise: They can be sensitive to background noise, making it challenging to isolate specific sound events;
- Calibration Needed: Sound sensors often require calibration to adjust sensitivity for different environments;
- Limited Directional Sensing: Most sound sensors have omnidirectional sensing, making it hard to determine the sound source’s direction [10];
What devices use sound sensors?
Sound sensors are used in various devices and applications, including:
- Home security systems;
- Noise pollution monitoring;
- Voice-controlled devices;
- Music instruments;
- Industrial automation;
- Robotics;
- Healthcare (hearing aids);
- Wildlife monitoring;
- Smart transportation systems;
What are the 5 types of sound sensors?
The five common types of sound sensors are:
- Microphone-based Sound Sensors;
- Sound Detection Modules (KY-038, KY-037, etc.);
- Sound Spectrum Analyzers;
- Ultrasonic Distance Sensors (HC-SR04);
- MEMS Microphones (Micro-Electro-Mechanical Systems);
How far can a sound sensor be detected?
The detection range of a sound sensor depends on its type and sensitivity settings. Typical microphone-based sound sensors can detect sounds within a range of a few meters to several meters, depending on the sound’s intensity and the sensor’s calibration.
Is a sound sensor analog or digital?
Sound sensors can be either analog or digital, depending on their design and purpose. Analog sound sensors provide an analog voltage output that varies with sound intensity. Digital sound sensors typically provide a binary signal (high or low) when the sound level crosses a set threshold. Some sound sensors combine both analog and digital outputs for versatility.
Useful Video: How To Use Sound Sensor With Arduino
References:
- https://lastminuteengineers.com/sound-sensor-arduino-tutorial/
- https://circuitdigest.com/microcontroller-projects/interfacing-sound-sensor-with-arduino
- https://sensorkit.arduino.cc/sensorkit/module/lessons/lesson/06-the-sound-sensor
- https://www.flyrobo.in/blog/sound-sensor
- https://randomnerdtutorials.com/guide-for-microphone-sound-sensor-with-arduino/
- https://www.instructables.com/How-to-Use-a-Sound-Sensor-With-Arduino/
- https://www.electronicshub.org/interfacing-sound-sensor-with-arduino/
- https://andprof.com/arduino-electronic/how-to-use-sound-sensor-with-arduino-arduino-projects-with-code/
- https://techatronic.com/sound-sensor-with-arduino-interfacing/
- https://www.seeedstudio.com/blog/2020/01/03/what-is-a-sound-sensor-uses-arduino-guide-projects/