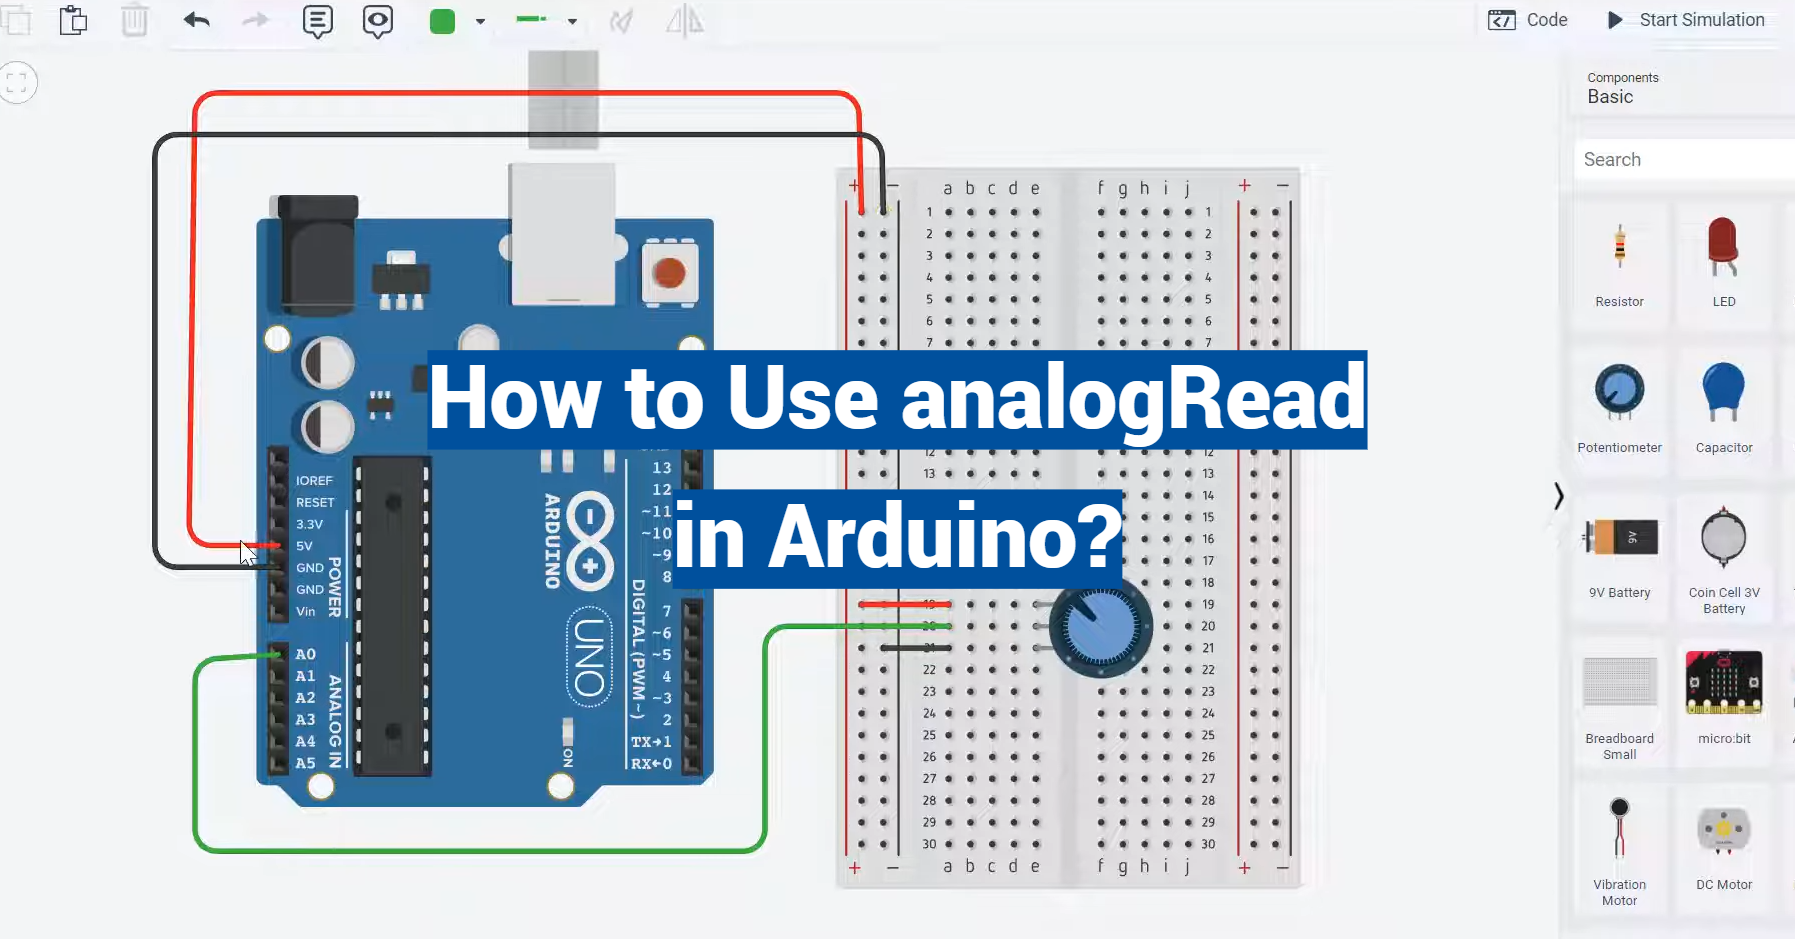
Diving into the world of Arduino, one might find themselves dealing with a multitude of functions. Among these, the analogRead function holds critical importance. This function is used to read the value from a specified analog pin on an Arduino board, which contains a multichannel, 10-bit analog-to-digital converter.
This article aims to provide a comprehensive guide on how to use the analogRead function in Arduino. We will delve into its application, explore examples, and understand its role in converting voltage into a digital value. Whether you’re a beginner or a seasoned Arduino enthusiast, this guide will offer valuable insights.
What Is analogRead() In Arduino:
Description
Syntax
Before we delve into the intricacies of analogRead(), let’s start with its syntax:
int analogRead(uint8_t pin);
The analogRead() function takes one argument, which is the pin from which you want to read the analog signal. The argument, pin, is of type uint8_t, which represents an unsigned 8-bit integer.
Parameters
pin
Type: uint8_t
Description: This parameter specifies the analog pin from which you want to read the analog voltage. Arduino boards come equipped with several analog input pins, usually labeled with an ‘A’ followed by a number (e.g., A0, A1, A2, etc.). The pin parameter should be set to the desired analog pin number to read the voltage from that specific pin.
Analog Read Pins
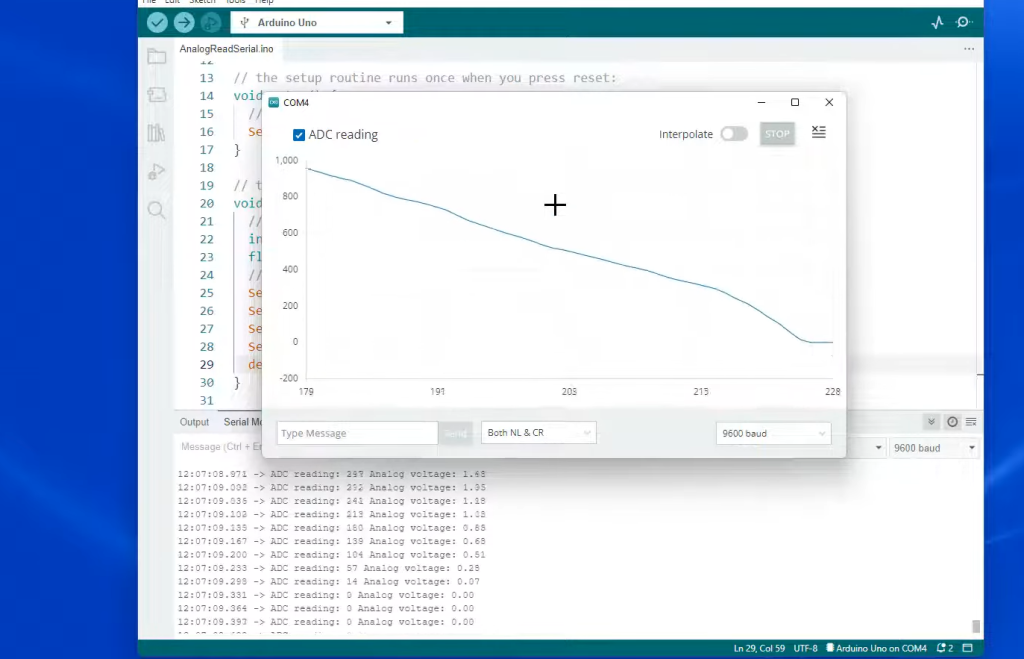
Arduino boards typically have a range of analog input pins, which vary in number depending on the specific board model. These pins are labeled with an “A” followed by a number (e.g., A0, A1, A2, etc.) [2]. The number of available analog pins may vary, so it’s essential to consult your board’s documentation to identify the available pins.
These pins are essential for interfacing with various analog sensors, such as light sensors, temperature sensors, potentiometers, and more. By using analogRead(), you can capture the voltage levels generated by these sensors and use them in your Arduino projects.
ADC Resolution
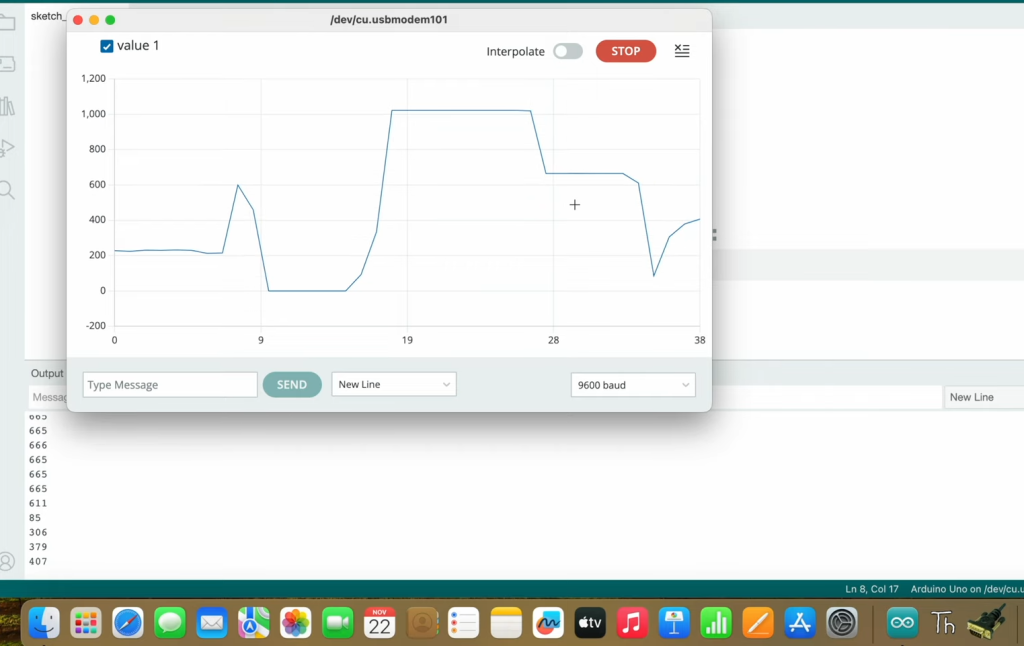
Analog-to-digital conversion (ADC) resolution is a crucial aspect of understanding how accurately analogRead() can measure analog signals. The ADC resolution determines how finely the analog voltage range is divided into discrete values. The higher the resolution, the more precise the readings.
Arduino boards commonly have a 10-bit ADC, which means the analog voltage range (usually 0 to 5 volts) is divided into 1024 discrete values. This provides reasonably good accuracy for most applications. However, some Arduino variants may have different ADC resolutions, so always check your board’s specifications.
AnalogRead() Function
The analogRead() function plays a central role in Arduino projects that involve analog sensors and components.
When you call this function with a specific analog pin as an argument, it performs the following steps:
- It reads the analog voltage present on the specified pin;
- It converts this analog voltage into a corresponding digital value;
- It returns this digital value as an integer between 0 and 1023 (for a 10-bit ADC);
This returned value represents the analog voltage as a discrete digital quantity, which you can use in your Arduino code for various purposes. For example, you can map the digital value to a different range to match the requirements of your project.
Returns
You can store this returned value in a variable for further processing or use it directly in your code to make decisions based on the analog sensor’s input.
Example Code
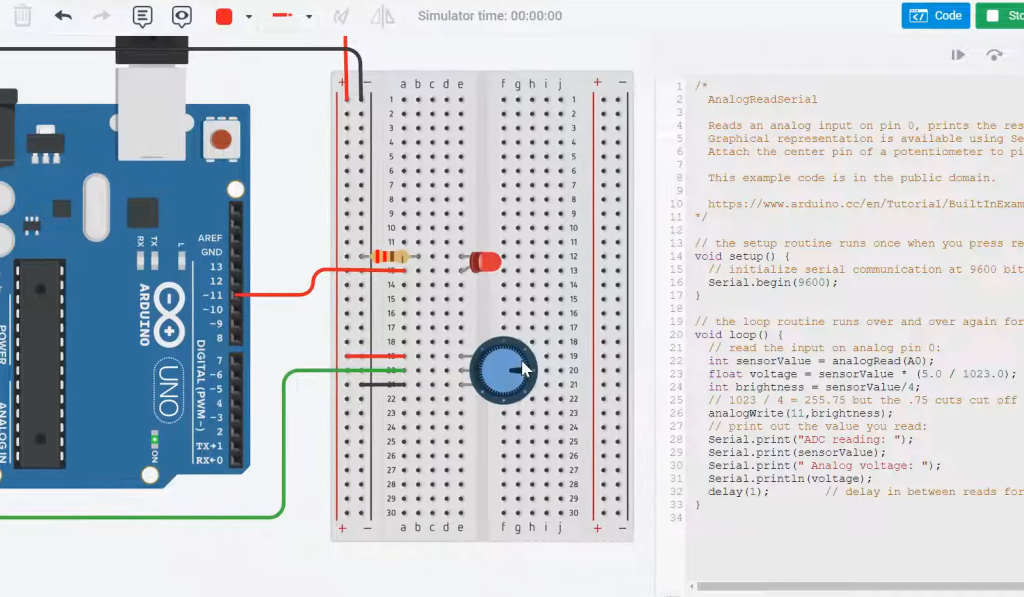
To better understand how the analogRead() function works in practice, let’s consider an example. Suppose you have a simple project where you want to read the analog voltage from a potentiometer connected to analog pin A0 and control the brightness of an LED based on this value [3].
Here’s how you can achieve this with Arduino code:
const int potentiometerPin = A0;
const int ledPin = 9;
void setup() {
pinMode(ledPin, OUTPUT);
}
void loop() {
// Read the analog voltage from the potentiometer
int potValue = analogRead(potentiometerPin);
// Map the potentiometer value to the LED brightness range (0-255)
int brightness = map(potValue, 0, 1023, 0, 255);
// Set the LED brightness
analogWrite(ledPin, brightness);
}
In this example:
- We define the pins for the potentiometer and LED;
- In the setup() function, we set the LED pin as an output;
- In the loop() function, we read the analog voltage from the potentiometer using analogRead() and store
- it in the potValue variable;
- We then use the map() function to convert the potentiometer value to a brightness value between 0 and 255, suitable for controlling the LED’s brightness;
- Finally, we use analogWrite() to set the LED’s brightness based on the mapped value;
This simple example demonstrates how analogRead() can be used to interface with analog sensors and control other components in your Arduino projects.
Notes and Warnings
Before you start using analogRead() in your Arduino projects, here are some important notes and warnings to keep in mind:
- Voltage Range: Ensure that the analog voltage you’re reading with analogRead() falls within the safe voltage range for your Arduino board. Most Arduino boards operate with a 0-5V analog voltage range, but this may vary depending on the specific board model. Exceeding this range can damage your board;
- ADC Resolution: Be aware of your board’s ADC resolution, as it affects the precision of analog readings. If you need higher precision, consider using an external ADC or a board with a higher-resolution built-in ADC;
- Reference Voltage: Arduino boards typically use a 5V reference voltage for analog readings. Some boards allow you to change this reference voltage. Ensure that the reference voltage matches your project requirements;
- Calibration: Analog sensors may vary in their output, even if they are of the same type. Calibration may be necessary to obtain accurate readings from specific sensors;
- Grounding: Proper grounding is crucial for accurate analog readings. Ensure that the ground of your sensor and Arduino board is connected;
- Noise and Filtering: Analog signals can be susceptible to noise. Depending on your application, you may need to implement filtering techniques to reduce noise interference;
How to Use Analog Read on an Arduino Board:
Arduino boards are versatile platforms for building interactive electronics projects. One of the fundamental features that make Arduino so adaptable is its ability to read analog signals from sensors and other components.
Set Up Your Arduino Board and Circuit
Before you can start reading analog signals, you need to set up your Arduino board and the accompanying circuit.
Here are the steps to get started:
1) Collect the following components:
- Arduino board (e.g., Arduino Uno, Arduino Nano);
- Analog sensor or component (e.g., a potentiometer, light-dependent resistor, temperature sensor);
- Breadboard and jumper wires;
- Any other components needed for your specific project;
2) Connect Your Sensor
Connect the analog sensor to your Arduino board using jumper wires. Make sure to connect the sensor’s output pin to one of the available analog pins on the Arduino (e.g., A0, A1, A2) [4].
3) Power the Circuit
Provide power to your circuit. Most sensors require a power source (usually 5V or 3.3V) and a ground connection. Connect these to the appropriate pins on your Arduino.
4) Check Connections
Double-check all your connections to ensure they are secure and correctly wired.
Start Programming the Arduino
Once your hardware is set up, it’s time to write the Arduino code to read analog signals.
1) Program the Arduino (Void Setup):
- Open the Arduino IDE: Launch the Arduino Integrated Development Environment (IDE) on your computer;
- Select Your Board: In the Arduino IDE, go to “Tools” > “Board” and select the type of Arduino board you are using;
- Choose the COM Port: Under “Tools” > “Port”, select the COM port that your Arduino board is connected to. If you’re unsure, you can check the COM port in the device manager (Windows) or the “Port” menu on macOS and Linux;
2) Write the Setup Code
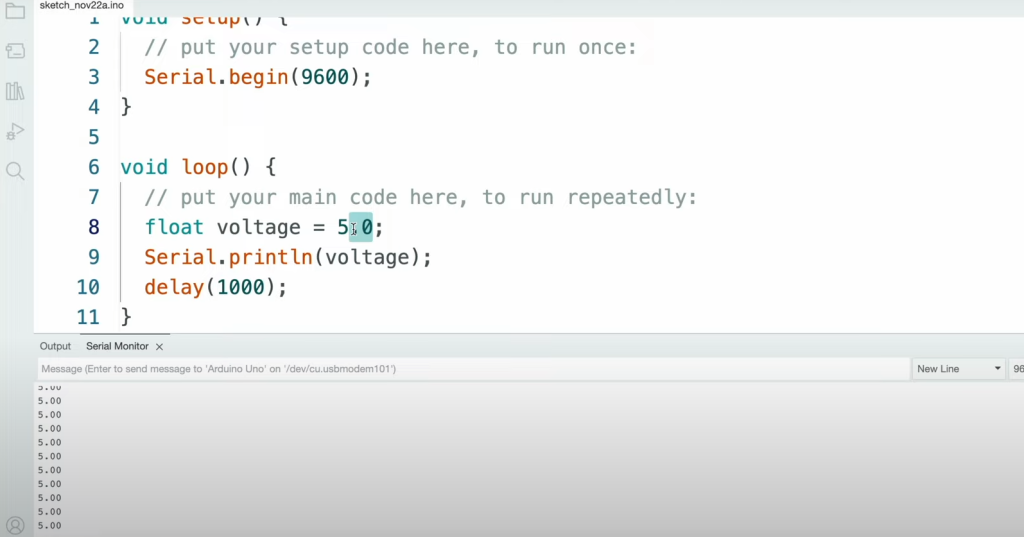
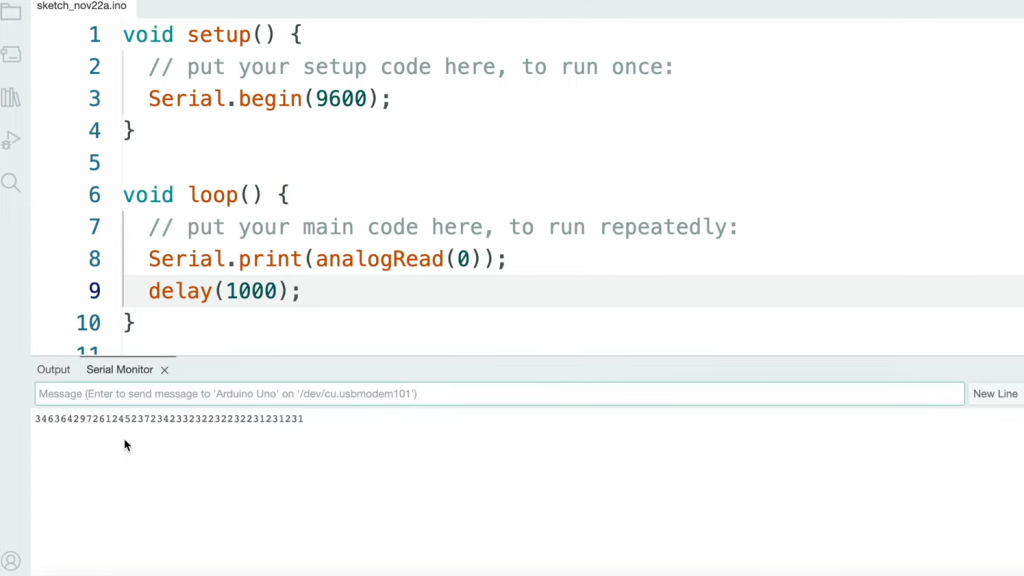
In the Arduino IDE, you have two main functions: setup() and loop(). The setup() function is where you initialize your Arduino. For analog readings, you typically don’t need to do much in setup(), but you should set the serial communication baud rate if you plan to output readings to the serial monitor.
Here’s an example [5]:
void setup() {
// Initialize serial communication at 9600 baud
Serial.begin(9600);
}
3) Program the Arduino (Void Loop)
Next, let’s write the code for the loop() function. This is where the main action happens.
Read the Analog Signal: In the loop() function, use the analogRead() function to read the analog signal from your sensor. Store the value in a variable.
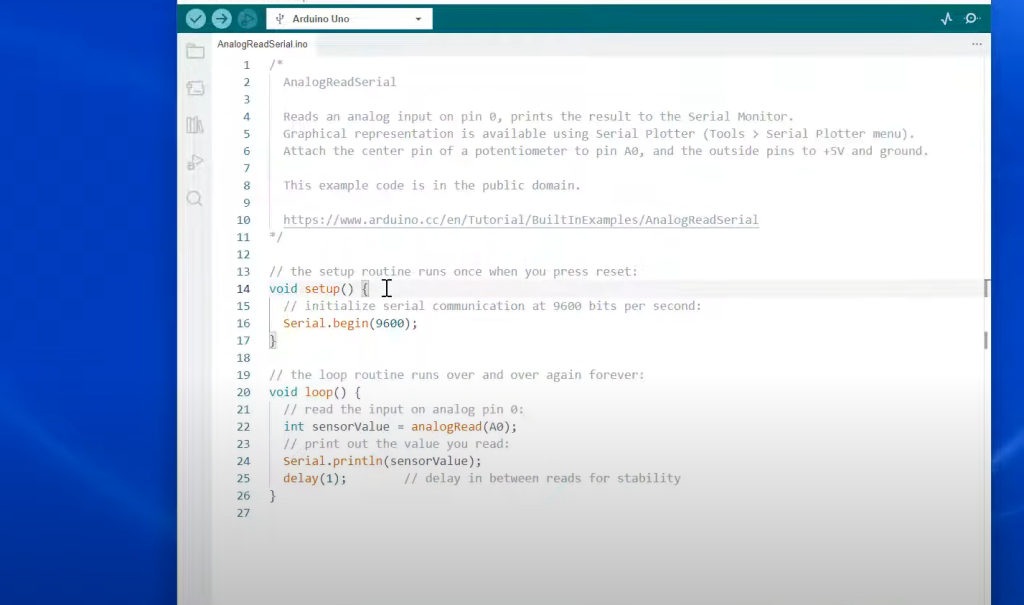
Here’s an example using a potentiometer connected to analog pin A0:
void loop() {
// Read analog signal from A0 and store it in a variable
int sensorValue = analogRead(A0);
// Print the sensor value to the serial monitor
Serial.println(sensorValue);
// Add a small delay to slow down the serial output (optional)
delay(1000); // 1-second delay
}
In this code:
- We read the analog signal from pin A0 using analogRead() and store it in the sensorValue variable;
- We print the value to the serial monitor using Serial.println();
- We include a delay to slow down the serial output. This is optional but helps make the readings more manageable when displayed on the serial monitor;
4) Use the Code
With your code uploaded to the Arduino board, you can now use the analog readings in your projects.
Here are some ideas for utilizing the analog data:
- Control LEDs: Use analog readings to control the brightness of LEDs. For example, the brighter the light, the brighter the LED;
- Create Interactive Art: Use sensors like potentiometers or capacitive touch sensors to create interactive art installations;
- Monitor Environmental Data: Use sensors like temperature sensors, humidity sensors, or light sensors to collect data about your environment;
- Build Robotics Projects: Integrate analog sensors to provide feedback to your robotic creations. For instance, you can use analog sensors for obstacle avoidance in a robot;
- Design Music Instruments: Create musical instruments that respond to touch or light, generating unique sounds based on analog sensor inputs [6];
Summing up, the analogRead() function in Arduino allows you to interface with analog sensors and components, opening up a world of possibilities for your electronics projects. By following the steps outlined in this guide, you can easily set up your Arduino, program it to read analog signals and use the data to bring your ideas to life. Whether you’re a beginner or an experienced Arduino enthusiast, analog readings are a crucial tool for your creative endeavors.
FAQ:
1. How does analogRead work in Arduino?
The analogRead() function in Arduino works by sampling an analog voltage applied to one of the analog input pins on the Arduino board. It converts this continuous voltage into a discrete digital value using the Analog-to-Digital Converter (ADC) built into the microcontroller. The ADC divides the analog voltage range into a certain number of discrete steps, typically 1024 for a 10-bit ADC, and assigns a digital value to represent the measured voltage. The function then returns this digital value as an integer between 0 and 1023 (for a 10-bit ADC) [7].
2. How to read analog data in Arduino?
To read analog data in Arduino, follow these steps:
- Set up your hardware: Connect an analog sensor or component to one of the analog input pins on your Arduino board;
- Initialize serial communication (optional): In the setup() function, use Serial.begin() to initialize serial communication if you want to view the analog readings in the Arduino IDE’s serial monitor;
- In the loop() function, use the analogRead() function to read the analog signal from the chosen analog pin;
- Store the reading in a variable;
- Process or display the analog data as needed;
Here’s a basic example:
void setup() {
Serial.begin(9600); // Initialize serial communication (optional)
}
void loop() {
int sensorValue = analogRead(A0); // Read analog signal from pin A0
// Process or display sensorValue as needed
}
3. How to use analog input in Arduino?
To use analog input in Arduino, follow these steps:
- Connect an analog sensor or component to one of the analog input pins (e.g., A0, A1, A2) on your Arduino board;
- In your Arduino code, use the analogRead() function to read the analog signal from the chosen analog pin;
- Store the analog reading in a variable for further processing or use;
Depending on your project, you can map, scale, or interpret the analog reading to perform specific actions or display information;
4. What is the code for analogRead in Arduino?
The code for using analogRead() in Arduino is straightforward. Here’s the basic syntax:
int sensorValue = analogRead(analogPin)
- int: Specifies the data type of the variable where you’ll store the analog reading;
- sensorValue: The name of the variable where you store the reading;
- analogRead(): The function to read the analog signal;
- analogPin: The argument indicating the analog pin you want to read [8];
5. How do you use the analogRead function?
You use the analogRead() function in Arduino by providing it with an argument that specifies the analog pin you want to read. Here’s an example of how to use it:
int sensorValue = analogRead(A0); // Read analog signal from pin A0
In this example, we read the analog signal from analog pin A0 and store it in the sensorValue variable.
6. Can the analogRead() function be used from any digital pin?
No, the analogRead() function cannot be used with any digital pin. It is specifically designed to read analog signals from analog input pins labeled with an “A” followed by a number (e.g., A0, A1, A2). These pins have dedicated analog-to-digital converters (ADCs) to read analog voltage levels. Digital pins can only read digital signals (high or low), and attempting to use analogRead() on them will not work as intended.
7. What is the difference between analogWrite and analogRead?
- analogWrite(): This function is used to generate a Pulse Width Modulation (PWM) signal on a digital pin. It is typically used for controlling the intensity of an output, such as LED brightness or motor speed. The output is a digital signal with varying duty cycles, simulating an analog output;
- analogRead(): This function is used to read analog voltage levels from analog input pins. It converts an analog voltage into a digital value, allowing you to measure and process analog signals from sensors and components;
Summing up, analogWrite() generates analog-like output, while analogRead() reads analog input.
8. How to read an Arduino analog sensor?
To read an Arduino analog sensor, follow these steps:
- Connect the analog sensor to one of the analog input pins on your Arduino board;
- In your Arduino code, use the analogRead() function to read the analog signal from the connected pin;
- Store the analog reading in a variable for further processing or display;
9. How to get analog output from Arduino?
Arduino boards primarily provide digital outputs, but you can create analog-like outputs using the analogWrite() function. This function generates a Pulse Width Modulation (PWM) signal on a digital pin, which can be used to control components like LEDs, servos, or motor speed. The output is still digital, but by varying the duty cycle (ratio of high to low time), you can simulate an analog voltage level and achieve variable output values.
10. Can an Arduino read analog signals?
Yes, Arduino boards are capable of reading analog signals using the analogRead() function. Arduino boards are equipped with Analog-to-Digital Converters (ADCs) that allow them to measure analog voltage levels accurately.
11. Can you analogRead a digital pin on Arduino?
No, you cannot use the analogRead() function on a digital pin. analogRead() is specifically designed to read analog signals from analog input pins, which are labeled with an “A” followed by a number (e.g., A0, A1). Digital pins can only read digital signals, which are either high (5V or 3.3V) or low (0V or ground).
12. How does Arduino read analog voltage?
Arduino reads analog voltage by utilizing its built-in Analog-to-Digital Converter (ADC). The ADC samples the analog voltage applied to one of the analog input pins and converts it into a digital value. This conversion involves dividing the analog voltage range into discrete steps and assigning a digital value to represent the voltage within that range. The analogRead() function is used to initiate this process and return the resulting digital value.
13. Does analogRead read voltage?
Yes, the analogRead() function in Arduino reads analog voltage. It converts the continuous analog voltage applied to an analog input pin into a digital value, which represents the voltage level within the specified range.
The returned value is an integer between 0 and 1023 (for a 10-bit ADC), where 0 corresponds to the minimum voltage (usually 0V or ground), and 1023 corresponds to the maximum voltage (usually 5V or the reference voltage).
14. Does analogRead work in ESP32?
Yes, the analogRead() function also works in the ESP32, which is a popular microcontroller board similar to Arduino but with more capabilities. The ESP32 has multiple analog input pins, and you can use analogRead() in your ESP32 Arduino code to read analog signals from those pins, just as you would on an Arduino board.
15. What type does analogRead return?
The analogRead() function in Arduino returns an integer value. This integer represents the digital value obtained from the Analog-to-Digital Converter (ADC) conversion of the analog voltage signal. The range of this integer value typically spans from 0 to 1023 (for a 10-bit ADC), where 0 represents the minimum voltage and 1023 represents the maximum voltage within the specified range.
16. How do I use analog pins as digital pins in Arduino UNO?
In Arduino Uno, you can use analog pins as digital pins by referring to them by their digital pin numbers. Analog pins on the Arduino Uno are labeled as A0, A1, A2, and so on. To use them as digital pins, you can refer to them as pins 14 (A0), 15 (A1), 16 (A2), and so forth.
Here’s an example of how to set a digital pin mode on analog pin A0:
pinMode(A0, OUTPUT); // Set analog pin A0 as an OUTPUT
You can then use the analog pins just like you would use regular digital pins for tasks like digital reading and writing.
Useful Video: Arduino Tutorial 10: Understanding How To Read Analog Voltage using analogRead Command
References:
- https://www.arduino.cc/reference/en/language/functions/analog-io/analogread/
- https://microcontrollerslab.com/analogread-arduino-example/
- https://www.javatpoint.com/arduino-analogread
- https://startingelectronics.org/beginners/arduino-tutorial-for-beginners/read-an-analog-input-with-arduino/
- https://www.theengineeringprojects.com/2018/11/how-to-use-analogread-in-arduino.html
- https://www.tutorialspoint.com/basic-analogread-in-arduino-program
- https://www.wikihow.tech/Use-Analog-Read-on-an-Arduino-Board
- https://www.instructables.com/Arduino-Reading-Analog-Voltage/

