

Arduino, an open-source platform for building digital devices and interactive objects, offers a variety of powerful programming features, one of which is #define. As a preprocessor directive in the Arduino programming language, #define allows for efficient and organized code development by letting programmers assign names to constant values before the program is compiled. This not only enhances readability but also promotes code efficiency.
This article will delve into the functionality of #define in Arduino, explaining its benefits, syntax, usage scenarios, and how it compares to other similar tools.
About Variable In Arduino:
What Is a Variable?
Naming Variables
One of the first steps in working with variables in Arduino is giving them meaningful names. Variable names serve as identifiers that help you and the Arduino compiler understand what kind of data is stored in the variable.
Here are some essential rules for naming variables:
- Start with a letter: Variable names must begin with a letter (A-Z or a-z). They cannot start with a number or special characters;
- Use letters, numbers, and underscores: You can use letters, digits (0-9), and underscores (_) in variable names. Avoid using spaces or special characters like @, $, %, etc.;
- No reserved words: Do not use Arduino’s reserved words, such as “if”, “for”, or “while”, as variable names. These words have predefined meanings in the Arduino language;
- Case sensitivity: Variable names are case-sensitive, meaning “myVariable” and “myvariable” are considered two different variables;
Here’s an example of properly named variables:
int temperatureSensorReading;
float voltage_value;
These variable names are descriptive and adhere to the naming rules.
Declaring Variables
In Arduino, declaring a variable means specifying its data type and name. The data type determines what kind of values the variable can hold.
Arduino supports various data types, including:
- int: Used for storing integer values;
- float: Used for storing floating-point values (numbers with decimals);
- char: Used for storing single characters;
- boolean: Used for storing true or false values;
- String: Used for storing sequences of characters (text);
When you declare a variable, you specify its data type, followed by its name.
Here’s an example of declaring variables:
- int ledPin; // Declaring an integer variable named ledPin;
- float temperature; // Declaring a floating-point variable named temperature;
- char initial; // Declaring a character variable named initial;
- boolean isOn; // Declaring a boolean variable named isOn;
- String message; // Declaring a String variable named message;
Once you’ve declared a variable, you can assign values to it and use it in your Arduino sketch.
Doing Math With Variables
One of the primary purposes of variables in Arduino programming is to perform mathematical operations. You can use variables to store values, manipulate them, and then use the result in your code [2].
Here are some common mathematical operations using variables:
Addition:
int a = 5;
int b = 3;
int sum = a + b; // sum will be 8
Subtraction:
int x = 10;
int y = 4;
int difference = x – y; // difference will be 6
Multiplication:
int p = 6;
int q = 7;
int product = p * q; // product will be 42
Division:
float numerator = 10.0;
float denominator = 3.0;
float result = numerator / denominator; // result will be approximately 3.3333
Increment and Decrement
You can also increment and decrement the value of a variable by one using the increment (++) and decrement (–) operators.
int counter = 0;
counter++; // Increment counter by 1, now it’s 1
counter–; // Decrement counter by 1, now it’s 0
Mathematical operations with variables are essential for creating dynamic and responsive Arduino sketches. Whether you’re building a temperature sensor or a simple calculator, variables enable you to perform calculations and make decisions based on the results.
Global Variables
In Arduino programming, variables can be categorized as either global or local. Global variables are declared outside of any function, typically at the beginning of your sketch. These variables are accessible from anywhere within your code, making them suitable for storing data that needs to be shared across multiple functions.
Here’s an example of declaring global variables:
int globalVariable1;
float globalVariable2;
void setup() {
// Initialization code
}
void loop() {
// Main program loop
}
In this example, globalVariable1 and globalVariable2 are global variables that can be used in both the setup() and loop() functions. This global scope allows you to maintain data persistence throughout the entire execution of your sketch.
Global variables are beneficial when you need to store configuration settings, sensor readings, or data that must persist between function calls. However, be cautious when using global variables, as they can lead to complex and error-prone code if not managed carefully [3].
Local Variables
In contrast to global variables, local variables are declared within a specific function and have a limited scope. They are only accessible within the function where they are defined. Once the function execution ends, the local variables are destroyed, and their memory is released.
Here’s an example of declaring and using local variables:
void setup() {
int localVariable1 = 5; // Local variable within the setup function
// Use localVariable1 within this function
}
void loop() {
int localVariable2 = 10; // Local variable within the loop function
// Use localVariable2 within this function
}
In this example, localVariable1 and localVariable2 are local variables with scope limited to their respective functions (setup() and loop()). Attempting to access them outside of these functions would result in an error.
Local variables are valuable for temporary storage within a specific context. They help encapsulate data, prevent naming conflicts, and conserve memory by releasing resources when they are no longer needed.
Why Should You Understand Arduino Syntax?
Understanding Arduino syntax is essential for anyone working with Arduino microcontrollers and the Arduino programming environment.
Here are several reasons why understanding Arduino syntax is important:
- Programming Arduino: Arduino is a popular platform for hobbyists, makers, and professionals to create electronic projects. To program an Arduino board effectively, you must understand its syntax, which is based on the C/C++ programming language. This knowledge allows you to write code that can control hardware components and perform various tasks;
- Customization: To create unique and customized projects, you need to be able to write your own code. Understanding Arduino syntax enables you to tailor your programs to meet specific project requirements, whether it’s building a simple LED blinker or a complex robotics project;
- Debugging: When you encounter issues or errors in your Arduino code, understanding the syntax is crucial for debugging. You need to be able to identify syntax errors, logical errors, and other issues that may arise during the development process. Knowing the language well will help you find and fix problems more efficiently;
- Library Usage: Arduino offers a vast collection of libraries that simplify complex tasks by providing pre-written code modules. Understanding Arduino syntax is necessary for using these libraries effectively. You’ll need to integrate library functions into your code and understand how to call them with the correct parameters;
- Portability: Arduino code is portable, which means you can use the same code on different Arduino boards with minimal modification. Understanding Arduino syntax allows you to write code that can be easily adapted to work on various Arduino models, making your projects more versatile;
- Community and Documentation: Arduino has a large and active community of users and developers. When seeking help or sharing your projects with the community, you’ll need to communicate effectively using the standard Arduino syntax. Additionally, most Arduino documentation and tutorials are written with the assumption that users are familiar with Arduino’s syntax;
- Learning and Innovation: If you want to learn more about electronics, microcontrollers, and programming, Arduino is an excellent platform. Understanding Arduino syntax is a fundamental step in your learning journey. Once you have a solid grasp of it, you can explore more advanced topics and experiment with new ideas;
- Job Opportunities: For those pursuing careers in electronics, embedded systems, or IoT development, understanding Arduino syntax can be a valuable skill. Many companies and industries use Arduino or similar platforms for prototyping and development, so proficiency in Arduino programming can enhance your job prospects [4];
About #define In Arduino:
Description
The #define directive is a feature of C and C++ programming languages, which are the basis of Arduino’s programming language. It allows the programmer to define an identifier that represents a value or expression. This defined identifier can then be used throughout the code in place of the value or expression it represents.
Syntax
The syntax of #define in Arduino is straightforward. It starts with the #define keyword, followed by the name you want to give to the constant, and then the value or expression the name should represent.
Here is the basic format:
#define identifier value
Parameters
The #define directive takes two parameters:
- Identifier: The name that will represent the value or expression. It can be any valid variable name;
- Value: The actual value or expression the identifier will represent. It can be a number, a character, a string, or an expression;
Use Cases
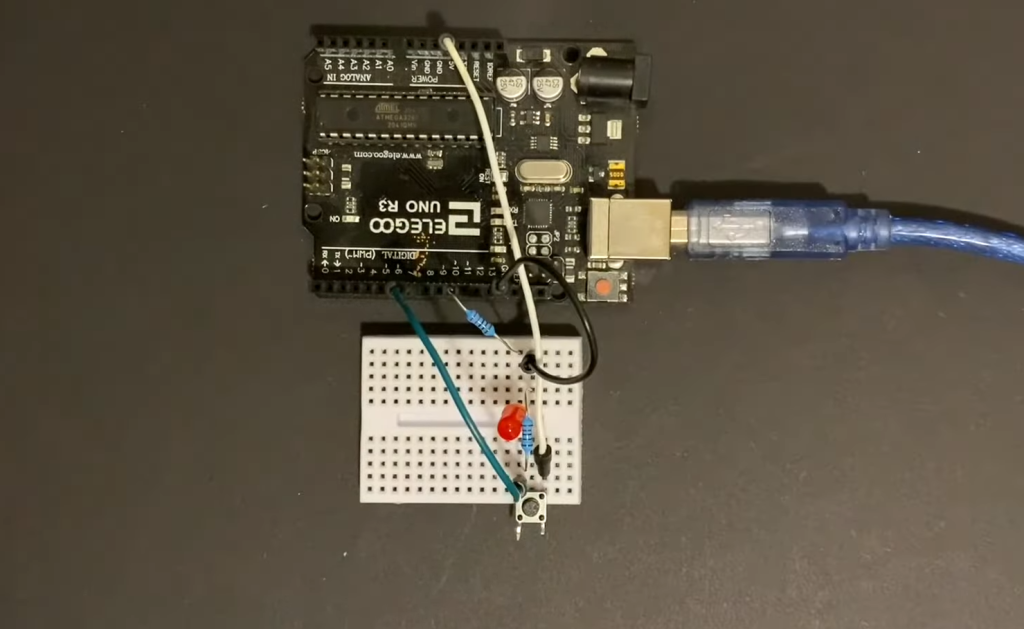
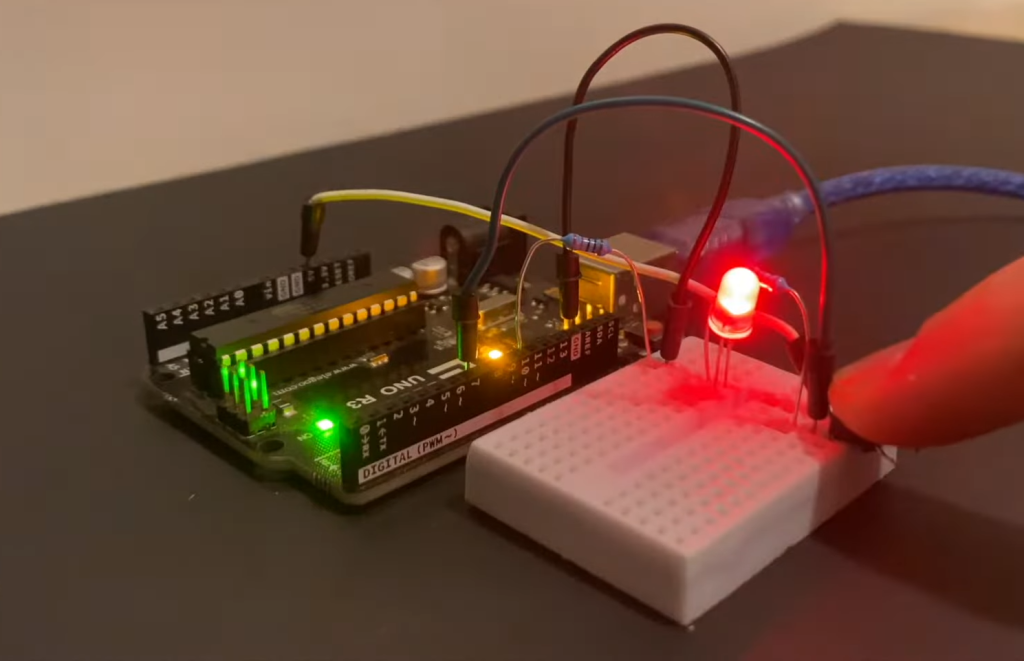
For example, if you’re building a project that requires the use of a specific pin on the Arduino board multiple times in your code, you can define a name for that pin number using #define. This makes your code easier to read and modify if needed [5].
Example Code
Here is an example of how to use #define in an Arduino program:
#define LED_PIN 13
void setup() {
pinMode(LED_PIN, OUTPUT);
}
void loop() {
digitalWrite(LED_PIN, HIGH);
delay(1000);
digitalWrite(LED_PIN, LOW);
delay(1000);
}
In this example, LED_PIN is defined as 13, which is the pin number we’re using to connect an LED. The LED_PIN identifier is then used in the pinMode(), digitalWrite(), and delay() functions.
Notes and Warnings
While #define can be a very useful tool, it’s important to note that it doesn’t follow the same rules as variables. For instance, #define doesn’t require a semicolon at the end of the line, and it doesn’t have a data type.
Also, #define creates a direct text replacement, so it doesn’t allocate any memory. This means that the value you assign with #define doesn’t actually exist in memory, making it impossible to change or manipulate during the execution of the program.
Lastly, be careful when defining names, as #define will replace every occurrence of the identifier in your code, even if it’s part of another word. Therefore, it’s good practice to use unique names for your identifiers to avoid unexpected replacements.
Difference Between #define and const in Arduino:
#define
#define is a pre-processor directive in Arduino programming. It’s used to define symbolic constants or macros which can be used throughout the code. The main characteristic of #define is that it performs a text replacement before the program is compiled.
This means that wherever the defined identifier is encountered in the code, the pre-processor replaces it with the defined value or expression. #define does not allocate any memory because it’s not a variable, but a textual substitution made by the pre-processor.
#define LED_PIN 13
In this example, wherever LED_PIN is mentioned in the code, the pre-processor will replace it with 13.
const
On the other hand, const in Arduino is used to declare constants. A variable declared as const is initialized at the time of declaration and its value cannot be changed afterward. Unlike ‘#An error occurred during generation. Please try again or contact support if it continues.
Should You Use “define” or “const” In Arduino?
When it comes to choosing between #define and const in Arduino, the decision often depends on the specific use case.
#define is a pre-processor directive that performs text replacement before the program compiles. It’s beneficial for calculations where it looks more natural than const variables. However, #define doesn’t allocate memory as it’s not a variable but a textual substitution made by the pre-processor [6].
On the other hand, const is used to declare constants. Once a variable is declared as const, its value cannot be changed afterward. const variables are generally preferred over #define for defining simple values, as they can be safer and avoid potential issues with scope and type safety.
For numeric pin numbers, it doesn’t matter much whether const or #define is used. However, if you’re using const, ensure it’s the correct type.
FAQ:
1. What is the difference between #define and const in Arduino?
#define and const are both used to create constants in Arduino, but they have some key differences:
- #define is a preprocessor directive, and it doesn’t allocate memory for the constant. It performs a simple text substitution before the code is compiled. This means that #define constants have no memory overhead;
- const, on the other hand, is a true variable with memory allocated for it. It is stored in flash memory on Arduino boards and uses RAM only when accessed. This can make const a better choice when memory usage is a concern;
In general, it’s recommended to use const for defining constants in Arduino, as it offers better memory management and type safety compared to #define.
2. How do I assign a value to a variable in Arduino?
To assign a value to a variable in Arduino, you declare the variable and then use the assignment operator = to give it a value. Here’s an example of assigning a value to an integer variable:
int myVariable = 42;
3. What is an integer in Arduino?
In Arduino, an integer is a data type used to store whole numbers. It typically uses 16 bits of memory, allowing it to represent values from -32,768 to 32,767. Integer variables are commonly used for counting, indexing, and storing numerical values that don’t require decimal precision.
4. How is #define used in Arduino?
In Arduino, #define is used to create constants and macros. It’s typically used at the beginning of a sketch before the setup() function.
Here’s a basic example:
#define LED_PIN 13
In this case, LED_PIN is defined as a constant with the value 13. You can then use LED_PIN throughout your code, and the Arduino preprocessor will replace it with 13 during compilation.
5. Should you use #define in Arduino?
While #define can be used in Arduino, it’s generally recommended to use const for defining constants, as it offers better memory management and type safety. #define should be reserved for creating macros and conditional compilation directives.
6. How do you define a variable in code?
In Arduino, you define a variable by specifying its data type and giving it a name. For example, to define an integer variable named myVariable, you would write:
int myVariable;
This declares an integer variable without assigning it an initial value.
7. What is the use of #define directive?
The #define directive in Arduino is used to create symbolic constants and macros. It allows you to give a name to a value or expression, making your code more readable and maintainable. It also enables you to define conditional compilation directives to include or exclude code sections based on certain conditions.
8. What is the difference between #define and int in Arduino?
#define and int serve different purposes in Arduino:
- #define is used to create constants and macros for symbolic representation;
- int is a data type used to declare integer variables that can store numerical values;
#define doesn’t allocate memory for variables, while int declares a variable with memory allocated for it.
9. What is the use of #define in C++?
In C++ (and Arduino, which uses C++), the #define directive is used to create constants and macros. It allows you to define values or expressions that can be used throughout your code, making it more readable and maintainable. Additionally, #define can be used to conditionally compile code based on certain conditions.
10. What is #define digitalWrite in Arduino?
#define digitalWrite is a common example of using #define to create a macro in Arduino. It simplifies the code for setting a digital output pin high or low.
For instance:
#define LED_PIN 13
digitalWrite(LED_PIN, HIGH); // Sets the LED pin high
11. How to define a constant value in Arduino?
To define a constant value in Arduino using const, you declare a constant variable with a data type and assign it a value.
Here’s an example:
const int MY_CONSTANT = 42;
This creates a constant integer named MY_CONSTANT with a value of 42.
12. How to define a string in Arduino?
To define a string in Arduino, you use the String data type.
Here’s an example:
String myString = “Hello, Arduino!”;
This creates a string variable named myString with the specified text.
13. How to declare print in Arduino?
To print data to the serial monitor in Arduino, you use the Serial object’s print or println method.
For example:
Serial.begin(9600); // Initialize the serial communication
Serial.print(“This is a message. “); // Print a message without a newline
Serial.println(“This is a new line.”); // Print a message with a newline
This code initializes serial communication and uses print and println to display messages.
14. Can #define be used for functions?
No, #define is not typically used to define functions in Arduino. #define is mainly used for creating constants and macros. Functions in Arduino are defined using the standard C/C++ syntax, such as:
void myFunction() {
// Function code here
}
15. How to define a variable as an integer in Arduino?
To define a variable as an integer in Arduino, you declare it with the int data type. For example:
int myInteger = 10;
This declares an integer variable named myInteger and assigns it the value 10.
Useful Video: Arduino in 100 Seconds
References:
- https://www.arduino.cc/reference/en/language/structure/further-syntax/define/
- https://handtoolsforfun.com/how-to-use-define-in-arduino/
- https://www.tutorialspoint.com/difference-between-hashdefine-and-const-in-arduino
- https://ecloniq.com/what-does-define-do-in-arduino-confira-isto-define-arduino/
- https://www.circuitbasics.com/using-variables-on-the-arduino/
- https://ai.thestempedia.com/docs/evive/evive-arduino-ide-tutorials/arduino-ide-variables/