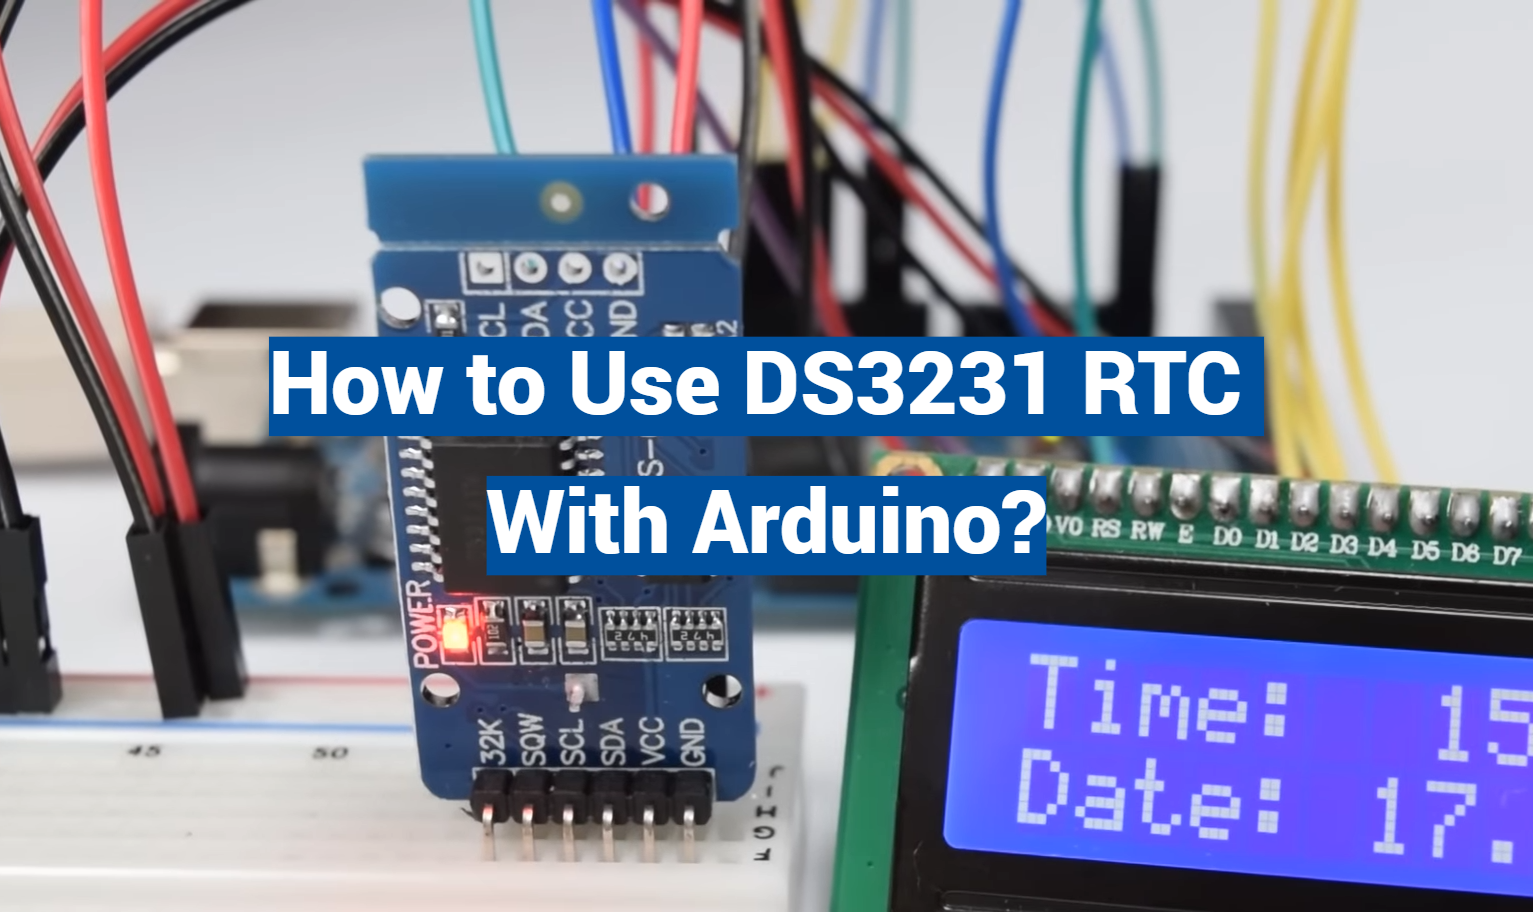
The DS3231 Real-Time Clock (RTC) is an affordable and highly precise module that can be used with Arduino to keep accurate time even when your Arduino is not powered. This feature makes it indispensable for projects that require time stamping or scheduling. In this guide, we will delve into the utilization of this convenient module with your Arduino, ensuring that your projects remain punctual and on track, every single time.
What is DS3231 RTC?
Why Use DS3231 RTC With Arduino?
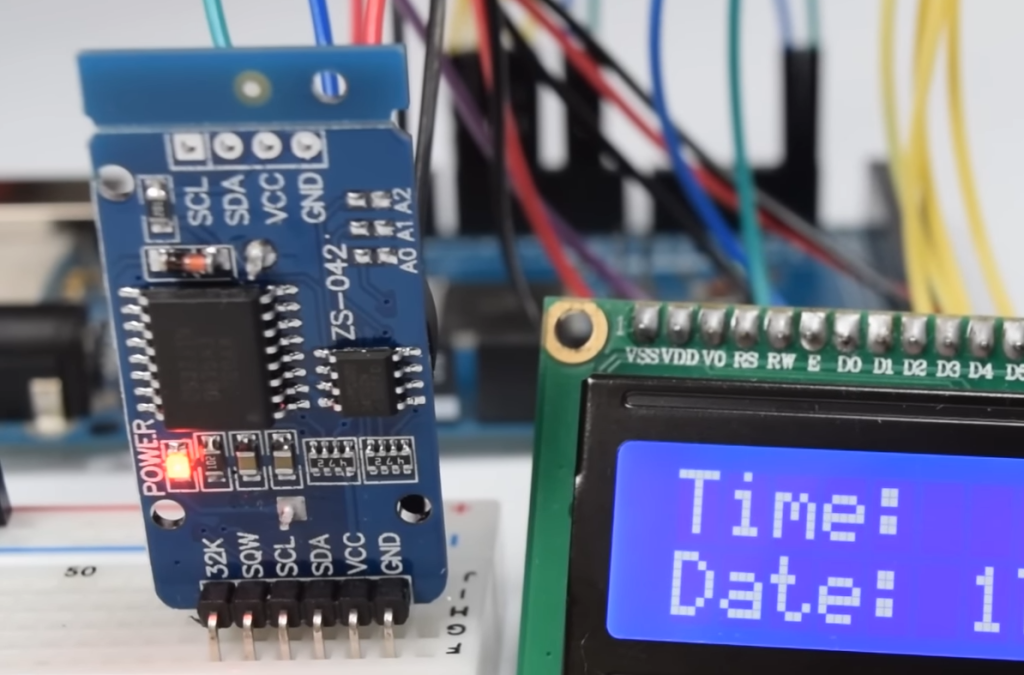
DS3231 RTC is a popular choice among hobbyists and professionals alike due to its high accuracy, low power consumption, and ease of use. Instead of relying on the internal clock of your microcontroller, which can be prone to error, using a dedicated real-time clock module like DS3231 ensures that your timekeeping is precise and consistent. [1]
Setting Up the Hardware
To use the DS3231 RTC with an Arduino, you will need to set up the hardware correctly. This section will guide you through the necessary steps to get started.
Step 1: Gather Your Materials
Before you can begin setting up your DS3231 RTC with Arduino, make sure you have all of the required materials on hand. These include:
- An Arduino board
- DS3231 RTC module
- Breadboard
- Jumper wires
- USB cable (for connecting the Arduino to your computer)
Step 2: Connect the DS3231 Module to Your Arduino
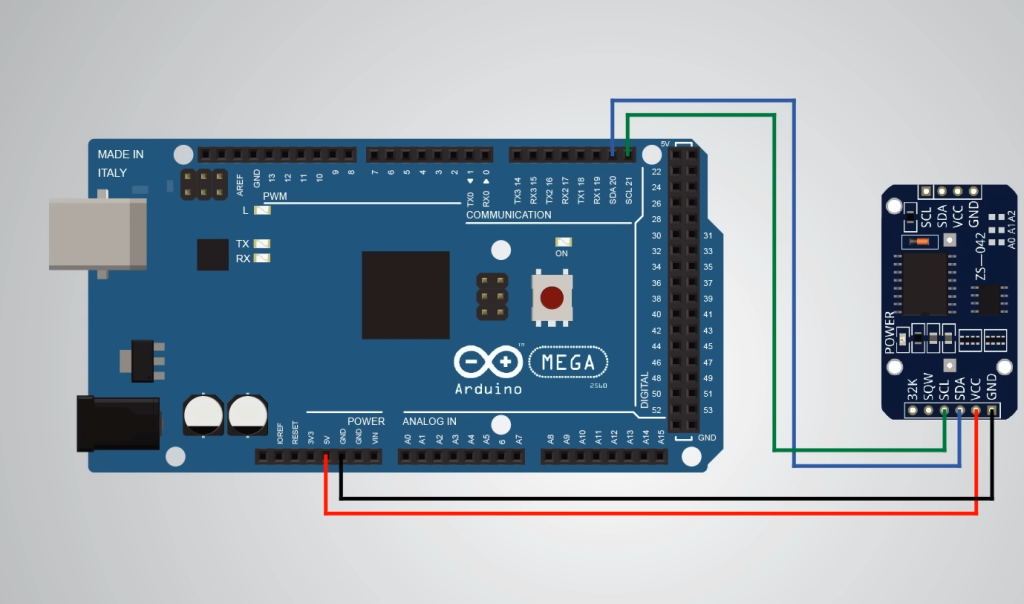
To connect the DS3231 module to your Arduino, follow these steps:
- Place the breadboard on a flat surface.
- Insert the DS3231 module into the breadboard.
- Connect the VCC pin of the RTC module to the 5V pin on your Arduino board.
- Connect the GND pin from the RTC module to the GND pin on your Arduino.
- Connect the SDA pin from the RTC module to the A4 pin on your Arduino (or the SDA pin if using another Arduino model).
- Connect the SCL pin from the RTC module to the A5 pin on your Arduino (or the SCL pin if using another Arduino model).
Step 3: Connect Your Arduino to Your Computer
Using a USB cable, connect your Arduino board to your computer. This will provide power to the board and allow you to upload code.
Step 4: Download and Install Libraries
To make working with the DS3231 RTC module easier, it is recommended to download and install libraries that will allow you to communicate with the module. Two popular libraries are the Adafruit RTClib and the Time library.
To install these libraries, follow these steps: [2]
- Open your Arduino IDE and navigate to Sketch > Include Library > Manage Libraries.
- In the search bar, enter “RTClilb” and select the Adafruit RTClib library from the search results.
- Click on the “Install” button and patiently wait for the installation process to finish.
- Repeat steps 2 and 3 for the Time library.
By following these instructions, you will successfully install the necessary libraries for your Arduino project.
Step 5: Upload Code to Your Arduino
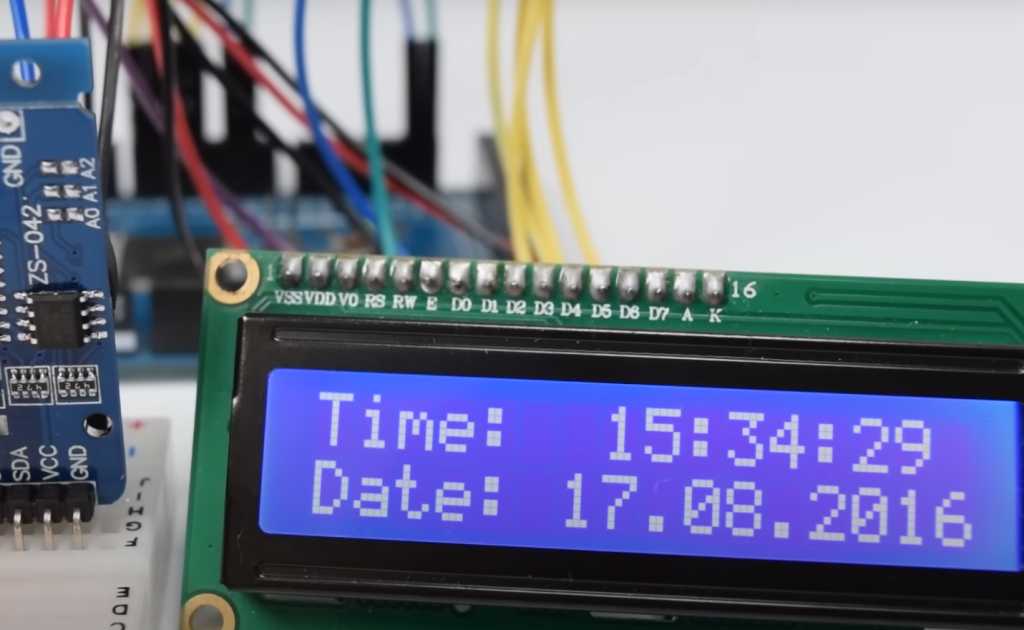
Now that everything is set up, you can upload code to your Arduino board. To test if your DS3231 RTC is working correctly, you can use a simple code that will print the current time and date to your serial monitor.
To upload the code, follow these steps:
- In your Arduino IDE, go to File > Examples > DS3231 > ds3231.
- Upload the code to your board by clicking on the arrow icon in the toolbar.
- Once the upload is complete, open the serial monitor by clicking on the magnifying glass icon in the toolbar.
- Set the baud rate to 9600 and you should see the current date and time being displayed.
Congratulations! You have successfully configured your DS3231 RTC with Arduino. Now you can utilize it in your projects for precise timekeeping. In the following section, we will delve deeper into the usage of the DS3231 RTC and explore its various features. So, without further ado, let’s jump right in!
Using the DS3231 RTC
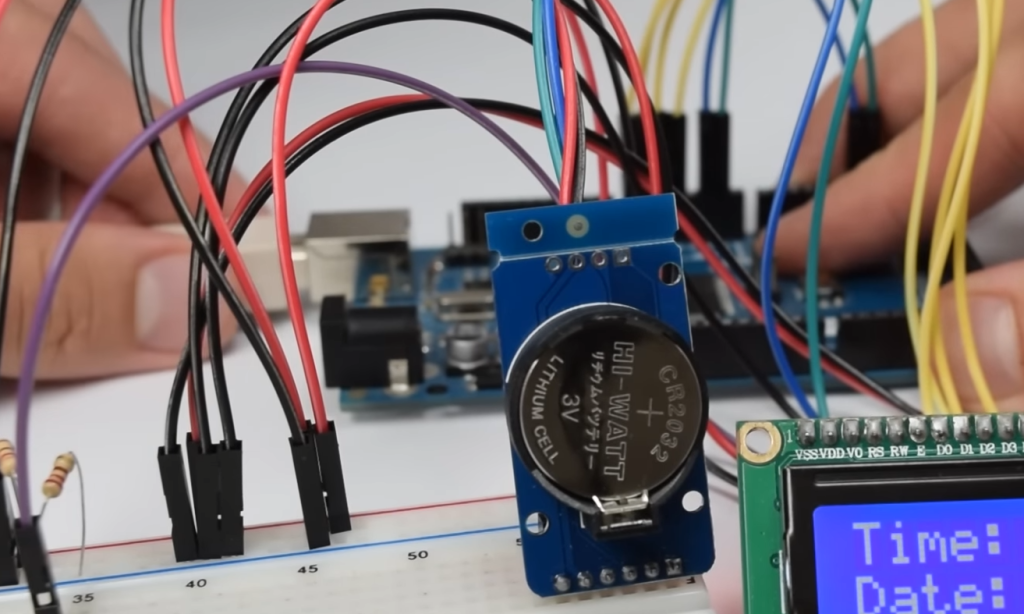
The DS3231 is an extremely accurate real-time clock (RTC) module that can provide timekeeping for your Arduino projects. Here are some of the key features of the DS3231:
- High accuracy (±2ppm)
- Low power consumption
- Battery backup for timekeeping in case of power loss
- Integrated temperature sensor for precise temperature readings
Getting the Current Time and Date
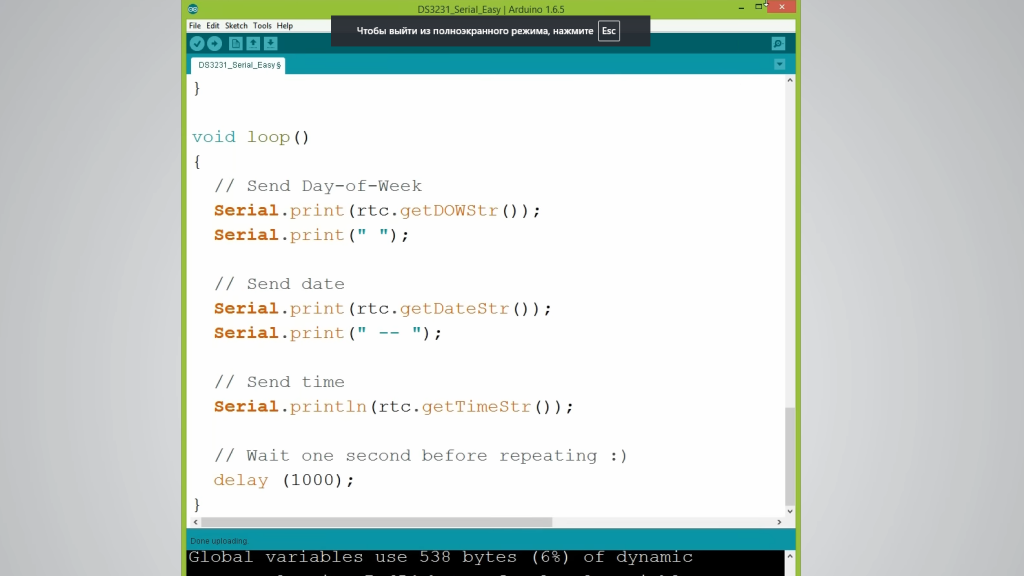
To get the current time and date from your DS3231 RTC module, you can use the following code:
“`
#include
DS3231 rtc;
void setup() {
Serial.begin(9600);
rtc.begin();
}
void loop() {
// Get current time and date
DateTime now = rtc.now();
// Print time to serial monitor
Serial.print(now.hour(), DEC);
Serial.print(‘:’);
Serial.print(now.minute(), DEC);
Serial.print(‘:’);
Serial.print(now.second(), DEC);
// Print date to serial monitor
Serial.print(‘ ‘);
Serial.print(now.day(), DEC);
Serial.print(‘/’);
Serial.print(now.month(), DEC);
Serial.print(‘/’);
Serial.println(now.year(), DEC);
}
“`
This code uses the DS3231 library and the DateTime object to get the current time and date from the RTC module. It then prints the values to the serial monitor in a readable format. [3]
Setting the Time and Date
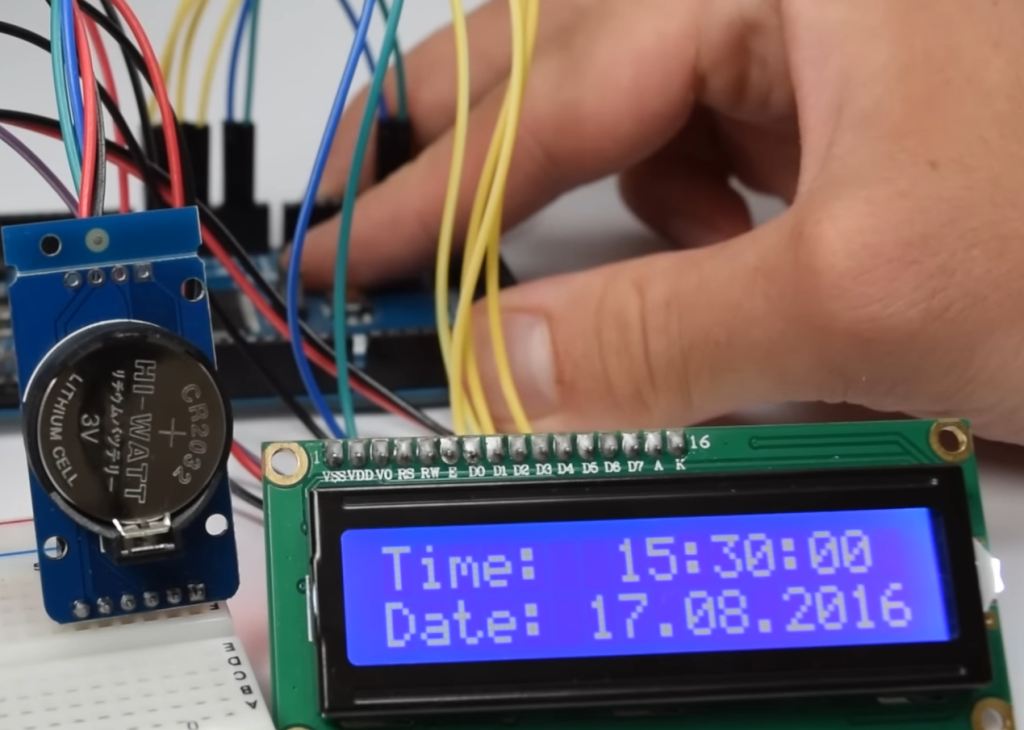
To set the time and date on your DS3231 RTC module, you can use the following code:
“`
#include
DS3231 rtc;
void setup() {
Serial.begin(9600);
// Initialize serial communication
rtc.begin(); // Initialize DS3231
// Uncomment the line below to set the time and date
//rtc.adjust(DateTime(2021, 10, 01, 12, 00, 00));
}
void loop() {
DateTime now = rtc.now();
Serial.print(now.hour(), DEC);
Serial.print(‘:’);
Serial.print(now.minute(), DEC);
Serial.print(‘:’);
Serial.print(now.second(), DEC);
// Print time to serial monitor
// Print the current date to the serial monitor
Serial.print(‘ ‘);
Serial.print(now.day(), DEC);
Serial.print(‘/’);
Serial.print(now.month(), DEC);
Serial.print(‘/’);
Serial.println(now.year(), DEC);
}
“`
By uncommenting the line “rtc.adjust(DateTime(2021, 10, 01, 12, 00, 00));”, you can set the time and date to a specific value. This is useful when testing or if your module loses power and needs to be reset.
Other Functions
In addition to getting and setting the time and date, the DS3231 RTC module also has other useful functions such as setting alarms and generating interrupts. These can be explored further in the library’s documentation.
Using the DS3231 Library Functions
The DS3231 library has many useful functions that can be used to interact with the RTC module. Here are some examples of commonly used functions:
- rtc.begin(): Initializes communication with the DS3231 module.
- DateTime now = rtc.now(): Gets the current time and date from the RTC module.
- void rtc.adjust(DateTime dt): Sets the time and date on the RTC module to the specified values.
- void rtc.setAlarm1(DateTime dt, char mode): Sets an alarm to trigger at the specified time. The “mode” parameter specifies whether the alarm triggers once or repeats daily/weekly/monthly/yearly.
- void rtc.enableInterrupts(): Enables interrupts on the DS3231 module, allowing it to generate an interrupt when an alarm is triggered.
- void rtc.disableInterrupts(): Disables interrupts on the DS3231 module.
These are just a few examples of the many functions available in the DS3231 library. Exploring and experimenting with these functions will allow you to fully utilize the capabilities of your RTC module. [4]
Using Alarm Functionality in Your Projects
The DS3231 RTC module’s alarm functionality can be extremely useful in projects that require time-triggered actions. Some examples of this include:
- Waking up a microcontroller at a specified time to perform a task.
- Setting reminders or timers for specific actions.
- Turning on/off lights or devices at predetermined times.
By using the setAlarm1() function in the DS3231 library, you can easily incorporate these features into your projects. Furthermore, by using interrupts with the enableInterrupts() function, you can ensure that your microcontroller is not constantly polling for time and conserves power.
Applications of DS3231 RTC Module
The DS3231 RTC module has a wide range of applications, including but not limited to:
- Timekeeping in projects involving sensors that require accurate timestamps.
- Use in data loggers or datalogging systems for precise time and date recordings.
- Scheduling and timing tasks in automation systems.
- Use as a clock/calendar in various electronic devices such as digital watches, clocks, and electronic calendars.
The DS3231 RTC module’s high accuracy, low power consumption, and battery backup make it an ideal choice for these applications. Additionally, its compact size and easy integration with Arduino make it a popular choice among hobbyists and professionals alike.
Troubleshooting Common Issues
While using the DS3231 RTC module, you may encounter some common issues that can easily be resolved. Here are a few troubleshooting tips:
- If your time or date is incorrect, make sure to check your code and ensure that the setAlarm1() function is not overriding your set time and date values.
- If you are getting gibberish characters on the serial monitor, make sure to check your baud rate settings and ensure it is set to 9600.
- If the module is not responding, check the wiring connections and ensure that you have correctly connected VCC, GND, SDA, and SCL pins.
FAQs
What is a DS3231 RTC?
DS3231 is a real-time clock (RTC) module that can be used to keep track of time and date. It is highly accurate and reliable, making it a popular choice among hobbyists and professionals alike.
How do I use DS3231 RTC with Arduino?
To use the DS3231 RTC with Arduino, you will need to connect it to your Arduino board using the I2C communication protocol. This can be done by connecting the SDA and SCL pins of the RTC module to the corresponding pins on your Arduino board. You will also need to download and install a library for the DS3231 RTC, such as the “RTClib” library.
What are some common applications of DS3231 RTC?
The DS3231 RTC can be used in a variety of applications, including:
- Timekeeping for projects that require precise timing
- Data logging, where accurate timestamps are necessary
- Alarm systems and timers
- Smart home automation
Are there any other features or benefits of using DS3231 RTC?
Aside from its accuracy and reliability, the DS3231 RTC also has a built-in temperature sensor, which can be used to measure ambient temperature. It also has an alarm function and battery backup, ensuring that timekeeping is not affected in case of power interruptions.
Can I use DS3231 RTC with other microcontroller boards?
Yes, the DS3231 RTC can be used with other microcontroller boards that support I2C communication. This includes popular boards such as Raspberry Pi, ESP8266, and STM32.
Is there a way to synchronize the time on my DS3231 RTC?
Yes, you can synchronize the time on your DS3231 RTC by using a GPS module or syncing it with an online NTP (Network Time Protocol) server. This allows for precise timekeeping and eliminates the need for manual time-setting.
Are there any troubleshooting tips for using DS3231 RTC with Arduino?
Here are some common troubleshooting tips if you encounter issues while using the DS3231 RTC with Arduino:
- Double check your connections, ensuring that the SDA and SCL pins are connected correctly.
- Make sure the correct library is installed and imported in your code.
- Check the battery backup on your RTC module to ensure it is functioning properly.
- If using a battery, make sure it has enough power.
- Try resetting both your Arduino board and RTC module if all else fails.
Where can I find more resources on using DS3231 RTC with Arduino?
You can find various tutorials, guides, and projects online that use DS3231 RTC with Arduino. Additionally, the official Arduino website and forums are great resources for troubleshooting and getting help from the community. You can also refer to the datasheet of the DS3231 RTC for more technical information. The possibilities are endless with this versatile and accurate real-time clock module!
Why is DS3231 RTC used with Arduino?
DS3231 RTC is used with Arduino because it provides highly accurate and reliable timekeeping, making it a valuable component for projects that require precise timing. It also has additional features such as a temperature sensor and battery backup, making it more versatile and convenient to use. Additionally, its small size and low power consumption make it ideal for use in portable or battery-operated projects.
What are some other alternative real-time clock modules that can be used with Arduino?
Aside from DS3231, there are other popular RTC modules that can be used with Arduino, such as the DS1307, MCP7940N, and PCF8563. However, these modules may have different features and capabilities, so it is important to research and choose the one that best fits your project’s needs. Some hobbyists also use a real-time clock module integrated into a microcontroller board, such as the Adafruit Feather M0 RTC or Teensy Real Time Clock Breakout Board. Ultimately, the choice of RTC module will depend on the project requirements and personal preference.
How to connect a DS3231 RTC to an Arduino?
To connect a DS3231 RTC to an Arduino, follow these steps:
- Connect the SDA and SCL pins of the RTC module to the corresponding pins on your Arduino board.
- Connect GND and VCC (3.3V or 5V) from the RTC module to GND and VCC pins on your Arduino board.
- Download and install a library for the DS3231 RTC, such as the “RTClib” library.
- Upload the example code provided by the library to your Arduino board to check if everything is working correctly.
- Adjust any necessary settings or code according to your project’s needs.
Are there any safety precautions to keep in mind when using DS3231 RTC with Arduino?
As with any electronic component, it is important to handle the DS3231 RTC module with care and avoid exposing it to extreme temperatures or moisture. Additionally, be cautious when connecting wires and components to your Arduino board and always ensure that the power source is turned off before making any changes or adjustments. Finally, make sure to use a compatible battery (if applicable) and follow proper battery handling procedures to avoid any potential hazards.
What libraries are needed to work with DS3231 RTC on Arduino?
There are several libraries available for working with DS3231 RTC on Arduino, such as the “RTClib” library, “DS323x” library, and “TinyGPS++” library. These libraries provide different functions and features, so it is important to choose the one that best suits your project’s requirements.
Can I use DS3231 RTC without an external power source?
Yes, the DS3231 RTC can be used without an external power source as it has a built-in battery backup. However, this battery may need to be replaced after some time if it runs out of power. Alternatively, you can use an external battery or connect your Arduino board to a stable power supply for continuous operation. It is also important to note that using the RTC without an external power source may result in slightly less accurate timekeeping due to potential fluctuations in the battery’s power. Thus, it is generally recommended to have a stable and reliable power source for optimal performance.
How to set the correct time on the DS3231 RTC?
To set the correct time on your DS3231 RTC, you can use a library or code that allows for adjusting the time settings. For example, the “RTClib” library provides functions such as `adjust()` and `setDateTime()` which allow you to set a specific date and time on your RTC module. Additionally, if using a GPS module or syncing with an online NTP server, the DS3231 RTC will automatically update its time to match the most accurate source.
How can I extend the battery life of my DS3231 RTC?
To extend the battery life of your DS3231 RTC, you can:
- Use a high-quality and long-lasting battery.
- Avoid exposing the module to extreme temperatures.
- Use an external power source when possible to reduce reliance on the battery backup.
- Turn off the RTC module when not in use. Some libraries have a `disableOscillator()` function that allows you to shut down the module and save battery power.
How does the DS3231 RTC keep time when the Arduino is powered off?
The DS3231 RTC has a built-in battery backup that allows it to keep time even when the Arduino is powered off. This battery typically lasts for several years and can be replaced when needed. When the power is turned back on, the RTC will update its time to match the current time on your Arduino board. However, it is recommended to regularly sync the RTC with a reliable time source to ensure accuracy.
What kind of projects can benefit from utilizing a DS3231 RTC with Arduino?
There are numerous projects that can benefit from using a DS3231 RTC with Arduino, such as:
- Time-sensitive projects that require precise and accurate timing, such as data logging or monitoring systems.
- Weather stations or environmental sensors that need to record time and date information.
- Smart home automation projects, where the RTC can be used to schedule specific actions at certain times.
- Wearable technology or portable devices that require a compact and low-power real-time clock.
- Robotics projects that need precise timing for motor control or data collection.
By incorporating a DS3231 RTC with Arduino, these projects can have more reliable timekeeping and enhanced functionality.
Conclusion
In this article, we have learned about the DS3231 Real-Time Clock (RTC) and how it can be used with Arduino. We have explored its features, interface, and basic operation.
The DS3231 RTC is a highly accurate clock module that can be used in various projects that require precise timekeeping. Its integrated temperature sensor also makes it suitable for applications that require temperature monitoring.
By following the steps outlined in this tutorial, you should now be able to easily connect and program the DS3231 RTC with your Arduino board. You can also explore its advanced features and customize it according to your project’s needs.
Overall, the DS3231 RTC is a reliable and versatile tool for timekeeping in electronics projects. With its ease of use and accuracy, it is a popular choice among hobbyists and professionals alike. So go ahead and integrate the DS3231 RTC into your next project for precise timekeeping!
Thank you for reading this tutorial. We hope that it has been helpful in expanding your knowledge on using the DS3231 RTC with Arduino. Happy tinkering!
Useful Video: How to set DS3231 Real time clock module for Arduino
References:
- https://howtomechatronics.com/tutorials/arduino/arduino-ds3231-real-time-clock-tutorial/
- https://circuitdigest.com/microcontroller-projects/interfacing-ds3231-rtc-with-arduino-and-diy-digital-clock
- https://electropeak.com/learn/interfacing-ds3231-real-time-clock-rtc-module-with-arduino/
- https://lastminuteengineers.com/ds3231-rtc-arduino-tutorial/
- https://learn.adafruit.com/adafruit-ds3231-precision-rtc-breakout/arduino-usage

