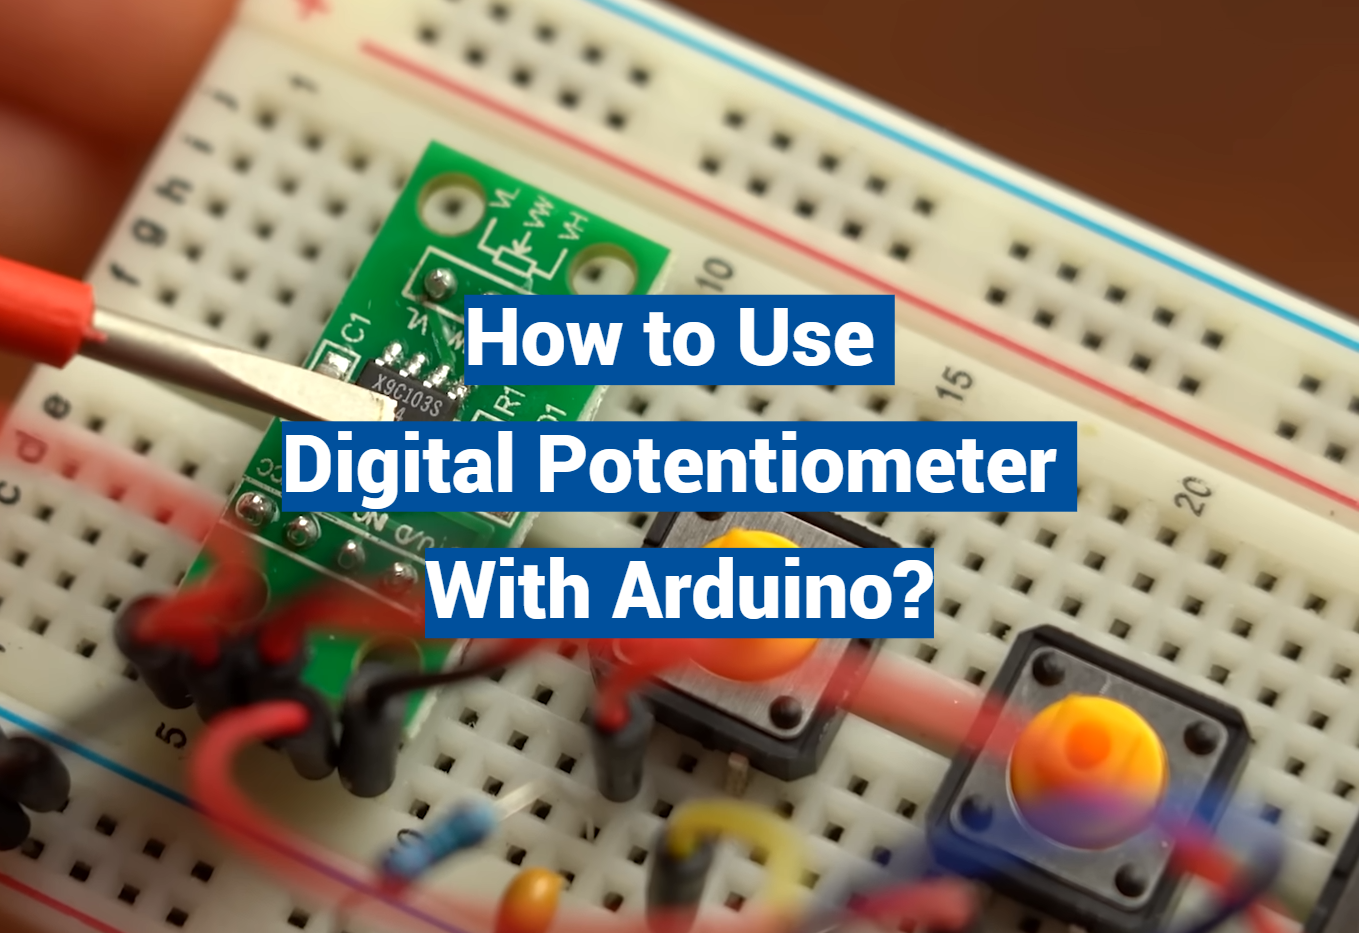
In the world of electronics, digital potentiometers serve as a vital component in adjusting output characteristics of various devices. When paired with the versatile Arduino microcontroller platform, digital potentiometers can be used to manipulate various parameters, such as adjusting the volume of an audio device or modulating the brightness of an LED. This document aims to guide you through the process of interfacing a digital potentiometer with Arduino, opening up a world of possibilities for your electronic projects.
What Is a Digital Potentiometer?
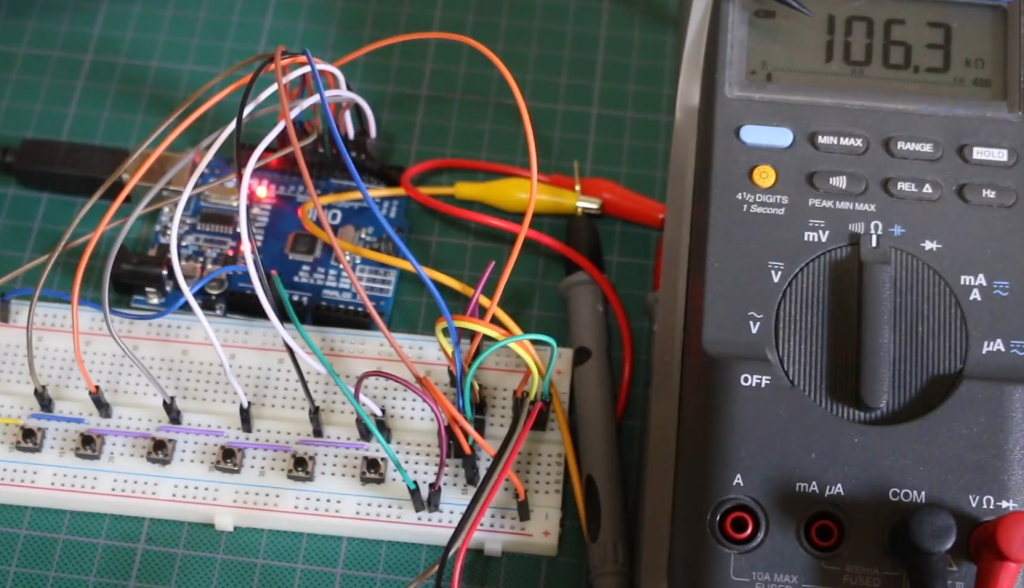
Unlike traditional potentiometers that use physical mechanisms such as dials or knobs, digital potentiometers have an integrated circuit (IC) that can be controlled electronically. This makes them more precise and easier to integrate into digital systems.
Digital potentiometers come in various forms, including single, dual, and quad-channel configurations. They are available in different resistance values and can handle varying levels of voltage and current.
Moreover, digital potentiometers present numerous benefits in comparison to their traditional counterparts. These advantages encompass compact size, reduced power consumption, and the capability to be remotely controlled.
How Do Digital Potentiometers Work?
Digital potentiometers use a series of resistors that can be switched on or off electronically. These resistors are connected in parallel and create a voltage divider circuit.
The resistance value of the digital potentiometer can be changed by sending digital signals to the IC, which then switches on or off the resistors accordingly. This changes the voltage output of the circuit and allows for precise control over resistance.
Some digital potentiometers also come with non-volatile memory, which means they can retain their resistance values even when power is turned off. This makes them ideal for use in applications that require preset resistance values. [1]
How to Use Digital Potentiometer With Arduino?
Using a digital potentiometer with an Arduino is a straightforward process. First, you need to connect the power and ground pins of the digital potentiometer to the corresponding pins on the Arduino board.
Next, connect the control pins of the digital potentiometer to any available digital pins on the Arduino. This will allow you to send digital signals to the potentiometer and adjust its resistance.
To control the digital potentiometer, you can use the built-in PWM (Pulse Width Modulation) function of the Arduino. This allows for precise control over the voltage output and, in turn, the resistance value of the potentiometer.
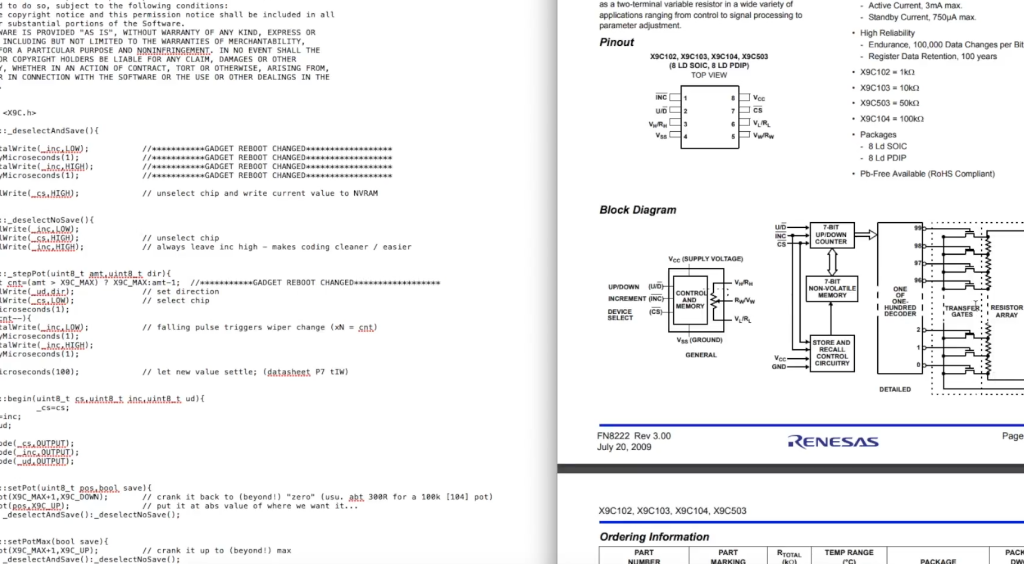
Once everything is connected and set up, you can write a simple code on the Arduino to control the digital potentiometer. This can be done using any programming language supported by Arduino, such as C++ or Python.
Applications of Digital Potentiometers
Digital potentiometers have a wide range of applications in various industries and fields. Some common uses include:
- Audio equipment: Digital potentiometers are commonly used in audio equipment to adjust volume and tone control.
- Lighting control: They can be used in dimmer switches to control the intensity of light.
- Automotive industry: Digital potentiometers are used in automobiles for steering wheel controls, climate control, and other functions.
- Industrial automation: They can be integrated into industrial machinery for precise resistance or voltage control.
- Medical devices: Digital potentiometers are used in medical devices to adjust parameters such as blood pressure and heart rate.
- Robotics: They can be used in robotics for motor control and position sensing.
Choosing the Right Digital Potentiometer for Your Project
When selecting a digital potentiometer for your project, there are a few factors to consider:
- Resistance range: Choose a potentiometer with a suitable resistance range for your application.
- Number of channels: Depending on the complexity of your circuit, you may need a single, dual, or quad-channel digital potentiometer.
- Power rating: Make sure the potentiometer can handle the required voltage and current in your circuit.
- Resolution: Higher resolution means more precise control over resistance. [2]
It is always recommended to consult the datasheet of the digital potentiometer you plan to use to ensure it meets your project’s requirements. Overall, digital potentiometers are a versatile and convenient component that can bring enhanced functionality and precision to your electronic projects. With the right selection and proper usage, they can be a valuable addition to any circuit.
Types Of Potentiometers
In addition to digital potentiometers, there are also other types of potentiometers available, including:
- Linear Potentiometer: Also known as a slide pot or slider, these have a linear resistance taper and are commonly used in volume control applications.
- Rotary Potentiometer: These have a circular resistance track and are used for knob-controlled functions such as tuning or panning.
- Trimmer Potentiometer: These are small, adjustable potentiometers used for fine-tuning circuits during assembly or maintenance.
Each type of potentiometer has its own unique characteristics and applications. It is important to understand the differences between them to choose the right one for your project.
Benefits Of Using Digital Potentiometers Over Traditional Ones
While traditional potentiometers have been widely used for decades, digital potentiometers offer several advantages that make them a better choice in many applications. Some benefits of using digital potentiometers over traditional ones include:
- Higher precision: Digital potentiometers can provide more precise resistance values compared to traditional ones.
- Remote control: They can be controlled remotely through digital signals, eliminating the need for physical adjustments.
- Non-volatile memory: Some digital potentiometers have non-volatile memory, which means they can retain their resistance values even when power is turned off. This makes them ideal for use in preset applications.
- Smaller size and lower power consumption: Digital potentiometers are much smaller in size and consume less power compared to traditional ones, making them suitable for use in compact and low-power devices.
In conclusion, digital potentiometers offer a convenient and efficient way to control resistance in electronic circuits. They have a wide range of applications and can provide better performance in certain situations compared to traditional potentiometers. With the advancements in technology, we can expect to see more innovative uses of digital potentiometers in the future. [3]
Drawbacks Of Using Digital Potentiometers Over Traditional Ones
While digital potentiometers have several advantages, they also have some drawbacks compared to traditional ones. Some potential drawbacks of using digital potentiometers include:
- Limited power handling capability: Digital potentiometers may not be suitable for high-power applications as their power handling capabilities are limited.
- Can be affected by noise and interference: Digital signals used to control the potentiometer may be more susceptible to noise and interference, which can affect the accuracy of the resistance value.
- Higher cost: Digital potentiometers are typically more expensive than traditional ones, making them less cost-effective for simple applications.
It is important to consider these potential drawbacks when deciding whether to use a digital or traditional potentiometer in your project. Ultimately, the choice depends on the specific requirements and constraints of your circuit. [4]
What Is The Difference Between Potentiometer And Digital Potentiometer?
Potentiometer and digital potentiometer are both electronic components used for resistance control in circuits. However, there are some key differences between the two:
- Adjustment method: A traditional potentiometer can be adjusted manually by physically turning a knob or slider. On the other hand, a digital potentiometer is controlled remotely through digital signals.
- Resolution: Digital potentiometers have higher resolution and can provide more precise resistance values compared to traditional ones.
- Memory: Some digital potentiometers have non-volatile memory, while traditional ones do not. This allows digital potentiometers to retain their resistance values even when power is turned off.
In summary, both types of potentiometers serve the same purpose but use different methods and technologies to achieve it. Depending on the requirements of your project, one may be more suitable than the other.
How Accurate Are Digital Potentiometers?
The accuracy of digital potentiometers can vary depending on factors such as resolution, temperature stability, and noise immunity. Generally, digital potentiometers have a tolerance range of around 1-5% compared to traditional ones with a tolerance range of 10%. However, higher-end digital potentiometers can provide even greater accuracy. It is crucial to select the right type of digital potentiometer with the required accuracy for your project to ensure optimal performance.
How Much Current Can A Digital Potentiometer Handle?
The current handling capability of a digital potentiometer varies depending on the type and model. Typically, they can handle currents ranging from a few milliamps to several amps. It is essential to check the datasheet of your chosen digital potentiometer to determine its maximum current rating before using it in your circuit. Exceeding the specified current limit can damage the component and may result in circuit failure.
Can Potentiometer Be Used With AC Or DC?
How Do You Calibrate a Digital Potentiometer?
Digital potentiometers may require calibration to ensure accurate resistance values. The calibration process involves connecting a known resistance value to the input terminals of the digital potentiometer and adjusting its output until it matches the desired value. This can be done manually or through automated methods using microcontrollers or dedicated calibration tools. It is essential to follow the specific instructions provided by the manufacturer for calibrating a digital potentiometer to achieve the best results.
How to Design a Digital Potentiometer?
Designing a digital potentiometer involves selecting the appropriate type, resolution, and accuracy for your specific circuit requirements. It also involves choosing the right control interface, such as I2C or SPI, based on the microcontroller or device you are using to control the potentiometer. Additionally, understanding the datasheet and pin configuration of the chosen digital potentiometer is crucial for proper integration into the circuit. For more complex designs, it may be beneficial to consult with an experienced engineer or use simulation software to test and optimize the design before implementation. Overall, careful planning and consideration are necessary for a successful digital potentiometer design.
What Is Arduino?
Arduino is an open-source electronic platform based on easy-to-use hardware and software. It consists of a microcontroller board, development environment, and community support. Arduino boards can be used to develop various interactive objects, from simple LED lights to complex robots. It is widely popular among hobbyists, students, and professionals due to its affordability and versatility.
With the integration of digital potentiometers, Arduino projects can be taken to the next level by adding precise resistance control. The combination of these two components opens up endless possibilities for experimentation and innovation in electronics.
How To Connect A Digital Potentiometer To An Arduino Board
To connect a digital potentiometer to an Arduino board, follow these steps:
- Start by identifying the pins on your digital potentiometer and their corresponding functions. Refer to the datasheet for details.
- Connect the VCC pin of the potentiometer to the 5V pin on the Arduino.
- Connect the GND pin of the potentiometer to ground on the Arduino.
- Connect the SDI (serial data input) pin of the potentiometer to any digital pin on the Arduino.
- Connect the SDO (serial data output) pin of the potentiometer to a digital pin on the Arduino.
- Connect the SCK (serial clock) pin of the potentiometer to another digital pin on the Arduino.
- Finally, connect the CS (chip select) pin of the potentiometer to a digital pin on the Arduino.
Once all connections are made, you can use an appropriate library and code to control the digital potentiometer through your Arduino board. It is important to note that different types and models of digital potentiometers may require different wiring configurations. Therefore, always refer to the datasheet for accurate and specific instructions. [6]
Understanding Code And Implementing It For Different Applications
The code used to control a digital potentiometer through an Arduino board may vary depending on the specific application and library being used. However, the basic principles remain the same:
- Initialize the digital pins that are connected to the potentiometer as output pins.
- Use digitalWrite() function to send signals from Arduino to the potentiometer through those pins.
- Use appropriate functions from the library to set desired resistance values or perform other actions on the digital potentiometer.
By understanding these principles, you can easily implement and modify code for different applications using digital potentiometers and Arduino boards.
FAQs
What is a digital potentiometer?
A digital potentiometer is an electronic component used to control resistance in a circuit through digital signals. It offers improved precision, remote control, non-volatile memory, and compact size compared to traditional potentiometers.
How do I choose the right type of potentiometer for my project?
Consider factors such as the required resistance range, taper (linear or logarithmic), physical size, and power consumption to choose the right type of potentiometer for your project.
Can I use a digital potentiometer in place of a traditional one?
Yes, you can replace a traditional potentiometer with a digital one as long as the specifications and wiring configurations are compatible. However, keep in mind that digital potentiometers may have limitations on maximum voltage and current ratings compared to their traditional counterparts.
Are there any precautions I need to take when using digital potentiometers?
Yes, it is important to follow the instructions in the datasheet and use appropriate libraries and code to ensure proper functioning of the digital potentiometer. It is also recommended to avoid exceeding its maximum voltage and current ratings.
How does a digital potentiometer work with Arduino?
Arduino boards can send digital signals to the potentiometer through specific pins, which are then converted to analog signals by the potentiometer. These analog signals control the resistance of the potentiometer, thus changing the output voltage in a circuit. The code written for Arduino can be used to set desired resistance values or perform other actions on the digital potentiometer.
What are the applications of using a digital potentiometer with Arduino?
Some common applications include digital volume control in audio systems, brightness control for LED lights, precision motor control, and temperature control in heating or cooling systems. However, the possibilities are endless and can vary greatly based on individual projects and creativity.
Is it difficult to program a digital potentiometer with Arduino?
The difficulty level may vary depending on the complexity of your project and your familiarity with coding. However, there are many resources available online that can guide you through the process step-by-step. With some practice and understanding of the basics, programming a digital potentiometer with Arduino can be a fun and rewarding experience.
Can I use any digital potentiometer with an Arduino?
While most digital potentiometers are compatible with Arduino boards, it is important to check the specifications and wiring configurations before making a purchase. Different models may require different libraries and code for proper functioning.
Are there any limitations when using a digital potentiometer with Arduino?
Some limitations to consider include the maximum voltage and current ratings, resolution of resistance values, and potential noise interference. These can be overcome by selecting a suitable digital potentiometer for your project and implementing appropriate measures in the circuit design. Overall, using digital potentiometers with Arduino can greatly enhance the functionality and precision of your projects, making them a valuable addition to any electronic setup. Keep exploring and experimenting with different applications to discover the full potential of this combination.
How can I learn more about using digital potentiometers with Arduino?
There are many online resources available, including tutorials, forums, and project examples that can help you learn more about using digital potentiometers with Arduino. You can also refer to the datasheet of your specific model for detailed instructions and specifications. As always, hands-on experience and experimentation is key to gaining a deeper understanding of this technology.
Conclusion
By now, you should have a good understanding of how digital potentiometers work and how they can be used with Arduino boards. With the right code and library, you can easily control resistance values for various applications such as audio systems, LED lights, motors, and more. Keep exploring and experimenting to discover new ways to incorporate digital potentiometers in your projects!
Useful Video: Digital Potentiometer (X9C103S) Introduction and Demo with Arduino
References:
- https://wiki-content.arduino.cc/en/Tutorial/LibraryExamples/DigitalPotentiometer
- https://docs.arduino.cc/tutorials/communication/DigitalPotControl
- https://www.instructables.com/Digital-Potentiometer-MCP41100-and-Arduino/
- https://www.arrow.com/en/research-and-events/articles/how-to-use-a-digital-potentiometer
- https://www.techrm.com/how-to-control-a-digital-potentiometer-using-arduino-uno/
- https://electropeak.com/learn/interfacing-x9c103s-10k-digital-potentiometer-module-with-arduino/

